Hello Scrapping Cottage friends! Thanks for taking the time to stop and visit with us today. It's Mary Marsh here bringing you the Saturday edition of the Blog.
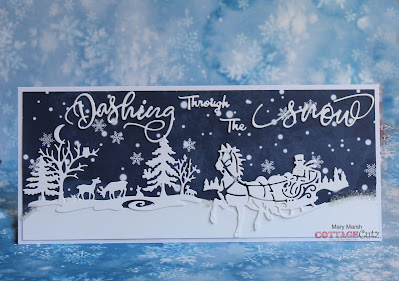
Today, I have for your viewing pleasure a card featuring the
Dashing Through The Snow (Christmas Part 1) and the
Winter Forest (
Christmas Part 2) dies. We all look for card ideas that we can put together quickly and reproduce multiples of at Christmas.
Today, I am showing you a way to do just that and it's using a slimline design. This design has found a resurgence of popularity in the card making world.
So let's get started with the details of how I created this card.
Design Steps:
I started off by selecting the designer paper I was going to use for my background. I wanted something snowy and I had several papers in my collection to choose from. I thought this dark blue one would work great for a nighttime scene. Now you could create your own snowy background but if your looking to make multiples quickly a designer paper is the way to go.
White Card Base: 9 1/4" x 4"
Designer Paper Layer: 9" x 3 3/4"
I decided to cut the images and the sentiment from white cardstock because it would make a nice contrast against the dark blue background. I also cut 2 snow slopes from white cardstock.
I am ready for card assembly. I attached the snow slopes to the designer paper with double sided tape. I let them overlap a bit because that's where I intended to place the one leg of the horse.
I used a combination of Ranger multi medium matte and mini glue dots to attach the images to the designer paper. I like the Ranger glue because it dries clear and makes a secure bond.
Next, I attached the sentiment. I decided to cut another set to make it really pop against the blue background. I used just the Ranger multi medium matte.
To finish off my card I attached the image panel to the white card base. I added some glitter to both ends of the snow slopes for a bit of an icy look. I am not sure why I did that or even if I liked it once it was done, but it's there now. All in all I am pleased with the way the card turned out.
Well, that's it for me for this week. I hope I have given you a fresh idea on a way to use two of these new dies. I will be back on Monday with another sample for you.
dies I used to create card:


