Showing posts with label Stitched Wide Rectangle Frame Set. Show all posts

Wednesday, March 20, 2019

Birthday Wishes Card

Hello!  This is Sukie and today I'm sharing this sweet birthday card for my guest designer post.  With it being the first day of Spring today, the floral design is perfect to share.  This die is so versatile and can be used for many occasions.
I used the Spring Teacup Bouquet for the focal point of my card.  Once I die cut all of the pieces out of white card stock, I watercolored everything with some Distress Inks. I went with a non-traditional color theme for my flowers.  I used some kraft card stock for the cup.
The background was kept simple with some kraft and watercolor card stock.  The frame was cut from the Stitched Wide Rectangle Frame Set
The flower clusters were assembled inside of the frame and adhered to the base of my card.  The arrangement of flowers was spread out to fill up the inside of my frame.
As a finishing accent, I added a sentiment from the My Craft Spot (retired) Tiny Tags 3 stamp set. The sentiment was attached to the cup handle with a jute bow.
I used these dies on my card, available here:

Tuesday, February 21, 2017

Happy Spring

Hi, Janja here!

Winter has not said its last word, but the sun is already showing its charm.
Today I share with you two cards with the spring flowers.


Supplies:
- CottageCutz set of stamps and dies: Daffodil Flower - March, Daisies Fower - April, Calendar Months, Pillow Box Plus (ladybugs), Fancy Pocket Plus (button), Stitched Square Set, Stitched Wide Square Frame Set,  Stitched Wide Rectangle Frame Set
- white and kraft card base: 5.3 x 5.3" (13,5 x 13,5 cm), folded
- patterned paper: 4.9 x 4.9" (12,5 x 12,5 cm)
- white cardstock: 4.3 x 4.3" (11 x 11 cm)
- patterned paper: 4.8 x 2.2" (12,1 x 5,6 cm)
- white and colored cardstock
- watercolor paper
- Distress ink: Antique Linen, Mustard Seed, Scattered Straw, Wild Honey, Rusty Hinge, Tumbled Glass, Broken China, Twisted Citron, Mowed Lawn, Peeled Paint
- Memento ink: Desert Sand
- liquid pearls: buttercup
- string

Stamp flowers on watercolor paper and color them. Mine are colored with Distress inks.


When coloring is completed, shadow both backgrounds with Antique Linen Distress ink and stamp partly old letter writing.


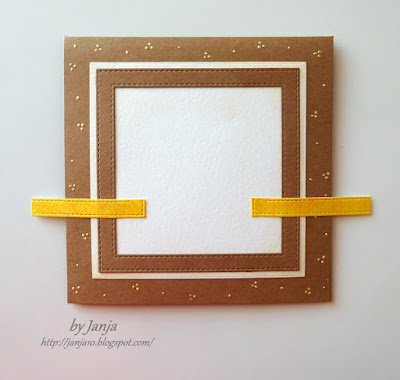
Cut out the part of frame with a die. Color it with Distress inks.


Cut out March sign with calendar months die. Also, cut out a square frame from kraft cardstock, and another square of white cardstock.


Start by assembling the card. Add a white square on the card front. On the remainding card base add small buttercup dots.


Fix frame and tape, which is cut with scissors to the half.


When the card is completed, it seemed to me that something is missing. I added a button and a bow.


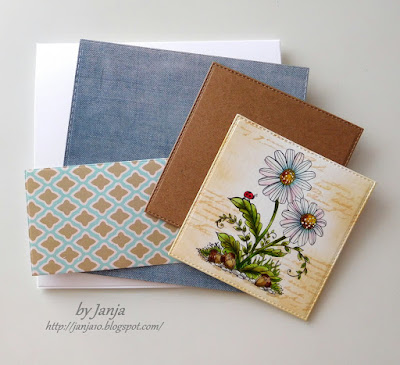
For another card I used a patterned paper.


Add a sentiment and cut out two ladybugs.


That's all for today. Thank you for coming over. 


Tuesday, December 20, 2016

Shaker card with mailbox

Hi, Janja here!

Christmas time is almost here. In Slovenia we don't have any snow yet, and the weather forecast is not promising us a white Christmas. Never mind, today I will take care of snow :).


For the card we need:
- CottageCutz dies: woodland mailbox, forest trees, stitched wide rectangle frame set (the largest die from set)
- kraft card base: 4.1 x 5.3" (10,5 x 13,5 cm), folded
- white and colored cardstock
- glitter
- white embossing powder
- Distress ink: Worn Lipstick, Festive Berries, Vintage Photo, Mowed Lawn, Peeled Paint, Black Soot

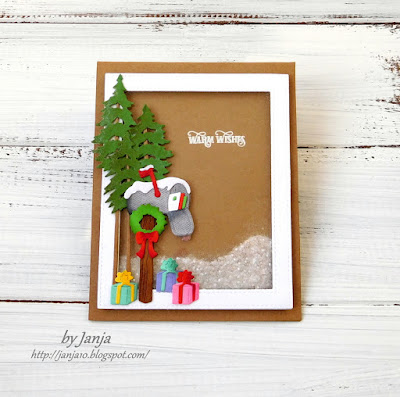
Prepare a card base from kraft cardstock. Cut out a frame from white cardstock with a frame die and a sheet of transparent foil in the frame size.


Coat the frame with glue and sprinkle it with glitter.


On kraft base stamp "Warm Wishes" and treat it with hot embossing technique. Use white powder.
Glue transparent foil to the back of the frame, and fasten across it self-adhesive foam tape. Finally, add snowflakes and attach the base card to the frame.


From colored cardstock cut out all the elements for the mailbox and spruces. Shadow them with Distress inks.


To finish the card, fix mailbox with gifts and spruces as shown using foam adhesive pads.


Another view to the snow-covered card, after we shake it.


I wish you a Merry Christmas.

Thank you for coming over and see you next Tuesday.


Friday, December 16, 2016

SPARKLING SNOW AND CHRISTMAS CARD


HELLO FRIENDS !!

It's Anita here !!
Winter is all in its beauty with sparkling snow fields and woodlands covered with snow and those adorable forest creatures !!!! Ah !!! the natural surroundings in a countryside in the snowy winter months looks awesome.

To capture that look I have a Step card with sparkling snow land amidst the woodlands and that country scene , all together in one card, actually made possible because of the amazing Christmas collection found at the CottageCutz Store.

Here is my card and all the close up pictures. Its a very simple card and I have added a sparkling dust powder on the die cuts to create that shimmery look.


To make the card,

Cut all the die cuts from CottageCutz dies in white card stock.


For the card base, cut a piece in white measuring 6 Inches by 12 inches. Score at 1", 2" 4" and 6". Fold along the score lines to make a step card.


Create three panels for each step that have a wavy top edge.


Distress wit Tumbled Glass Distress ink and apply clear glue. 

Add the sparkling dust powder and remove the excess. This will create the snowy ground.

Adhere these panels on each step.

For the last panel, Add a frame from Stitched Wide rectangle frame die and top of it adhere the die cuts as shown to create a snowy woodland scene.


On each step, add the die cuts to build up the scene.


Add a sentiment on top to finish the card.

CottageCutz dies used.


I hope you liked this sparkling winter card. Have a great and fun filled Christmas  !!!