Showing posts with label Stitched Sun Clouds & Umbrella. Show all posts

Saturday, March 09, 2019

Rainy Day Duck (new die)

Hello Scrapping Cottage friends! Thanks for taking the time to stop and visit with us today. It's Mary Marsh here bringing you the Saturday edition of the Blog.

We have a new release of 36 Spring dies in the online store. There are a variety of designs so perfect for Easter or Spring cardmaking. Take a look in the store you definitely won't be disappointed.

For my card today I am using the new Rainy Day Duck die. This little ducky has such detail right down to the water puddle and splashes of water coming off the puddle. It would be so perfect for a get well card, a thinking of you, a thank you and even a birthday card. So let's get started with some details on how I created my card. 

Step 1: Having a layout in mind at the card start is always a big boost for me. That way I can just choose the card colors and designer paper and I am good to go. I liked this week's sketch #739 on Splitcoaststampers because there are lots of layers and the image panel is big enough to show off the sweet little ducky. 
I looked through my designer papers to get one that would coordinate with the whimsical die cut image I was using. Well that took much longer than I anticipated (lol)!! I selected 4 papers before I settled on the one I am using on this card. Dotted paper always works for me. 
Teal card base: 4 1/4" x 5 1/2"
Teal dotted designer paper: 4 1/8" x 5 3/8"
Teal diamond paper (Layer 3 on the sketch): I used the largest die of the Rectangle set
White image Layer: Again I used the largest die of the Rectangle set
Next I cut the duck image. I used a daffodil cardstock for the body and a tangerine cardstock for the beak and legs. I selected another patterned paper for her umbrella and a coordinating cardstock for the handle. I cut the umbrella twice to give a little contrasting edge.


I love how the water puddle has splashes of water coming out to give the appearance of movement. CottageCutz dies are so detailed. I used the puddle of water as element 6 of the sketch. 

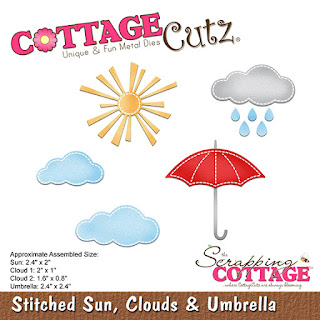
For the rain cloud and raindrops I used the Stitched Sun, Clouds and Umbrella die. I used dimensional adhesive on the rain cloud. The umbrella I used on my card is part of the Rainy Day Duck die. 

After I attached the cloud, I thought of adding a sentiment on the cloud. So I carefully removed it and stamped my sentiment. I decided to make this a thinking of you card. My cards are always a work in progress so sometimes I have to backtrack in the creating process (lol)!!! 
Step 2: Now that all the card elements are cut, I am ready to start assembly. Attached the background designer paper and the designer paper that is element 3 of the sketch with double sided tape. This is my favorite adhesive. 
For Element 4 of this sketch I decided to use purple cardstock. I cut it 1/2" x 4 1/8". 
 To complete my card I added the image panel and it was done. I hope I have given you some inspiration on a way to use this die. I made another card with these same dies and sketch but the card colors and paper are different. You can see that one here
That's it for me for this week see you next Saturday. 
dies I used to create card:


Saturday, April 21, 2018

LLamas & Botanical Card Samples (Part 2)

Hello Scrapping Cottage friends! Thanks for taking the time to stop and visit today. We have a brand new release of Llamas & Botanical dies available in the online store. And the dies are currently on sale for a limited time at 25% off the retail price.

The new dies have a couple of super cute Llama images as well as cactus and other succulents. And, let's not dismiss our sweet hummingbird and a great garden bird image. There are so many different ways to use these dies and the Design Team has been featuring these dies in their posts over the past 10 days. If you haven't' seen them look back over the blog for some great eye candy.

Today, I have 2 additional samples to share with you.

Card 1: This first sample is a card from Janja Albrecht. She used the Shelf w/Plants dies to create a lovely indoor scene. She has the plants nestled on a shelf against a brick wall backdrop.

It's a great card of encouragement that is sure to brighten the spirits of the one who receives it. She used the perfect encouragement sentiment on her card.

Card 2: This next sample is a card that I (Mary Marsh) created. I used the Traveling Llama die for my sample. From the moment I saw this die, I had an idea to create a card to welcome a new family to our neighborhood.
This card along with a baked loaf of banana bread or a plate of chocolate chip cookies is always appreciated. And it's a way to get to know your new neighbor.

The llama with his bags all packed and loaded just reminded me of someone that is moving in somewhere. You could also use it to let friends know you are moving. Or how about when you are sending your student off to college or to summer camp. Lots of ways to use this die and even more that I haven't thought of.
That's our card samples for today.  Hope these samples have sparked some ideas for ways to use these dies. I will have another group post on Tuesday with these new dies. And, remember they are currently 25% off for a limited time in the online store.

Dies used to create cards:
http://www.scrappingcottage.com/cottagecutztravelingllama.aspx

http://www.scrappingcottage.com/cottagecutztravelingllama.aspx
http://www.scrappingcottage.com/cottagecutzstitchedovalsetbasics.aspx
http://www.scrappingcottage.com/cottagecutzstitchedsuncloudsandumbrella.aspx


Friday, April 06, 2018

Sending Smiles Across the Miles

Good morning Cottage Cutz fans!  It's Jeanne today with a card that will surely brighten the day of someone far away.  This card features the Spring Hot Air Balloon and the Stitched Sun, Clouds and Umbrella dies.
I started with an A2 red card base and a blue panel cut to 4 x 5 1/4 inches.  I used a paper printed to look like watercolor.  Normally I like to watercolor my own backgrounds but this is nice if you're pressed for time.
Next I cut all the pieces - some from colored card stock and others from white.  I used the background of the balloon but not the front piece to keep it from looking Easter-ish.  The rectangle for the sentiment is cut from the second smallest Nested Wacky Stitched Rectangle set.
I colored the rabbit, basket fringe and tassel pieces with Copic markers and used a sponge dauber with Crumb Cake ink to add some shadow to the basket.  I then assembled the pieces.
I glued the sun in the upper right corner, letting some of the rays hang off.  I used paper snips to clip off the over hang.
I glued the sky panel to the front of the card and arranged the clouds and sentiment panel.
Finally I used foam tape to pop the rabbit and basket off the card front.
I hope you enjoyed today's card.  It would surely bring a smile to a loved one's face!

Dies used:
http://www.scrappingcottage.com/cottagecutzspringhotairballoon.aspx
http://www.scrappingcottage.com/cottagecutzstitchedsuncloudsandumbrella.aspx
http://www.scrappingcottage.com/cottagecutznestedwackystitchedrectangleset.aspx


Thanks for stopping by today!  I hope you have a fun weekend and have time do some crafty things!


Sunday, March 18, 2018

Stitched Spring Garden

Hi!

This is Anja again. This week I added a bunch of new Zig markers to my collection and I had to try them out. I used dies from the Stitches collection and combined them in a light Spring garden card. This dies are so fun to use and you can combine them in different theme cards.


For this card I used:
- Cottage Cutz dies (Stitched Flowers, Stitched Garden Friends, Stitched Honey Bees, Stitched Sun, Clouds & Umbrella),
- watercolor paper for background (14,5x14,5 cm) and die cuts,
- craft card base (15x15 cm),
- Zig markers (numbers: 024, 043, 046, 052, 063, 065, 066, 083, 094, 200,  260)
- Distress Inks (Tumbled Glass, Stormy Sky),
- water spritzer,
- watercolor brush,
- black pen,
- white pen,
- heat gun,
- paper glue. 

First I die cut all the pieces from watercolor paper. I used Zig markers and watercolor brush to color it. First I colored on the edge and then pushed colored with the watercolor brush to the middle. I don't have a black Zig marker, so I used a black brush pen.


I also used watercolor paper for the sky background. I used two blue Distress Inks to color the paper. Then I spritzed a few water drops over it and dried the paper with the heat gun.


When I had everything colored I added eyes to the snail and the bee. I used black and white pen. Then I arranged the sun, flowers, clouds and critters on the card. I decided to use the stitched fly lines also.

And this is my finished card.


Rise & Shine dies are still available for 25 % less, so don't forget to check them it out.

Have a beautiful Sunday and a nice week ahead.
Se you next time.
Anja Z.


Cottage Cutz dies I used:


Saturday, March 10, 2018

Easter Egg Plant (new die)

Hello Scrapping Cottage friends! Thanks for taking the time to stop and visit today. It's Mary Marsh here bringing you the Saturday edition of the Blog. Our days are about to get a lot longer starting tomorrow. This weekend is our Spring forward time change. So remember to push your clocks 1 hour ahead tonight when you go to bed.

Before I start with today's card, I wanted to let you know we have a new release of dies. It's our Rise & Shine collection and they are currently on a 25% sale. To see some card samples from the team - click here.

Today, I am showing a card from our Spring die collection. They are on a limited time sale at 25% off. I used the Chickies w/Egg Plant, Spring Meadow, and Stitched Flowers dies. So let's get started with some details on how I created my card.

Step 1:  Since I knew what dies I planned on using, I looked through my cardstock and patterned papers for some spring colors. I have a spring mix stack from DCWV that has some great patterns in it. I just needed to match it to cardstock. Decided that yellow and green would coordinate well with the pattern of paper I chose.
Wild Wasabi (green) card base: 4 1/4" x 5 1/2"
Daffodil Delight (yellow) layering panel : 4 1/8" x 5 3/8"
Patterned Paper layer: 3 7/8" x 5 1/8"
Step 2: cut my "egg plant" from a lilac cardstock and layered yellow underneath.  The plant pot is also cut in lilac with a matching paper for the trim. The stitched flowers are cut in lilac and yellow.
Step 3: Started the assembly of the card base and layering panels. Used double sided tape to secure. 
I decided to cut a white rectangle 1 3/4" x 4 1/2" as a base for the egg plant & pot. Lightly Sponged distress tumbled ink as a background.
Used the Spring Meadow die to add some grass to the bottom of this panel. This die has 2 heights of grass so you can add shading for a slight color variance. I used the wasabi green cardstock and sponged the background. Also cut a butterfly in lilac cardstock for another element for my card.
I cut a stitched cloud from the Stitched Sun, Clouds & Umbrella die. Sponged that in distress ink and stamped my Easter sentiment directly on the cloud. I used my MISTI tool to stamp 2x in order to get a darker shade of purple.
Step 4:  Attached all the elements to the image panel with double sided tape and glue dots.
 Used dimensional foam tape to secure the panel to the patterned paper layer. I wanted it lifted somewhat since the paper has a busy pattern. Attached my 2 stitched flowers and butterfly and this card is completed.

I hope I have given you another idea for an Easter card. The team has been showing lots of samples over the past month. There is a search box on the right side of the Blog if you are looking for a sample for a particular die.
Have a great weekend. Happy St Patrick's Day and I will see you again next Saturday.
 
Dies I used to create card:
http://www.scrappingcottage.com/cottagecutzchickiesweggplant.aspx

http://www.scrappingcottage.com/cottagecutzstitchedflowers.aspx

http://www.scrappingcottage.com/cottagecutzstitchedsuncloudsandumbrella.aspx

http://www.scrappingcottage.com/cottagecutzspringmeadow.aspx