Showing posts with label Stitched Square Set. Show all posts

Tuesday, March 14, 2017

Notepad with Chloe

Hi, Janja here!

Small notepads are always useful for writing or drawing. They can also be a nice gift.
I prepared one today and decorated it with lovely bear Chloe.


Supplies:
- CottageCutz stamp & die sets: Chloe with Kitty, Garden Gnomes 2 (butterfly and flowers), Victorian Fence, Square set, Stitched Square set
- white cardstock (2x): 5.3 x 5.1" (13,5 x 13 cm)
- patterned paper: 4.9 x 4.9" (12,5 x 12,5 cm)
- white cardstock: 4.7 x 4.7" (12 x 12 cm)
- white blank sheets: 5.1 x 5.1" (13 x 13 cm)
- Distress ink: Worn Lipstick, Mustard Seed, Tumbled Glass, Twisted Citron, Antique Linen, Vintage Photo
- watercolor brushes
- clouds mask
- stencil brushes

Stamp Chloe with black Archival ink on watercolor paper, and color her.


Cut out all the elements with dies.


Fasten masking tape on white front page, and shadow background.


Trim white and patterned paper. Cut out square in the middle of both with a dies. Use the largest dies from both sets.


Cut off the lower corners on both cardstock and frame with a corner puncher. Glue both frames to each other.


Fasten frame to the front page and decorate it partially.


Bind the sheets with a spiral, and complete the front page of notepad.


Thank you for joining me today. See you again at next Tuesday. 


Tuesday, February 21, 2017

Happy Spring

Hi, Janja here!

Winter has not said its last word, but the sun is already showing its charm.
Today I share with you two cards with the spring flowers.


Supplies:
- CottageCutz set of stamps and dies: Daffodil Flower - March, Daisies Fower - April, Calendar Months, Pillow Box Plus (ladybugs), Fancy Pocket Plus (button), Stitched Square Set, Stitched Wide Square Frame Set,  Stitched Wide Rectangle Frame Set
- white and kraft card base: 5.3 x 5.3" (13,5 x 13,5 cm), folded
- patterned paper: 4.9 x 4.9" (12,5 x 12,5 cm)
- white cardstock: 4.3 x 4.3" (11 x 11 cm)
- patterned paper: 4.8 x 2.2" (12,1 x 5,6 cm)
- white and colored cardstock
- watercolor paper
- Distress ink: Antique Linen, Mustard Seed, Scattered Straw, Wild Honey, Rusty Hinge, Tumbled Glass, Broken China, Twisted Citron, Mowed Lawn, Peeled Paint
- Memento ink: Desert Sand
- liquid pearls: buttercup
- string

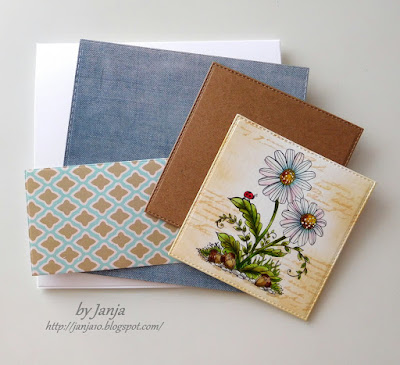
Stamp flowers on watercolor paper and color them. Mine are colored with Distress inks.


When coloring is completed, shadow both backgrounds with Antique Linen Distress ink and stamp partly old letter writing.


Cut out the part of frame with a die. Color it with Distress inks.


Cut out March sign with calendar months die. Also, cut out a square frame from kraft cardstock, and another square of white cardstock.


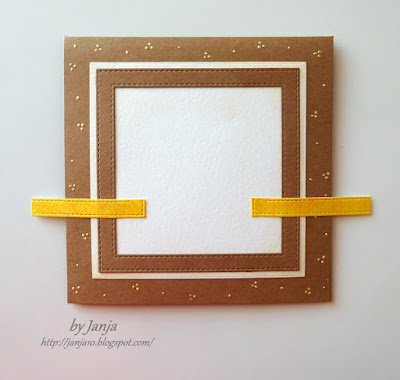
Start by assembling the card. Add a white square on the card front. On the remainding card base add small buttercup dots.


Fix frame and tape, which is cut with scissors to the half.


When the card is completed, it seemed to me that something is missing. I added a button and a bow.


For another card I used a patterned paper.


Add a sentiment and cut out two ladybugs.


That's all for today. Thank you for coming over. 


Saturday, July 16, 2016

T-LIGHT HOLDER FOR CHRISTMAS

Hello friends !!!

It's Saturday today  I'm Anita here with you with another lovely CottageCutz project. It is raining heavily here in India. The weather is dark and gloomy and kind of little cold. I simply love this climate as I can stay indoors and do all my crafting work to my hearts content.
I have seen that Christmas preparations have already started in some parts of the world. Although December is far away , yet cards have been designed and many new projects have already started taking shape.
To stay in tune with the crafting world, I have thought of something that we all love during Christmas. These are T-light holders made with the CottageCutz dies.
I was myself very excited when I saw the final result. This Lacey Cutwork simple yet dainty holder will surely light up your home during the festival.


To make this T-light holder , follow these pictures as I explain them.

For one holder, 4 pieces of  CottageCutz Filigree Butterfly Pocket die, any die cut  square or round for the base, and CottageCutz Ivy die.


Fold the Pocket die along the score lines.


Cut away the side flaps, leaving about 0.25 inch from both the sides, as shown.
Do this for all four pocket dies.


Apply double sided tacky tape on the base flap with the die facing right side up.


  Apply tape on the inside right flap of each die.


  Join the flaps together like this

  
Remove tape from the bottom flaps and fold inwards pressing on a CottageCutz Stitched Square die. You can also use a doily die.
  
Spray the Ivy leaves with Peeled Paint Distress Spray and dry

 Close the box after you place the T-light , with ribbons or twine, bringing the top of all the four pocket dies together. Arrange leaves and flowers of your choice. Add pearl trims.


The complete project.


I hope you all will surely make this as one of your Christmas projects.
We also have a brand new Challenge at the blog-Greenery. So do stop by and play along to get amazing prizes.