Showing posts with label Stitched Oval Set. Show all posts

Saturday, April 21, 2018

LLamas & Botanical Card Samples (Part 2)

Hello Scrapping Cottage friends! Thanks for taking the time to stop and visit today. We have a brand new release of Llamas & Botanical dies available in the online store. And the dies are currently on sale for a limited time at 25% off the retail price.

The new dies have a couple of super cute Llama images as well as cactus and other succulents. And, let's not dismiss our sweet hummingbird and a great garden bird image. There are so many different ways to use these dies and the Design Team has been featuring these dies in their posts over the past 10 days. If you haven't' seen them look back over the blog for some great eye candy.

Today, I have 2 additional samples to share with you.

Card 1: This first sample is a card from Janja Albrecht. She used the Shelf w/Plants dies to create a lovely indoor scene. She has the plants nestled on a shelf against a brick wall backdrop.

It's a great card of encouragement that is sure to brighten the spirits of the one who receives it. She used the perfect encouragement sentiment on her card.

Card 2: This next sample is a card that I (Mary Marsh) created. I used the Traveling Llama die for my sample. From the moment I saw this die, I had an idea to create a card to welcome a new family to our neighborhood.
This card along with a baked loaf of banana bread or a plate of chocolate chip cookies is always appreciated. And it's a way to get to know your new neighbor.

The llama with his bags all packed and loaded just reminded me of someone that is moving in somewhere. You could also use it to let friends know you are moving. Or how about when you are sending your student off to college or to summer camp. Lots of ways to use this die and even more that I haven't thought of.
That's our card samples for today.  Hope these samples have sparked some ideas for ways to use these dies. I will have another group post on Tuesday with these new dies. And, remember they are currently 25% off for a limited time in the online store.

Dies used to create cards:
http://www.scrappingcottage.com/cottagecutztravelingllama.aspx

http://www.scrappingcottage.com/cottagecutztravelingllama.aspx
http://www.scrappingcottage.com/cottagecutzstitchedovalsetbasics.aspx
http://www.scrappingcottage.com/cottagecutzstitchedsuncloudsandumbrella.aspx


Tuesday, March 20, 2018

Coloring Easter eggs

Hi, Janja here!

Coloring Easter eggs is a ritual in the spring. There are so many fun ways to decorate Easter eggs. Let's see how Bunny did it.


Supplies:
- CottageCutz dies: Egg Painting Bunny, Spring MeadowStitched Alphabet, Miss Petunia Bunny, Just Hatched Chick, Pillow Box Plus, Stitched Oval Set
- white card base: 5.3 x 5.3" (13,5 x 13,5 cm), folded
- white cardstock
- silver cardstock
- Distress inks: Spiced Marmalade, Festive Berries, Aged Mahogany, Broken China, Mowed Lawn, Tea Dye
- Distress Oxide ink Vintage Photo
- Memento inks: Tangelo, Lady Bug
- glue, double-sided adhesive tape, self-adhesive pads, fun foam

Cut out all the pieces we need. Mine are colored with Distress inks.


Cut the same large white frame as the card base. Stamp some stains on it.


Make two holes in the frame, and insert a string. Attach letters on the string.


Fix the frame to the card base with a self-adhesive foam tape or use a fun foam.


Complete the card.


And for the youngest, something sweet. Pillow boxes with chocolate eggs.


I would like to remind you that the new Rise & Shine release is still available for 25 % less. 

Thank you for coming over. Have a nice day. 


Saturday, July 29, 2017

Wedding Carriage

Hello Scrapping Cottage friends! Thanks for taking the time to stop and visit today. It's Mary Marsh here bringing you the Saturday edition of the Blog.

Have you had an opportunity to visit the online store to see the new dies that have been released? There are 20 new wedding dies and 17 fun new nesting shapes.

Janet (our video artist) has put together a video showcasing all the new nesting shapes dies. Just click on the photo below to be taken to the CottageCutz YouTube channel.
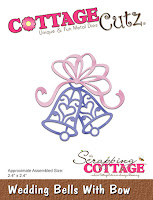
Now onto the card that I have created. Today, I am featuring the new Wedding Horse & Carriage and the Wedding Bells with Bow dies. So let's get started with some details.
 
I am attending an outdoor wedding in September that will be held at a farm type venue. I have seen the property and rustic elegance would be a perfect description. The ceremony will be held in front of a lake on the property and the bride will make her appearance in a carriage. So the new wedding horse & carriage die was spot-on for my card idea.
 
Step 1: I like to make wedding cards with the same colors that the bride has chosen. I always think that's a great compliment to her. I am using chocolate, pearlized gold and a copper metallic paper. Found these papers in my stash that are a good match for her wedding colors.
 
Chocolate Card Base: 5 1/2" x 4 1/4"
Pearlized Gold Layer: 5 1/4" x 4 1/8"
 Step 2: Embossed the pearlized gold panel with a scrollwork embossing folder. I like the added interest it gave my card.
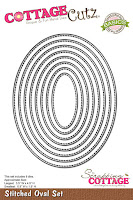
Step 3:  Cut all the die cuts at this point. The horse & carriage are cut in chocolate,  and the bells and bow are cut in copper. I wanted another layer to my card so I used the largest stitched oval die as a backdrop for the carriage and bow.
Step 4: Decided to add some burlap ribbon to enhance the rustic appeal of my card. Just a strip across the middle of the embossed panel will work fine.  Attached the dies to the oval panel and added a couple of copper hearts.


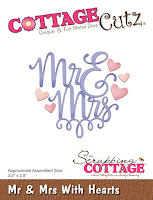
Step 5: Since I had the bells already cut in copper, I used them to finish the inside of my card. Added another layer of the pearlized gold cardstock, more hearts and the celebrate phrase completed the inside. The hearts are part of the new Mr & Mrs with hearts die.
I hope I have given you some inspiration on a way to use some of these new wedding dies. See you next Saturday and happy crafting!!!
 
Dies I used to create card:
http://www.scrappingcottage.com/cottagecutzweddinghorseandcarriageelites.aspx
 
http://www.scrappingcottage.com/cottagecutzweddingbellswithbow.aspx
 
http://www.scrappingcottage.com/cottagecutzmrandmrswithhearts.aspx
 
http://www.scrappingcottage.com/cottagecutzexpressionspluscelebratephrase.aspx


Tuesday, April 04, 2017

Enjoy every moment

Hi, Janja here!

Nature is these days breathtaking with beautiful color spectrum of blooming flowers. It is therefore not unusual that I once again reused beautiful CottageCutz stamps and dies - Birthday Flowers.


Supplies:
- CottageCutz stamps and dies: Narcissus Flower - December, Larkspur Flower - July, Garden Gnomes 1 (Hello),  Wildflowers 2 (dragonfly), Fancy Floral Lace Border, Oval Set, Stitched Oval Set, Stitched Rectangle Set, Stitched Circle set
- kraft and white card base: 4.25 x 5.5" (10,8 x 14 cm), folded
- patterned paper: 4 x 5.2" (10,2 x 13,2 cm)
- green cardstock: 4 x 5.2" (10,2 x 13,2 cm)
- patterned paper: 3.74 x 5" (9,5 x 12,7 cm)
- Distress inks: Tattered Rose, Picket Raspberry, Blueprint Sketch, Mowed Lawn, Peeled Paint, Spiced Marmalade, Rusty Hinge
- watercolor paper

Stamp flowers on watercolor paper. After coloring, cut out flowers with matching die.


If we do not have appropriate colored cardstock, use Distress inks and color white cardstock.


Cut out paper strip with stitched rectangle die. Fix the die on the edge of cardstock, and cut out one line with stitches. Then move the die, and cut it out again.


From white cardstock cut out two lace border. Shadow them gently with Distress ink - Tattered Rose.


Stamp and emboss sentiment with white powder. Attach lace.


Cut out two ovals from kraft cardstock and patterned paper.


Trim patterned paper and card base.


Add the dragonfly and the card is completed.


With circle die cut out a hole in a patterned paper. Fasten patterned paper to a green cardstock, and put them together on a white card front.


Stamp and color flowers. Cut them out with the matching die. Attach flowers in a circle. Use self-adhesive foam pads. Stamp "Hello" on a strip, and attach it to the background with eyelet. 


Thanks for joining me today!