Showing posts with label Sofa & Chair. Show all posts

Wednesday, July 06, 2016

~Framed Sofa & Chair Scene~


Hello Scrapping Cottage friends! Thanks for taking the time to stop and visit today. It's Mary Marsh here bringing you the Wednesday edition of the Blog.

Today for your viewing pleasure, I am featuring several new dies set from the June "Home Sweet Home" release. This release is chock full of dies that are all about the home. They can be used in so many creative ways as the Design Team has been showing you for the past 2 weeks.
 
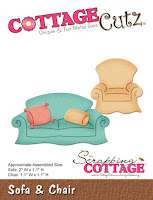
Today, I thought I would make a card to send to a friend who has had some stressful days at work. We all need to take time to relax a bit. Don't you agree? The sofa & chair dies were so perfect for my card idea. So let's get started with some card details.
 
Card Base: 5 1/2"  x 4 1/4" - used a Caribbean Blue shade of cardstock.
Embossed Paper Layer:  5 3/8" x 4 1/8" - used a vanilla cardstock
 
Step 1.  Created the background texture using an embossing folder and my BigShot machine.
 
 
Step 2. I wanted this panel raised from the card base. The card has nice dimension that's not picked up in these photos. I decided not to use mounting tape. Instead I has some fun foam which works quite nicely. I only had blue but once it's on the blue card base you can't really see it. It gives about an 1/8" lift to the panel.


Step 3. I die cut my frame using the Pierced Wide Rectangle Frame set and attached it to the embossed layer. Added some pearls to the frame corners. I die cut my sofa and chair in a medium brown cardstock and the sofa pillows with a striped patterned paper. This card could also work for a guy just eliminate the pearls.
 
Since I don't have the floor lamps, rugs and plant dies, I punched an oval for my rug and used the flower pot from the Garden Accessories and the leaves from the Fancy Pocket Plus to create my plant. Just another way to get more use out of the CottageCutz dies you own.  I attached the dies with a variety of adhesives - double sided tape, glue dots and multi-matte medium.
 
 
Step 4. To complete my card, I stamped my sentiment on a die that is also part of the Fancy Pocket Plus set. I added a bit of thick baker's twine that matches my cardstock color. I decided to add a couple of cats to this scene because my friend likes cats and that finishes off the card. 
 
Well friends, that's it for me for today, so until next time.......inky hugs.


http://www.scrappingcottage.com/cottagecutzsofaandchair.aspx
http://www.scrappingcottage.com/search.aspx?find=fancy+pocket+plus
http://www.scrappingcottage.com/cottagecutzgardenaccessories.aspx
http://www.scrappingcottage.com/cottagecutzpiercedwiderectangleframesetbasics.aspx
 
 
  .

Tuesday, June 21, 2016

Home sweet home

Hi, Janja here!

With great joy I share with you a card made with the June's release of the CottageCutz dies - Home Sweet Home. It comes with 24 beautiful dies that complement each other. I am sure that you will create with them in such joy as I did.
Let's see how I made the card.


White card base: 13.36 x 5.3" (41,6 x 13,5 cm), folded.
Cut out 6 squares from different patterned papers: 5 x 5" (12,7 x 12,7 cm).


1.Entrance hall
- large die from the CottageCutz - stitched heart set
CottageCutz die - home sweet home phrase
- cardstock in natural and white color
- Distress inks: Victorian Velvet, Spun Sugar, Antique Linen
- cord and metal brad

In a natural cardstock make folds with a bone folder. Brush it with Distress ink Antique Linen. With the entire surface of a pad dragged over the cardstock. Cut out a heart. In the heart make two holes, insert a cord and paste it to background. Shadow the inscription and paste it on the heart.


2. Living room
CottageCutz die - curtains w/ rod
CottageCutz die - sofa & chair
- CottageCutz die - wing chair & window shade (wing chair)
- CottageCutz die - floor lamps, rugs & plant (floor lamp and rug)
CottageCutz die - build-a-house accessories (dog)
CottageCutz die - build-a-house set 1 (windows)
- cardstock in white, blue and gold color
- patterned paper
- cardstock in natural color: 5 x 2" (12,7 x 5 cm)
- Distress inks: Victorian Velvet, Spun Sugar, Antique Linen

Cardstock in natural color is prepared same as for the heart. This is our living room floor. From the remaining cardstocks with dies cut out an equipment. Shadow and mount them on the background.


 Now glue both rooms with double-sided adhesive tape on card base.
 

3. Bathroom 
- white cardstock: 5 x 2" (12,7 x 5 cm)
- embossing folder
- patterned paper, cardstock in silver, blue and white color
- Distress inks: Victorian Velvet, Spun Sugar, Weathered Wood

With an embossing folder prepare a bathroom floor. Cut out all elements with dies, shadow them and glue to the background. Cut out white towels from the bottom of a shower curtain.


 4. Laundry
CottageCutz die - washer & dryer
CottageCutz die - ironing board w/ iron
CottageCutz die - vacuums
CottageCutz die - buld-a-house set 2 (window)
CottageCutz die - build a house accessories (cat, curtain)
- patterned paper: 5 x 2" (12,7 x 5 cm)
- embossing folder
- cardstock in white, blue, black and silver color
- Distress inks: Victorian Velvet, Weathered Wood, Cracked Pistachio, Peacock Feathers, Antique Linen
Repeat the procedure as in the bathroom.


On front page of the card place a house.
 
5. House
CottageCutz die - build-a-house set 1
CottageCutz die - build-a-house accessories (stairs, curtains, lamp, mailbox)
CottageCutz die - garden accessories (fence, pot plant)
CottageCutz die - grass tree & vines
CottageCutz die - clouds & sun
- cardstock in natural color
- white and color cardstock, pearl cardstock
- Distress inks: Festive Berries, Aged Mahogany, Antique Linen, Vintage Photo
Cut out a house and a fence with dies from natural cardstock which is treated after already known procedure. Windows, front door, flower boxes ad stairs are from pearl cardstock. Shadow other elements with Distress inks. Assemble the house.


I would like to remind you on our CottageCutz challenge #3 - pocket. You still have time to share your projects with us till the end of the month.
  
Thank you for watching. I hope you enjoyed. 
Janja
List of dies used: