Showing posts with label Retro Tag Toppers. Show all posts

Sunday, August 19, 2018

Owl Good

Hi!

This is Anja. The other DT ladies started making Christmas cards, so slowly I'm getting in this mood too. The new dies take longer to come to me, so I used the ones I already have and made a card that could also be used for sending holidays wishes.


For this project I used:
- Cottage Cutz dies (Stylized Owl, Angel With Holly, Christmas Holly Bells, Lantern w/ Holly Vine, Retro Tag Toppers, Oval Set),
- Distress Inks (Vintage Photo, Crushed Olive, Pine Needles, Aged Mahogany, Barn Door, Walnut Stain, Tea Dye, Mustard Seed, Spiced Marmalade, Black Soot),
- craft card base (10x15 cm),
- black card stock for background (10x15 cm),
- white card stock for die cuts,
- wood patterned stamp, 
- brown card stock (10x15 cm, 5 pieces),
- white pigment ink,
- black pen,
- adhesive foam pads,
- paper glue,
- scissors.

First I made the owl. I used white card stock and then colored the edges with Distress Inks. I used black pen for the eyes.


I used different dies for the vines. I again used Distress Inks for coloring.


I made the banner with Retro Toppers dies. I wrote the sentiment by myself with black pen. I used Distress Ink to color around the edges.


Then I made the background. First I cut five 10x15 cm pieces of paper from brown card stock. I used Oval Set dies to cut the ovals from the paper.


Then I colored the edges of the ovals and the paper with Distress Ink.


Next I used the same Distress Ink to stamp the wood pattern on the background.


Then I glued all five pieces of paper together and distress the edges with the scissors.


I decided to color the edges with white ink to make them a bit softer. I also glued the back with black paper.


And then I glued the background to the craft colored card base and then added the holly vines and owl (I used adhesive foam pads).  In the end I glued the sentiment on top of the vines.

And this is my finished card.


The new dies are still 25 % off, so don't forget to check it out.

May your Sunday be sunny and fun.

See you again next week.

Anja Z.


Cottage Cutz dies I used:


Thursday, July 12, 2018

Traveling Llama!

Good Morning Scrapping Cottage Crafters!

Hello it is Pam sharing on the blog today! We don't have a new release of dies for July,  so we are having a throwback month.  The team will be featuring some of our previously released dies to give you some fresh ideas for using them.

Since it is vacation time for a many families I thought it would be fun to make a travel related card.  My niece is going on short mission trip with her church. She is heading to El Salvador to work with children and share her love of singing to the Lord!  So this card is dedicated to her.


Design Steps:

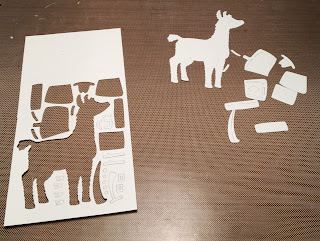
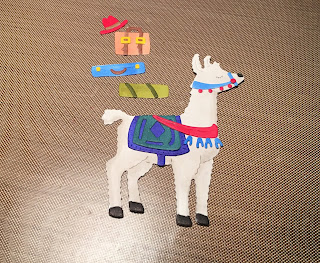
 1.  Cut all of the pieces from the Traveling Llama in white card stock
 2.  Use your markers and color the pieces.  I find it easier to color the smaller pieces while they are still attached to the larger piece of white card stock
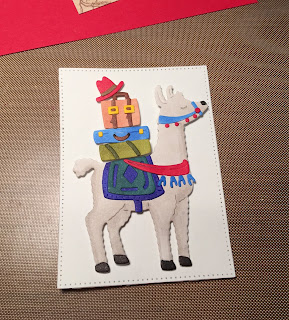
 3.  After all of the pieces are colored assemble the llama
 4.  Use an A2 white card base, cut a slightly smaller piece of red then a slightly smaller piece of DP.  Use the third from the largest Pierced Rectangle die and cut out a white rectangle
 5.  Pop up the Llama onto the white rectangle
 6.  Glue the red card stock to the DP map and add the ribbon.  Then glue the panel to the front of the white card base
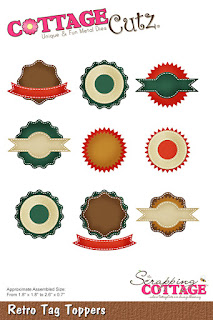
7.  Use the Retro Tag Toppers and cut out the pieces in tan and dark brown.  Stamp the sentiment and cut out the circle and glue the tag together
8.  Pop the rectangle with the llama to the front of the card then add the sentiment tag and your card is complete
Cottage Cutz Products


As always thanks so much for stopping by to visit!  We appreciate it so much!

Blessings
Pam


Sunday, July 01, 2018

Circles and Tools

Hi!

This is Anja. Can't believe how the time flies. It's already July and finally holidays ahead. Can't wait for a few week off and more time to craft and clean out my craft room. And of course going to the seaside and meeting with friends. Yey!

For today's card I used new Dad's Tools die. I love this die. You can make really cool small tools, all that you can find in your dad's garage. Other design teams members made such great cards, using this die and I gave it a go today.


For this card I used:
- Cottage Cutz dies (Dad's Tools, Retro Tag Toppers, Circle Set),
- Distress Oxides (Faded Jeans, Vintage Photo, Fossilized Amber, Antique Linen, Broken China, Fired Brick, Black Soot),
- white card base (10,5x15 cm),
- white card stock for die cuts and stamping,
- white watercolor paper (10x15 cm) for background,
- silver pigment ink,
- Gansai Tambi silver watercolor,
- brush,
- water spritzer,
- heat gun,
- sentiment stamp,
- acrylic block,
- Versafine Onyx black ink,
- scissors,
- paper glue.

First I made the background. I used Distress Oxides and blended the three colors together. Then I spritzed it with water and colored it with the heat gun.


Then I spritzed the background with silver drops and also dried it with the heat gun.


In the next step I die cut three circles out of the paper. I used 5th largest circle from the die set.


Next I die cut three circles from the Retro Toppers Set. I colored it with Distress Inks.


Then I glued the background and the circles on the card base.


Next I die cut and colored the tools.


I stamped the sentiment on white paper and cut it out with the scissors.


And then I just glued the tools and the sentiment on the background. And the card was finished.


I used leftover cut to decorate the inside of the card.


Enjoy the res of the Sunday and see you again next time.

Anja Z.


Cottage Cutz dies I used:


Friday, June 29, 2018

You Look Fabulous

Hi Cottage Cutz fans!  It's Jeanne posting today with another fun card using the Just for Guys dies. 
These dies are so fun and have a great retro look!  To start I die cut the car, gas pump and medallion from Real Red, Crushed Curry, Blueberry Bushel, white and black card stock.
Next, I cut a panel 5 1/2 x 4 1/4 inches from striped paper, a white panel 5 x 3 3/4 inches and a strip 1 x 3 3/4 inches from the polka dot paper.
I put the panel together and then adhered all the gas pump and car pieces.
Finally, I stamped the sentiment on the medallion and glued that together.  I thought this went perfectly with the retro look of the car and pump.  Foam dots pop it off the panel.

The panel is adhered to an A2 card base.

Dies:
http://www.scrappingcottage.com/cottagecutzracecarsandflags.aspx

http://www.scrappingcottage.com/cottagecutzretrotagtoppers.aspx

Thanks for stopping by today.  Be sure to check out the new release.

Have a creative weekend!