Showing posts with label Mary Marsh.. Show all posts

Saturday, August 31, 2019

Sending Hedgehugs


Hello Scrapping Cottage friends! Thanks for taking the time to stop and visit with us today. It's Mary Marsh here bringing you the Saturday edition of the Blog. 

The new release of Birthday dies have been restocked in the online store and on a 25% off sale So if you didn't get the ones you wanted previously, all 25 designs are in stock. This release is filled with cute little whimsical animals, birthday cakes, cupcakes and birthday phrases. Everything you need to create some outstanding birthday cards.

Today for your viewing pleasure, I am featuring the Birthday Hedgehog die. I created a card of encouragement for a friend who needs some hugs and encouragement. So let's get started with some details on how I created my card.  

Step 1: Since I knew what die I was using and I also had my designer paper and coordinating cardstocks selected, I just needed my layout. The sketch #764 over on Splitcoaststampers caught my eye. It would allow me to cut the designer paper in varying sizes. This paper is a bit busy and having it broken up just a little with a cardstock layer underneath would work out just right. 
I decided to add an additional layer to the sketch. I liked the coral and green coordinating colors so I went with both. 
garden green card base: 4 1/4" x 5 1/2"
calypso coral layering panel: 4 1/8" x 5 3/8"
designer paper layer: 3 7/8" x 5 1/8"
 
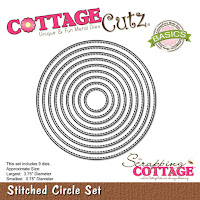
I cut my hedgie in 2 shades of brown cardstocks - soft suede and taupe. I layered him on a cantaloupe circle cut with the 6th largest die from the Circle set. For a layering panel I used coral cardstock and the 6th largest die from the Stitched Circle set.
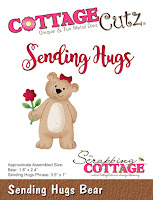
The Sending phrase is from the Sending Hugs Bear die. I cut it 2x in garden green cardstock to make it stand out on the designer paper. It's an older die but still available in the store and currently on sale. 

Step 2: I am ready to start assembly of my card. I cut the designer paper at 7/8", 1 1/8", 1 3/8"and 1 5/8". Adhered that to the coral base with double sided tape.
I stamped my "hedgehugs" sentiment on a coral flag banner. It also had the word sending but I just masked that with tape before inking. I used my MISTI for placement.
Attached the hedgie to the circle panels using dimensional adhesive. I added the flag to the bottom of the circles. I wanted it to look like the hedgie was standing on it.

Step 3: I am ready for final steps. I added the hedgie image to the designer paper layer.
The "sending phrase" was attached with Ranger multi medium matte. I like this adhesive because it dries clear unlike some other glues.  
To complete my card, I added this panel to the garden green base. I decided not to add any other embellishments because I thought the background scallop design was sufficient.

Well, that's it for me for this week. see you next Saturday. There is a big Labor Day sale going on right now. Check it out here.

dies I used to create card:
http://www.scrappingcottage.com/cottagecutzbirthdayhedgehog.aspx
http://www.scrappingcottage.com/cottagecutzsendinghugsbear.aspx
 

http://www.scrappingcottage.com/cottagecutzstitchedcirclesetbasics.aspx


Saturday, April 20, 2019

DT Samples w/Spring & Fantasy Dies (Day 4)

Hello Scrapping Cottage Friends! Thanks for taking the time to stop and visit today. We are sampling cards from our Spring and also our new Magical Fantasy release.
There are 27 new designs in the Magical Fantasy release. And for a limited time the individual dies are on sale at 25% off. We want to give your some ideas for your own card making. So let's get started with our samples for today.

Card 1: This is a card that I (Mary Marsh) created using the beautiful new Unicorn Floral die. I thought this would make a great feminine graduation card since the grad will be going on a new life adventure. To create the circular wreath look I used one of our circle dies and drew a pencil line. Then I started building my wreath starting with the unicorn and worked my way around. The coloring on our packaging is so beautiful that I used similar colors. A simple change of sentiment and this could be a birthday, anniversary or even a get well card.

Card 2:  Our next sample is from Anja Zurga. She also created a floral card using the Spring Teacup Bouquet. How perfect would this be for Mother's Day. What Mom doesn't like to get flowers? Or do you have a friend who loves to garden and has flower beds that are the envy of the neighborhood? Make her a card like this to let her know you are thinking of her. So many occasions and possibilities with this die.
Card 3: Our next sample is from Pam MacKay. She used the Sweet Unicorns die to create a beautiful and whimsical birthday card. Since Unicorns are adorable and very magical, the special little one in your life will love it. The background was created with distress oxide inks and the use of shimmer paper on the unicorn manes added just the right touch of sparkle.  The sentiment carries through the magical appeal of her card.
 Card 4:  Our last sample for today is from Janja Albreht. She used the Peeking Egg Bunny and Spring Potted Bunnies dies to create this super cute and colorful Easter card. Don't you just love these precious little bunnies and look at that little bunny behind. The eye catching  Easter Phrase is using an older die -Retro Alphabet.
Well that's our samples for today. I hope the team has given you some fresh ideas for creative ways to use the new dies over the past 4 days. If you haven't seen the other cards check here, here and here. Happy Easter everyone!

dies used to create cards: