Showing posts with label Lois. Show all posts

Monday, September 24, 2018

Gnomes Bake Shop

Hi, Lois here with my Monday card.  Before showing the card, however, I wanted to let you know that the Christmas Release (Part 3) and new Halloween dies are on sale at 25% off on the CottageCutz website.  I hope you check them out.  There is also a cute new die, Dakota the Husky, which is available only in the CottageCutz store.

Now, on to my card!   I'm a big fan of fun-fold cards, and today's card is a Center Step Card.  If you're unfamiliar with this technique, you can find a tutorial on Splitcoaststampers.  This is my card for today.


Cardstock used for this card are as follows:

Brown - 5 1/2" x 11"
Red - 3 1/8" x 4 1/8"
White - slightly larger than 3" x 4"
Patterned paper - 3/4" x 5 1/4" (3 pieces)


I die cut the pieces for the bake shop from brown and white cardstock.


Using Copic markers and some distress ink, I colored the pieces and constructed my bake shop.


I then cut the gnomes from white cardstock . . .


. . . then colored and constructed the figures.


Following the directions from the Center Step Card tutorial, I cut, scored, and folded my card base from the brown cardstock.


After die-cutting the white piece of cardstock with the second largest Wacky Stitched Rectangle die, I layered the red and white pieces onto the center of the card; then glued the three strips of patterned paper -- trimming down the vertical strips to size.


I then added the bake shop and gnomes to finish the card.


CottageCutz dies used on this card are:

http://www.scrappingcottage.com/cottagecutzbakeshop.aspx


http://www.scrappingcottage.com/cottagecutznordicgnomes.aspx


http://www.scrappingcottage.com/cottagecutznestedwackystitchedrectangleset.aspx

Monday, September 17, 2018

Elfin Laundry

Hi, Lois here with my Monday post.  CottageCutz has some new dies in the store -- Christmas (Part 3) and some really cute Halloween ones, as well.  Both of these sets are on sale at 25% off.  Be sure to check them out.  I'm actually using a die from the Christmas (Part 2) release.  It doesn't necessarily have to be a Christmas card though.  You could use it for a thank-you note AFTER Christmas.


To start my card, I cut the tree portions from some green cardstock, the tree trunks and clothespins from some tan cardstock, and the rest from white cardstock.


Using the packaging as a guide, I colored all the pieces, -- sponging the tree parts with distress ink and coloring the rest with Copic markers.  I then constructed all the pieces, which took quite a bit of time -- those pieces are really small.  That's actually why I like CottageCutz dies, all the detail!


I then cut my card base:

White - 5 1/2" x 8 1/2", scored at 4 1/4"; and 3" x 4 1/4"
Red Plaid - 5 1/4" x 4"


I used some more distress ink and sponged in some color at the top and bottom of the small white panel, giving just a hint of sky and grass.


After layering the plaid and small white pieces onto the card base, I carefully adhered all the die-cut pieces.


I then stamped the sentiment at the top, and my card was complete.


The CottageCutz die used on this card is:

http://www.scrappingcottage.com/cottagecutzelfsclothesline.aspx

Monday, September 10, 2018

We Three Kings

Hi, Lois here for my Monday post.   I like to make Christmas cards all year long -- even when it's 90 degrees + outside.  And CottageCutz has made it very convenient.  Their Christmas release (parts 1 and 2) are both currently on sale in the store at 25% off.

One of my favorite Christmas carols is We Three Kings.  That's what inspired my card for today.


I found a website that provided free printable Christmas carol lyrics.   I printed the song sheet for We Three Kings that I wanted to use for the background of my card.


It printed out at 3 1/4" x 5 1/8"; so when I cut my cardstock, I cut the black piece 3 1/2" x 5 3/8" to give just a little frame around the song sheet.  The white base is 5 1/2" x 8 1/2", scored at 4 1/4".


After cutting the song sheet down, I mounted it on the black piece of cardstock and set it aside.


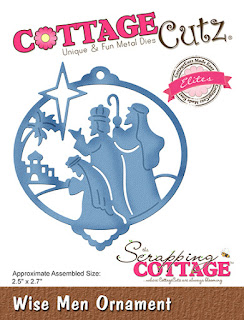
I wanted to try the technique Inlaid Die-cuts for my ornament, so I cut the various sections of the ornament die in black, tan, blue, gray, and yellow.


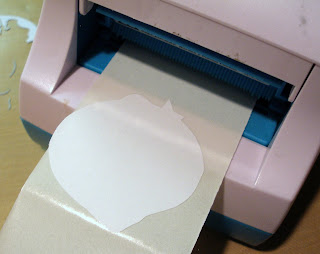
I laid the black ornament piece onto some white scrap paper and drew around the edge.


After cutting out the shape just inside the line, I ran the paper through my Xyron sticker maker so that the adhesive would be on the front side.


After carefully placing the black ornament on the paper, I started to fill in the spaces with the colored pieces . . .


. . . until it was completely filled.


To attach the ornament to my card, I threaded a piece of black twine through the hole at the top and taped it at the top to the back of the sheet music panel, placing some foam pop dots behind the ornament -- and gluing the music panel to the white card base.


I then pulled the twine tight and adhered the ornament to the front of the card.  And my card was completed.


The CottageCutz die used on this card is:

http://www.scrappingcottage.com/cottagecutzwisemenornamentelites.aspx

Monday, September 03, 2018

Woodland Scene

Happy Labor Day!  Lois here for my Monday visit.    CottageCutz is having a HUGE Labor Day Sale -- up to 60% off (25% off on the new Christmas release) and FREE SHIPPING on orders over $50.  Be sure to check it out.

And now, on to my card for today.  Even though there are three layers on this card, it almost looks like a one-layer card.


To start, I cut my cardstock as follows:

White - one piece 5 1/2" x 8 1/2" (scored at 4 1/4") and one piece 4 1/4" x 5 1/2"
Red - one piece 4" x 5 1/4"


Using various Ranger Distress inks (Mowed Lawn, Scattered Straw, Dried Marigold, Red Lipstick, Tumbled Glass) and sponge applicators, I created my background on the smaller white piece of cardstock.  I had cut this piece larger than what I would ultimately need so that I could trim the edges and remove the dark marks along the sides.


I then cut my die-cut images from red (for the sentiment banner) and tan (for the trees and deer).  Prior to cutting the sentiment, I adhered a piece of double-sided adhesive sheet so that it would be easier to attach the sentiment to my card.


Using Ranger Distress Vintage Photo ink and a sponge dauber, I sponged around the edges of the deer and trees (lighter on the trees than on the deer).


After running the trees through my Xyron sticker maker, I constructed my cardbase and began to make my scene.


Once the trees were attached, I ran the deer family through my Xyron sticker maker -- although I had to use the next-size larger one for the buck, who was too large to fit through the 1" sticker maker.


After adding the deer to my scene, my card was completed.


Only one CottageCutz die was used on this card:

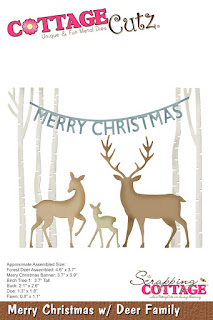
http://www.scrappingcottage.com/cottagecutzmerrychristmaswdeerfamily.aspx