Hello Scrapping Cottage Friends!
It is
Pam sharing with you on the blog this fine Thursday!
It is new release time again! This collection is so fantastic for spring through summer and especially wonderful for those who love to garden. Check it out in the
online store because right now it is being featured with a
FABULOUS discount!!
I am using the
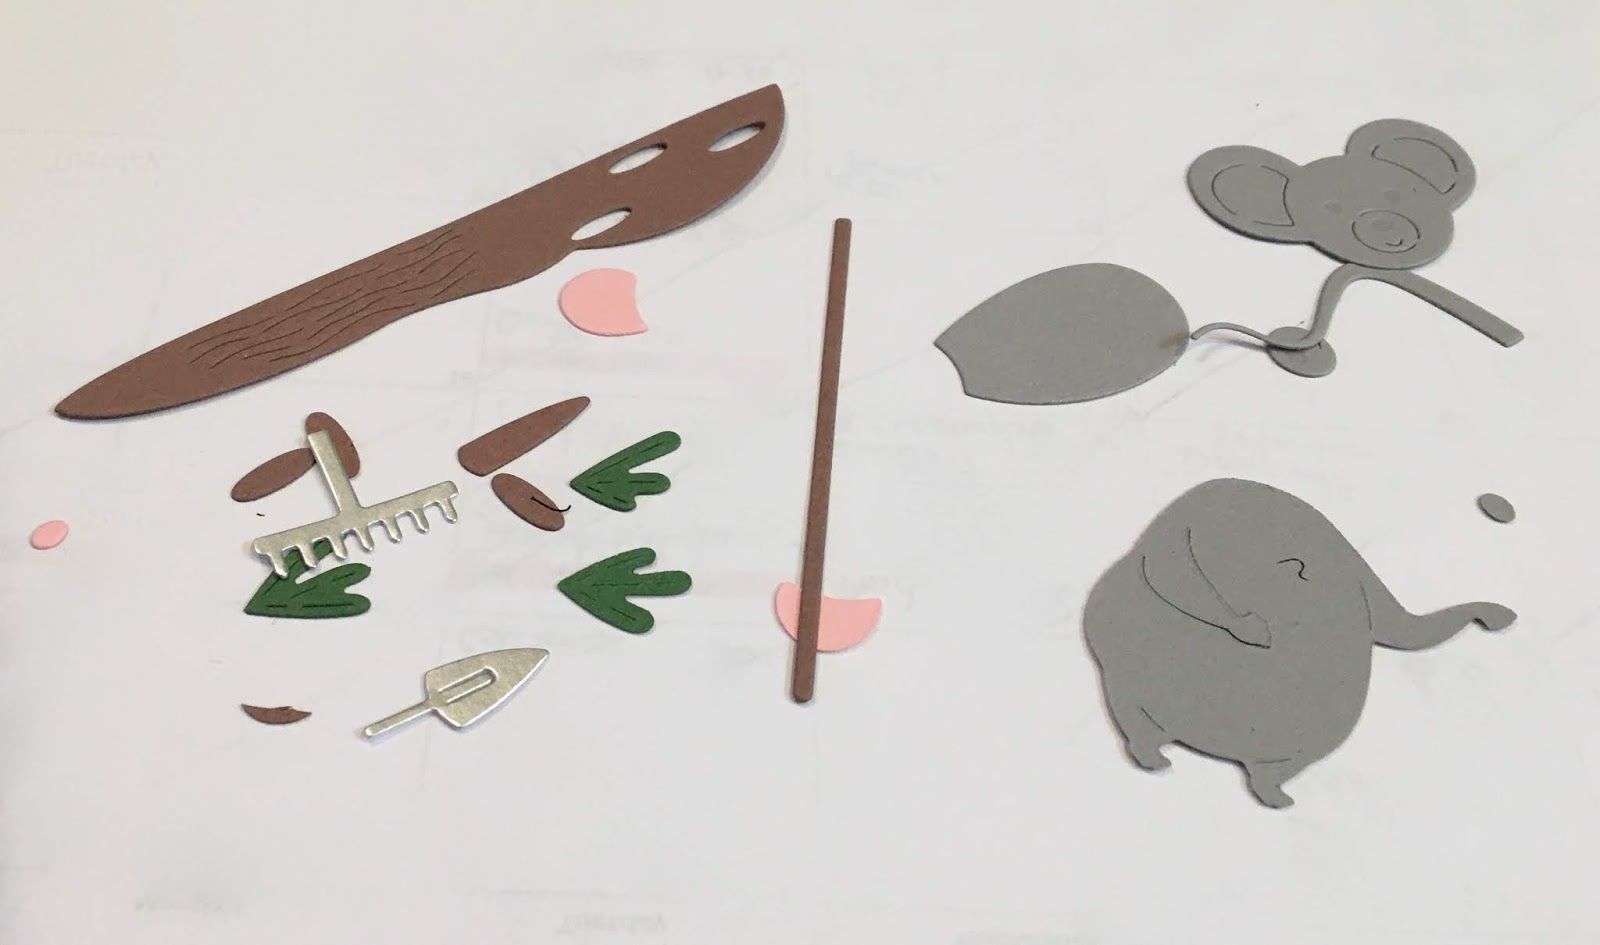
Gardening Mouse and it is just the cutest mouse ever!!
Design Steps:
1. Cut out all of the pieces using the
Gardening Mouse die. The colors of card stock I used where gray, brown, pink, green and metallic silver
2. Shade the pieces with a variety of inks and then assemble using a fine tip glue
3. Use a white A2 card base, cut a piece of light orange slightly smaller then the card base, and a piece of DP 4 x 5 1/4. Using the
Victorian Fence die cut out a white fence. Using the second from the largest
Pierced Rectangle die cut out a red rectangle and then layer it onto light orange card stock
4. Glue the orange to the card base and then glue down the DP
4. Glue the garden base to the bottom of the red rectangle leaving the top of the garden base unglued so you can then slip the white fence behind it
5. Pop up the mouse into the garden and then pop up the little shovel. Add the sentiment and your card is complete
CottageCutz Products
Thanks for stopping by! Please check out this
new release it is so adorable and has so many uses! Plus it is on sale now!!
Blessings
Pam