Showing posts with label Fancy Pocket Plus. Show all posts

Monday, June 06, 2016

CottageCutz Challenge #3 - POCKET

Hi, Vladka is here!

Thank you very much for all your great cards and projects you've made for Challenge #2. Two lucky winners will be announced at the end of this post. So, stay tuned.


And here is time to start new challenge. 
This time theme is POCKET. 

So, create a pocket on your card or on any other project an decorate it with CottageCutz dies.
And please, use ONLY CottageCutz dies and not any other dies. "Add your link" button is available under the list of used dies. If you are not familiar with this button, please check this post for more explanation. Challenge will be closed on 30th of June!

Ok, let's go to my project. I hope this will inspire you a little bit. 

Here is list of all supplies I used:
Cardstock: kraft Cardstock for the pocket and white cardstock for butterflies and greenery 
CottageCutz Dies: Listed Below
Distress Ink: Peeled Paint
Other: Scissors, Sizzix machine


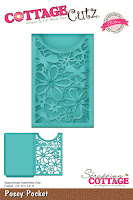
I made a really simple pocket with new Posey Pocket die and used it for summer table decoration. All you need to do is to cut it out with kraft cardstock and cut off the lower fold, so that pocket is open also there. Glue it just on the side. So, you will be able to put cutlery through the pocket:


With Leafy Swirls cut some greenery out of white cardstock and colored it with Peeled Paint distress ink:


For the finish touch cut the butterflies out with butterfly die (I used Fancy Pocket Plus die) and white cardstock. Glue everything together as shown on the photo. 


So, this is my project for today and I can't wait to see yours. 

-------------------------------------------------------------

And now go back to our challenge a little bit more. As I told you before, two lucky winners will be randomly chosen and will get gift certificate for Scrapping Cottage store.

First one will get gift certificate value of 50$...

... and second one in the value of 25$.

You have time till 30th of June to participate. 
Both winners will be announced in the same post as new challenge (for June) will begin.

All you need to do is take your CottageCutz dies and start creating! 
Please, use only CottageCutz dies!
Have fun and don´t forget to show us all your projects.

"Add your link" button is available under the list of used dies.

-------------------------------------------------------------

And of course we should not forget about the winners for the first challenge.

1st Gift certificate value of 50$ goes to Damjana. Her card was linked under number 4:


2nd Gift Certificate value of 25$ goes to Cebelica. Her card was linked under number 11:


Congratulations!
Please, contact Joanne at scrappingcottage@cox.net to claim your Gift Certificate.
This is it for today. Have fun!


Wednesday, May 25, 2016

~April Showers bring May Flowers~


Hello Scrapping Cottage friends! Thanks for taking the time to stop and visit today. It's Mary Marsh here bringing you the Wednesday edition of the Blog. 

Today for your viewing pleasure, I am featuring a new die set from the May release. This one is the Spring Stamps die. It's an 8 piece die set with just the cutest images for your card making. Joanne has made it so easy to make a really cute card with this new set.  In fact, I think this die set almost makes the card for you (lol)!!!

So lets get started with how I put this card together. How I started my design process this week was with my papers and colors. I came across this patterned paper in my stash the other day and decided I was going to use it sooner than later.
Card Base: 4 1/4" x 5 1/2"
Patterned Paper Layer: 4 1/8" x 5 3/8"

 Then I decided on my layout and found this sketch on line. It's a good one to use all 4 of the squares from this new Spring Stamps set. Sketches are such a good way to get your card design going.
 
 
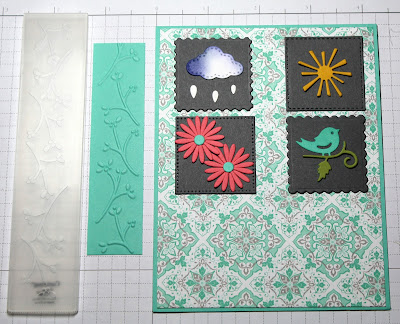
I thought the die cut squares would look good in a darker shade as a backdrop for the images. I chose a dark gray and cut 4 of them. Each square die in this set has a different edge and is a 1 1/2" square. There is a scallop, a postage stamp edge, a pierced square and a stitched square. I used all 4 patterns.


Cut the images next and adhered them to the squares. The bird image is cut in blue and then I pieced the green cardstock for the branch and leaf. On the cloud image I sponged some purple and dark blue to represent a rain cloud. I arranged them according to my sentiment the rain and sun brings the flowers and birds in spring.


I cut a 1" x 4 1/8" panel of the Caribbean blue cardstock and used an embossing folder for background texture. Attached right below the squares.


My sentiment is computer generated in Word 2016. It reads "April sun and showers bring May flowers". I used word art to put in a circular fashion. I won't give instructions here but if you want to know how I did this just leave a comment and I will get back to you. Cut with the stitched circles die using the 4th largest die.


My butterfly is cut from another new die, the Fancy Pocket Plus. I will have a sample using the complete die in the coming weeks. Scattered a few centers that were left from the flowers I cut to complete my card.
 
Well, friends that's it for me for this week. A reminder that you still have 6 days to get your card completed for our 2nd challenge. This one is spring themed. Get more info here. These new dies would be perfect for the challenge.

So until next time.......inky hugs!

http://www.scrappingcottage.com/search.aspx?find=spring+stamps
http://www.scrappingcottage.com/search.aspx?find=fancy+pocket+plus
http://www.scrappingcottage.com/cottagecutzstitchedcirclesetbasics.aspx


Wednesday, May 18, 2016

Skirt Fold Technique


Hello Scrapping Cottage Friends! Thanks for taking the time to stop and visit today. It's Mary Marsh here bringing you the Wednesday edition of the Blog. 

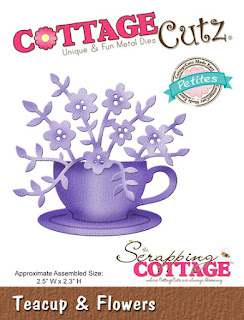
Today for your viewing pleasure, I am featuring a fun card fold and showcasing the teacup & flowers die. This die is the perfect companion to the skirt fold technique that I used on my card.

Let's get started on just how I made this card and the fun fold I used. The skirt fold technique isn't something new but I think it has such feminine appeal. And, a big plus is that it's not hard to do.

Skirt Fold Technique instructions:
Step 1: Start with your choice of patterned paper measuring 3" x 6. You score at 3/4", 1", 1 3/4", 2", 2 3/4", 3", 3 3/4", 4".


Step 2: Your paper needs cut in order to create an angle. Lay the paper on your trimmer with the wider part that is not scored to your right. The 2nd score line should be in the groove of your trimmer. The top left corner of your paper should be at the 1 1/2" mark on your trimmer. It will be at an angle in your trimmer and you just cut from point to point.


click on photo to enlarge to see score lines

 
Step 3: Fold accordion style, back and forth, on your score lines. The finished folded piece will look like this.

Step 4: To hold the folds in place add some adhesive to the back of each pleat.

Step 5: Attach patterned paper to white card base. Base measure 3 7/8" x 5 1/2". At this point I also added my ribbon at the top of the skirt fold pleats. I think it adds a finished look. No photo of this step.

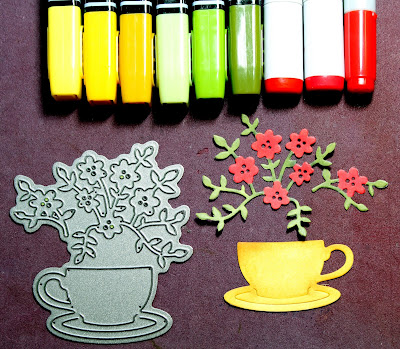
Step 6: Die-cut the teacups & flowers image. I used X-Press It card stock because I colored the image with alcohol markers.
 
 
Step 7: Attached teacup & flowers image to card base.  Stamped a sentiment and added some enamel dots.

 I also added a die cut heart from the brand new fancy pocket plus dies to the bottom of my card. I am giving you a little sneak peek of the new This N That CottageCutz dies that were just released. There is a 25% off sale right now at the Scrapping Cottage store. More to come with these fabulous new dies.


Just a reminder about our newest challenge. The theme is Spring and you have until May 31st to enter. Get all the deets here.
 
See you again next Wednesday Blogger friends! Until next time......inky hugs. If you have any questions about what I have created just ask. I will get back to you with an answer.
 
http://www.scrappingcottage.com/cottagecutzteacupandflowerspetites.aspx
http://www.scrappingcottage.com/cottagecutzfancypocketplus.aspx