Showing posts with label Easter Egg Hunt. Show all posts

Saturday, March 04, 2023

Easter Egg Hunt

Hello CottageCutz friends! Thanks for taking the time to stop and visit with us today. It's Mary Marsh here bringing you the Saturday edition of the Blog.

We have a brand-new release of dies in the online store. It's our Flowers & More release. The individual dies are currently on sale for 30% off. This release has what we are calling "simple cuts". Meaning not as many pieces to put together so they assemble quickly.


They are so perfect for the many card making occasions that we all have. Birthdays, Thank You, Sympathy, Mother's Day or even a scrapbook layout just to name a few. For your viewing pleasure today, I am featuring the new Fence w/Flower Garland die to create an Easter card. 

Design Steps:

I started my card by stenciling clouds on white cardstock with tumbled glass, broken china, spun sugar and mowed lawn distress inks. I blended the colors directly on the white card base.

White card base: 4 1/4" x 5 1/2"
Next, I die cut the fence & flowers with different colored cardstocks. I also used the Easter Egg Hunt (Spring 2020 release) die for my Bunny & phrases 
I secured these images to the card base with dimensional adhesive and clear drying glue. 
I added the Easter Egg Hunt phrase and colored eggs to complete the front of my card.  The colored eggs are from the Mr. Peter Rabbit die (Spring 2018 release). 
I wanted to finish off the inside of my card as well. Since my theme is an Easter egg hunt, I thought  I would show a bunny that collected the Easter eggs (lol)!!! So I used the Juggling Spring Bunny (2020 Spring Release)die and a bunny kisses phrase - that's from the Bunny Kisses & Easter Wishes (2019 Spring Release) die. 
Found some designer paper in a water-colored pack that I bought from Hobby Lobby. I thought it would work nicely for the background. I attached the phrase words with clear drying glue and the bunny with dimensional adhesive. 

Well, that's it for me for this post. I hope I have given you a way to use the new Fence w/Flower Garland die. It's a nice compliment to so many other CottageCutz dies.  See you next Saturday!!!

Reminder: Our YouTube Channel has a new video from Jen Hartsgrove. There is a giveaway for being a subscriber, liking the video and leaving a comment. Click here.

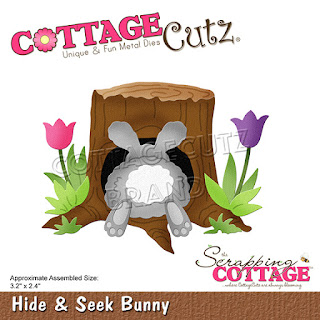
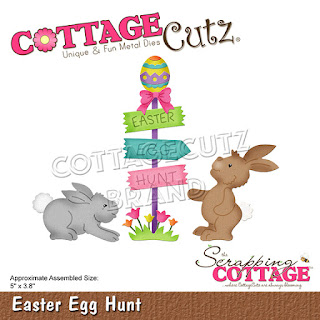
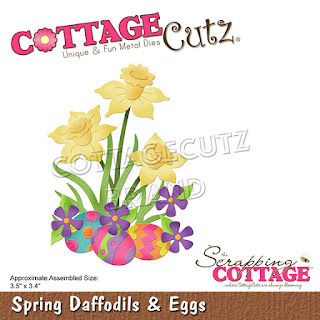
dies I used to create card:


Sunday, April 04, 2021

Easter Egg Hunt

Hi!

It's Anja here. I have my last Easter card for you today.

For this project I used:

- Cottage Cutz dies (Bunny Tree Cottage, Easter Egg Hunt),

- Distress inks,

- white card base (11x15 cm),

- white card stock for die cuts,

- black pen, 

- paper glue. 


First I cut and colored the bunnies and all the other pieces.

Next I cut and colored the eggs and the sign. 

Then I did the background.

Last I arranged all the pieces on the card base and glued it together. And my card was done.


And that's all from me for today. Have a nice Easter Sunday and see you again next week. 

Anja Z. 


Cottage Cutz dies I used for this card: 


Thursday, April 09, 2020

Easter Egg Hunt

Dear Scrapping Cottage Friends,

It is Pam creating with you today on the Thursday Blog!

It is just a few days before Easter and I just wanted to wish all of you a very blessed day on this special holiday.  I made this one last Easter card to celebrate!  I combined 3 of the Spring Release dies and I just love how it turned out.
Design Steps:
 1.  I decide to use a fun card design for these dies.  I used an A2 white card base and then I cut the front fold in half.  I cut a piece of checked green DP just slightly smaller then the half front fold.  Then cut a piece of pink DP slightly smaller then the green DP.
2.  Glue the front flap pieces to the white card base.  Then on the inside cut a piece of pink DP slightly smaller then the inside white card base and then a piece of green DP slightly smaller then the pink DP.  Then glue to the inside of the card
 3.  Using the Easter Egg Hunt die cut out all of the pieces in a variety of colors
4.  Using a variety of ink colors shade the pieces and then assemble with a fine tip glue.  I used tiny black rhinestones for the eyes
 5.  Cut dark green card stock using the Spring Grass die.  Glue the grass to the bottom of the front flap and the bottom of the inside.  Next glue the sign to the front and the bunnies to the inside as shown

6.  I decided to add some clouds and sun to the card so I cut the pieces out using the Spring Frogs die.    I also thought it would be fun to add some Easter Eggs so I cut out a variety of colored eggs using the Basket of Eggs die.  Glue the pieces as shown and your card is complete
 

CottageCutz Products


My favorite Easter memory is when my mom dressed us up in our fluffy Easter Dresses and off we went to church to celebrate the Resurrection of our Lord.  I hope you are making special memories too!!  HAPPY EASTER!!

Blessings


Pam

Friday, March 20, 2020

Egg Hunt!

Happy Friday everyone!  I hope today finds you well and safe.  Here in California we're on mandatory stay at home orders.  I know many will take this time to craft.  This is a great time to send cards to friends to let them know you are thinking about them.

My card today is for Easter and features three new dies from the Spring release.
It is also for the color challenge this week at Splitcoaststampers - Highland Heather, Purple Posy, Balmy Blue and Soft Sea Foam.

To start I cut all pieces from white cardstock.  I colored my tree stump, sign post and bunny using neutral Distress Oxide inks.
I then colored the eggs and signs using the colors specified in the challenge.  I also added Mossy Meadow since that is considered a neutral and is allowed by the challenge rules.
I used a fine multi-liner pen to trace over the lines on the signs and emphasize the words.

Next I cut a piece of polka dot paper 4.25 x 5.5 inches and a frame using the largest of the Stitched Wide Square Frames.
I centered the frame die on my polka dot panel and cut it out.  Then I adhered the panel to a white card base.
This allowed me to add my frame flush with the polka dot panel.  This card is very flat and would make for easy mailing.
Finally I added all the elements to the card.
This is a super fun and quick card to make.  By coloring all the pieces (rather than using different colors of cardstock) I was able to make one pass through the die cutting machine with each die!

Be sure to visit the online store where the new Spring release is on sale for a limited time!

Dies used:
http://www.scrappingcottage.com/cottagecutzhideandseekbunny.aspx
http://www.scrappingcottage.com/cottagecutzeasteregghunt.aspx
http://www.scrappingcottage.com/cottagecutzspringdaffodilsandeggs.aspx

http://www.scrappingcottage.com/cottagecutzstitchedwidesquareframesetbasics.aspx


Thanks for stopping by today - I hope you have a fun and creative weekend!


Sunday, March 15, 2020

Easter Egg Hunt

Hi!

It's Anja here. Hope you're all doing well. I have a simple card for you today, combining two new dies in a lovely Easter scene.


For this card I used:
- Cottage Cutz dies (Easter Egg Hunt, Hide & Seek Bunny, Happy Easter Greeting),
- Distress Inks,
- craft card base (15x15 cm),
- white card stock for die cuts,
- bristol paper for background (12,5x12,5 cm),
- green card stock for background (13x13 cm),
- brush,
- paper glue.

First I cut and colored the bunny and the sign.


Next I did the same with the sentiment.


Then I cut the paper for the background and colored it.


Then I cut another piece of paper for the background. This time I used green cardstock.


When I had all the pieces I assembled the card together.


Stay healthy. See you again next week.

Anja Z.


Cottage Cutz dies I used: