Showing posts with label Cowgirl Chick. Show all posts

Monday, September 01, 2025

Hey!

 Hello Friends,

HUGE LABOR DAY SALE SAVE UP TO 65% OFF! Sale ends Sept. 5th CLICK HERE to shop.

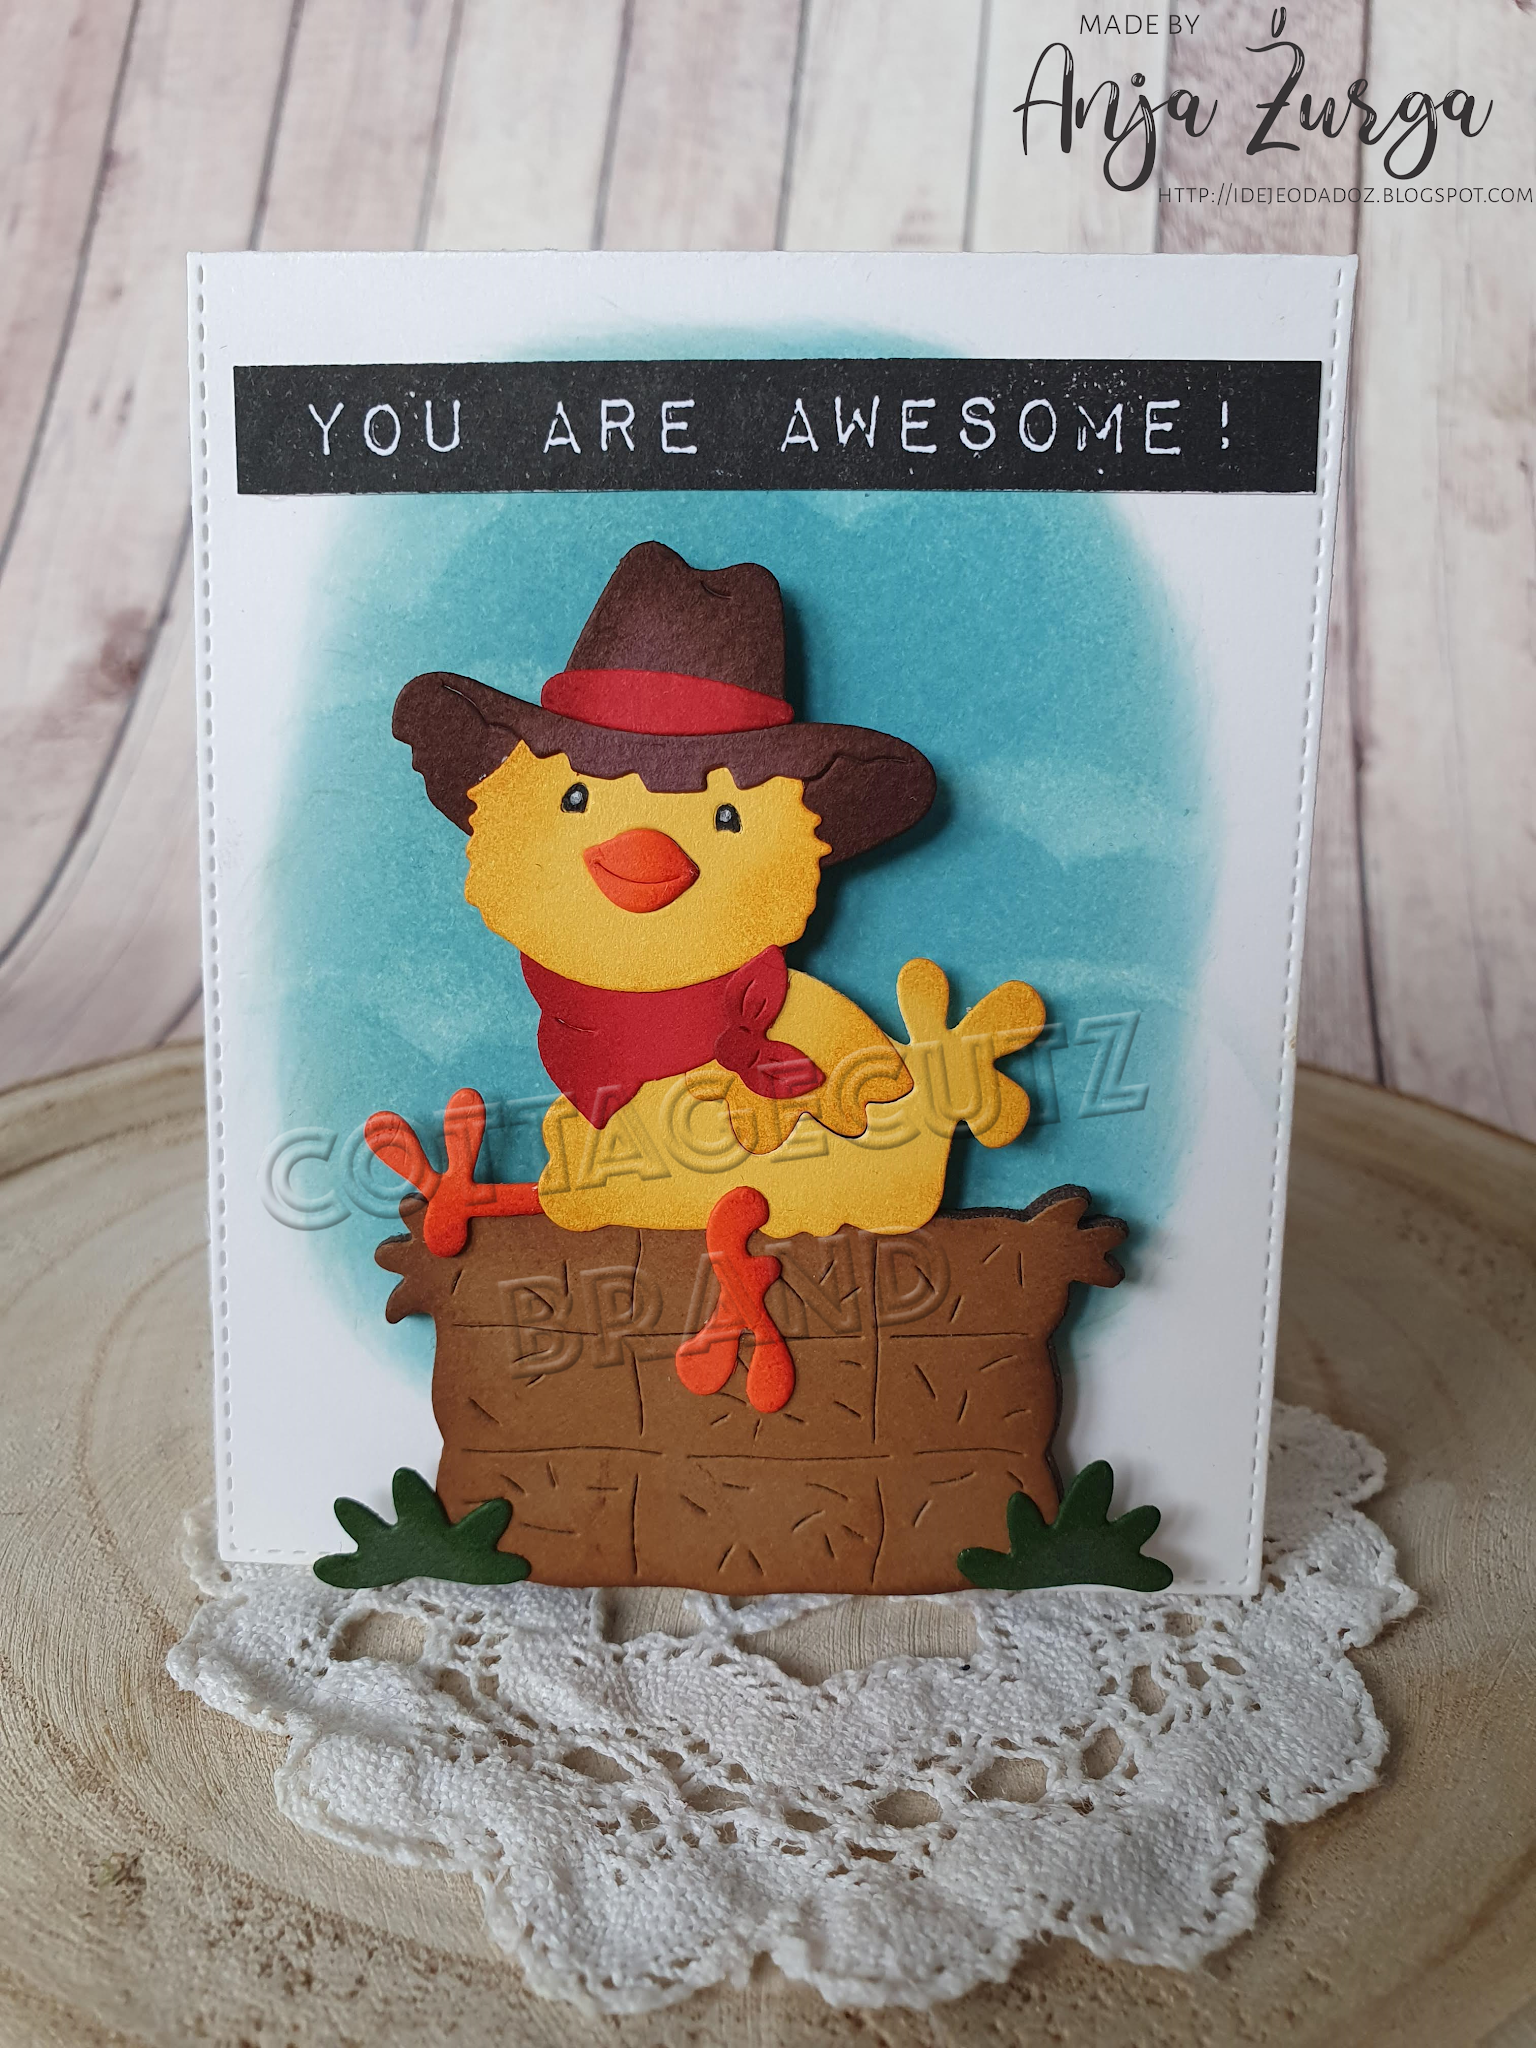
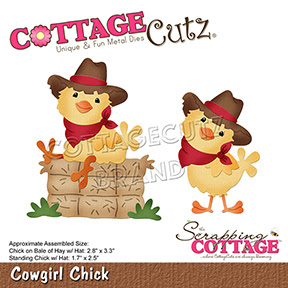
It is time for a fun little hello card using a cute little country chick!! The card today features the Cowgirl Chick and the Stitched Alphabet dies.  

 Background Photo by Freepiks

Design Steps:

1.  Use the Cowgirl Chick die and cut out the following colors of card stock: yellow, red, brown, orange and tan.  Shade the pieces with coordinating inks and then glue together
2.  Use an A2 white card base cut a piece of brown 4 1/8 x 5 3/8 and a piece of checked red DP 4 x 5 1/4.
Glue the brown piece to the white card base and then glue down the red checked piece to the brown
3. Cut white card stock using the 3rd from the largest Cross-Stitched Circle die.  Cut brown card stock using the 2nd from the largest Stitched Scalloped Circle die.  Use the Stitched Alphabet die and cut the word HEY in brown card stock
4.  Glue the white circle onto the brown scalloped circle and then glue to the card front as shown above
5.  Glue down the Chick sitting on the hay and the word HEY
6.  Add a white bow to the upper left hand side of the card and using a white gel pen add a few highlights.  Your card is complete

Thanks so much for stopping by! 

Blessings and Take Care


Head over to Cottage Cutz and do a little shopping today!

Get Social With Cottage Cutz


Friday, May 17, 2024

Tiered Accordion Farm Card

Happy Friday friends!

It's Kris  sharing with you today.  I've made what I call a Tiered Accordion Card in a farm theme and I love how this turned out!!  So much so that I want to make a couple more, so I need to get more farm papers a.s.a.p.!   I'm featuring the Farm Cow Peeker, the Farm Pig Peeker, and the Cowgirl Chick dies.


I made up my own measurements for this 5" x 7" card, however.... it's a super tight fit into a 5-1/4" x 7-1/4" envelope because of the bulk, so next time I will make this 4-3/4" x 6-3/4".   I will go ahead and give you the measurements I should have created this at, not what I actually made it so you can easily fit it into a 5x7 envelope.  ☺


The patterned paper is all from the Down on the Farm by Doodlebug Design. The sentiment is from the Cow's it Going? stamp set by La-La Land Crafts.

DESIGN STEPS:

1.  Cut 4 pieces of white cardstock: (back to front)

    • 6-3/4" x 4-3/4"
    • 7-1/2" x 4-1/2"  - score at 1/2", 1", and 1-1/2" on each end parallel to short side
    • 7-1/2" x 3-1/4" - same as above
    • 7-1/2" x 2" - same as above


2.  Cut Designer Paper: (from back to front)

    • 4-1/2" x 6-1/2" (or 6" if you are using 6" dp - leave the gap at the bottom)
    • 4-1/4" x 4-1/4" 
    • 4-1/4" x 3"
    • 4-1/4" x 1-3/4" 

3.  I also cut the paper that has strips of different patterns and trimmed the one on back layer (farm scene) at 4-1/2" and the other 3 at 4-1/4" wide. 


***TIP:  If you don't like the look of the white flaps showing on top of the designer paper (see 5 photos down) then NOW is the time to make that change.  Simply adhere the tiered panels before you adhere the designer papers. 

4.  I glued the strips to the tops of each coordinating designer paper, then adhered to the white coordinating panels, leaving an even white space all around (except the largest one as my dp was only 6", so I left larger space at the bottom that will be covered up. Fold and burnish score lines on 3 smaller panels. 


5.  To attach the accordion panels, start with the tallest one, add double sided adhesive or glue to the outter flap.  Ahere it by aligning the bottom with the bottom of card base, and so the first score line is at the edge of the base designer paper (not the edge of white card base).  Repeat on opposite end.


6.  For the middle sized panel, align the first score line with the white edge of previous panel (not the dp as you did with the first panel).  Repeat or the shortest panel.  


Now it's time to decorate!!  

7.  Die cut animals from white and color with Copics and Distress inks or medium of your choice.  

8.  For the pig and cow, I cut a long strip of thick white cardstock and attached to back of animal for sturdiness.  I then added tape to the front of white strip and attached it behind the tiered panel. 


9.  Die cut the flag banner from the  Windows Slimline set from the designer paper that has all the bandana squares on it.  

10.  Die cut the sentiment from the smallest Pierced Circles set, then adhere to blue banner.  Adhere to top of card base and ... DONE!


I just LOVE how this turned out!!  Like I said, I would make those 2 changes (1/4" smaller w & h) and I would attach my papers over the flaps when adhering my tiered panels.  But overall, these COTTAGECUTZ dies make the cutest cards for this farm-lovin' girl!!

Thanks so much for stopping by!  I hope you get crafty with your favorite CottageCutz dies!

~Kristine


Head over to Cottage Cutz and do a little shopping today!

Get Social With Cottage Cutz

Sunday, August 01, 2021

Awesome Chick

Hi!

It's Anja here for my Sunday post. While I'm still waiting for the new slimline dies and stamp sets to arrive, I'm still making cards with cute Country Farm release dies. This time I made a smaller card with a cute chick.


For this card I used:

- Cottage Cutz dies (Cowgirl Chick, Nested Stitched Rectangles Slimline),

- Distress Inks and Oxides,

- yellow, orange, red, light brown, dark brown, green and white card stock for die cuts,

- black pen, 

- white ink, 

- dark brown foam,

- black pigment ink,

- sentiment stamp,

- acrylic block,

- scissors,

- plastic stencil (clouds),

- baby wipe, 

- scoring board, 

- adhesive foam pads,

- paper glue. 


First I cut and colored the chick. This time I used colored card stock and just emphasized the edges with Distress Inks. I also cut the hay from foam to give it some dimension. 

Next I cut the rectangle and made a card base out of it.  

Then I colored the card stock with Distress Oxide ink and added the clouds with a plastic stencil and baby wipe. 

Last I stamped the sentiment and cut it out.

 
When I had all the pieces ready I adhered the chick on the card base. I used adhesive foam pads for the chick and two layers of foam for the hay to give it more dimension. Last I added the sentiment and my card was done. 


And that's all from me for today. Before I go I want to invite you to The Scrapping Cottage online store to check the new Lil' Bluebird Designs release and Christmas in July Sale.
 
Have a nice week and see you again on Sunday.

Anja Z.


Cottage Cutz dies I used: