Showing posts with label CottageCutz Double Stitched Rectangle Dies. Show all posts

Thursday, June 17, 2021

Hay There

Hello Scrapping Cottage Friends 

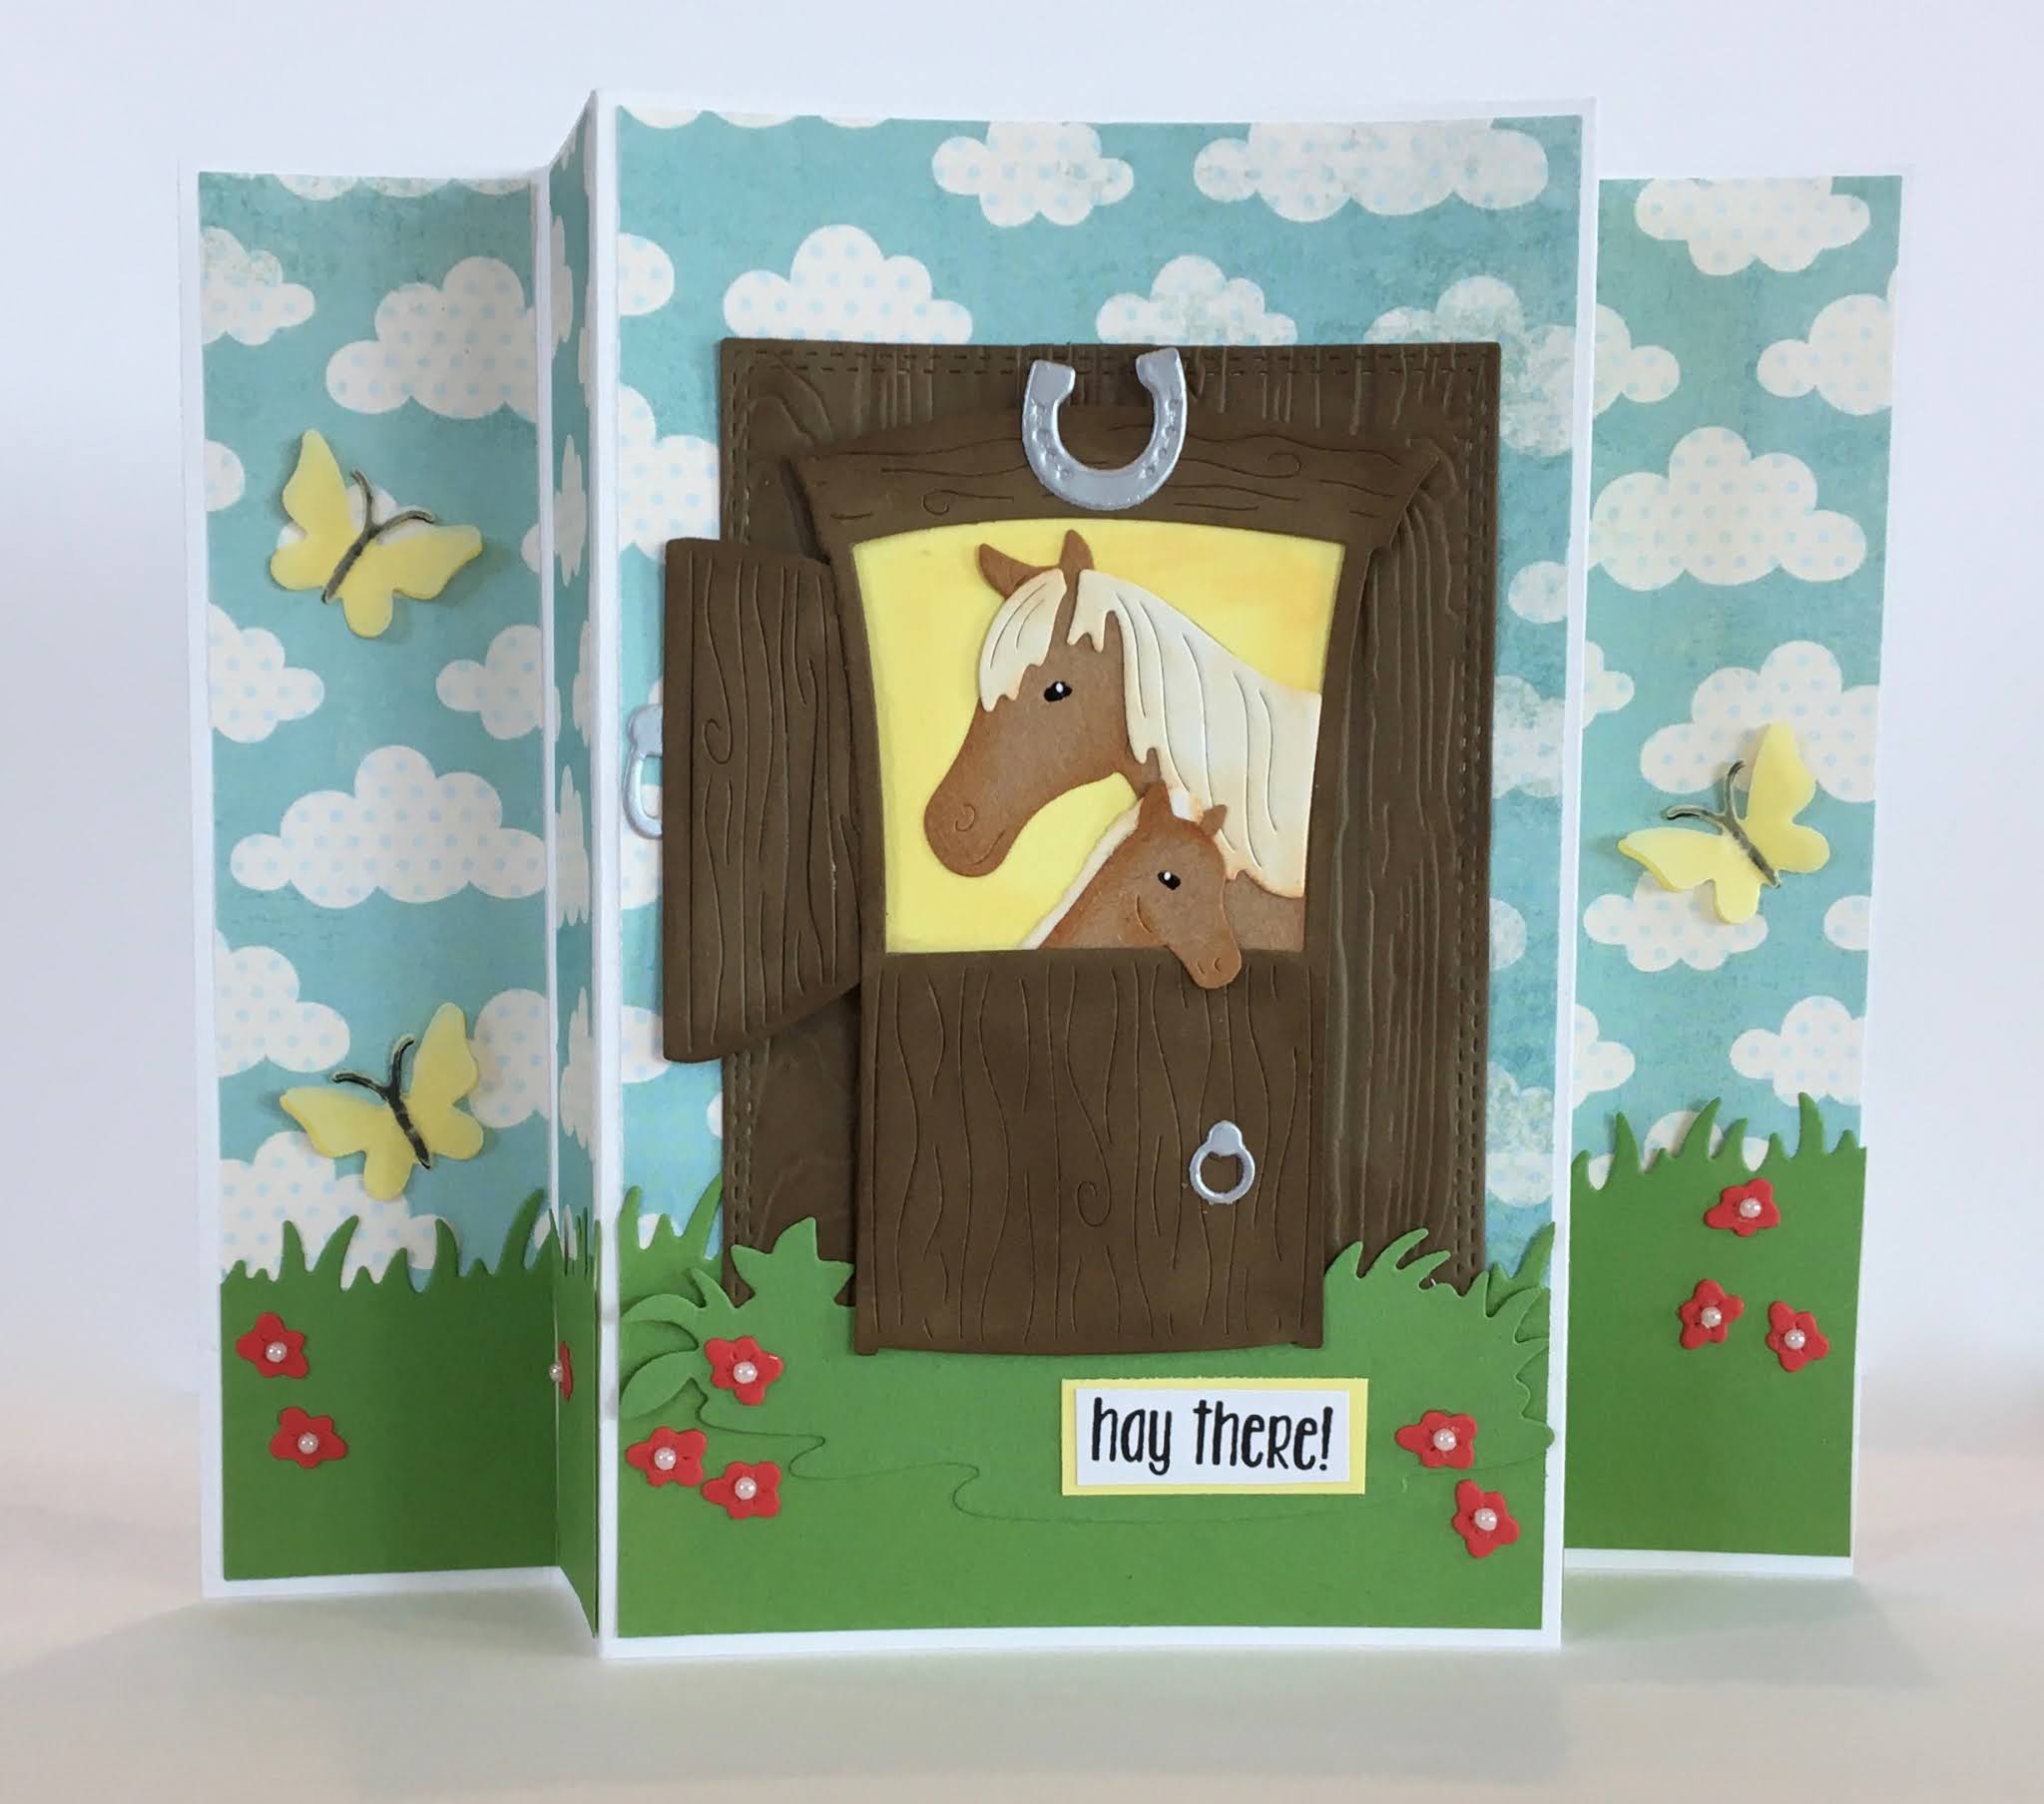
IT IS NEW RELEASE TIME! The collection is called COUNTRY FARM! It has the most delightful dies.  Everything from Tractors to Cowboy Chicks!  Each die is just full of awesome details and can be used for so many different occasions.  Today, I am using the Country Farm Stable.  This fun fancy fold hello card will be going to someone that loves horses!


Design steps:

1.  Start with a white piece of card stock 8 1/2 x 5 1/2.  Score at 1 3/8 and 2 1/2.  Flip the card over and repeat the scoring on the other end of the card. Valley fold the first score line and then mountain fold the next two and the final score line is a valley fold as shown above
2.  Using the Country Farm Stable cut out all the pieces with a variety of colors: green, brown, cream, silver, light brown, red, and yellow.  Shade the pieces and glue together using a fine tip glue
3.  For the front of the card cut a piece of cloud DP 3 1/4 x 4 1/4 and a piece of green card stock 3 1/4 x 1 1/2.  Use the Slimline Grass die for the background grass.  Cut a rectangle of brown using the second from  the largest Double Stitched Rectangle die and shade with ink
4.  Glue the cloud DP down add the grass strip and then glue down the brown rectangle.  Next pop up the stable door with the horses.  Add the green grass piece to the bottom of the stable door
5.  For the sides of the fold cut 2 pieces of cloud DP 1 1/4 x 5 3/8 and 2 pieces 1 x 5 3/8
6.  Use some small pieces of green cut with the Slimline Grass die.  2 cut at 1 1/4 x 1 and 2 cut at 1 x 1 mine are just slightly different as you can see because the grass die has a slope in it

7.  Add the red flowers with little pearl centers and the butterflies.  Stamp and layer the sentiment and your card is complete.  Just for your info you sign your card on the back!

CottageCutz Products


Thanks so much for stopping by today.  I hope you take some time to get crafty.  And please don't forget to check out the new Country Farm release!

Blessings and Take Care
Pam


Thursday, August 27, 2020

Sand Castles

 Hello Scrapping Cottage Friends

It is Pam sharing some creative tips today!

I have another fun beach themed card for you.  Who doesn't love the beach right!  The only part of the beach that bugs me is sand everywhere!! Even in places you never dreamed of.  But the sound of the ocean, the cool water,  and the warm breezes really out number the sand complaint! Anyway I am using the Sandcastle die today and I hope you enjoy this card as much as I enjoyed making it!

Background Photo by xiaokang Zhang on Unsplash

Design Steps:
1.  Use the Sandcastle die and cut the pieces out of a Sand DP, Dark Brown Card Stock, Silver and white.  Use TH's inks to shade the pieces 
2.  Color the bucket and flag red, the star fish yellow and shade the shells.  Glue together with a fine tip glue
3.  Use a piece of Sand DP and a piece of Sky DP.  Cut the hill in the sand and then lay the sand on top of the sky and cut with the Double Stitched Rectangle die second from the largest
4.  Glue the sand to the bottom of the Sky DP
5.  Cut a piece of white textured card stock 4 x 5 1/4.  Then glue the beach rectangle to the center of the white textured card stock.  Stamp the sentiment in black as shown
6.  Using dimensional dots pop the castle to the sand as shown.  Your card is complete

CottageCutz Products

I really hope you are enjoying your summer.  I can't believe it is almost over! Time just seems to fly especially when you are creating!
Blessings
Pam

Thursday, June 04, 2020

Tulips!

Hello Scrapping Cottage Friends,

It is Pam designing with you on the blog today!

I love tulips!  They are usually one of the first flowers to pop up in the spring! Signaling that the cold winter months are coming to an end.  My favorite tulips are yellow but the red come in a close second!


Background Photo by Wynand van Poortvliet on Unsplash

Design Steps:
1.  I used a black A2 card base, red card stock 4 x 5 1/4, and polka dot DP  3 3/4 x 5.  Glue the red card stock to the polka dot DP and set aside 

2.  Next cut out a piece of green card stock using the Spring Grass die.  Cut out a white rectangle using the Double Stitched Rectangle die 3rd from the largest.  Use a cloud stencil and blue ink to create the background.  Glue the cloud stitched rectangle onto a red rectangle layer

 3.  Using the Garden Wheelbarrow die cut out the pieces in red, black, silver, dark and light green, red and yellow

4.  Shade the pieces and then assemble them using a fine tip glue
5.  Next pop the cloud panel onto the polka dot DP add the grass then the wheelbarrow.  Then carefully arrange the tulips and glue them into the wheelbarrow.  Add the sentiment and glue to the black card base and your card is complete
 CottageCutz Products


Thanks so much for stopping by today.  I appreciate it so much.

Blessings and See You Soon!
Pam

Thursday, May 14, 2020

Gardening Cat

Hello My Scrapping Cottage Friends!

It is Pam having fun with you on the blog today!

I have a wonderful sister who has a number of cats.  In fact we call her the cat whisperer!!  And she loves to garden and soak up the sun!  So this card will be a perfect thank you for her!

 (background photo Photo by Tim Mossholder on Unsplash)

Design Steps:

1.  The base is an A2 white piece of card stock.  Second layer is dark green card stock 5 1/4 x 4 and the flower DP is 5 x 3 3/4.  Glue the layers together as shown above

2.  Using the Gardening Cat die cut out the pieces using grey, pink, dark green, metallic silver, yellow and brown
3.  Shade all of the pieces using a variety of inks.  Add white polka dots using a Sukra white gel pen
 4.  Cut the fence using white card stock and the Victorian Fence die.  Also using green card stock and the Spring Grass die cut out the grass
5.  Use the Double Stitched Rectangle die cut out a piece of wood grain DP and layer onto dark green card stock.  Next glue down the grass and fence
6.  Pop the small fence panel to the card base and then pop up the cat and sentiment and your card is complete
CottageCutz Supplies


Thanks so much for stopping by today!  I hope you have a wonderful time creating!
Blessings
Pam


Thursday, November 14, 2019

Reindeer Baking!

Hello Scrapping Cottage Friends!

It is Pam sharing with you today!

I am so glad I have gotten a head start on my Christmas cards.  So that I can make each one of them special for the family member or friend.  The one I am making today is going to a friend that loves to bake.  I personally would rather bake then cook!  These little baking reindeer are just adorable!

Design Steps:

 1.  Using the Let's Bake Cookies die cut all of the pieces out in white card stock
 2.  Color and shade the pieces using your favorite markers
3.  Assemble the 3 reindeer and place dimension tape on the back of each of the reindeer
 4.  Use a white A2 card base cut a piece of red polka dot DP  4 x 5 1/4.  And then using the Double Stitched Rectangle die cut second from the largest cut out a piece of DP.
5.  Glue down the DP stitched rectangle then wrap white Ric Rack to the red DP on the top and bottom.  Then glue to the card base
6.  Arrange your little reindeer on the front of the card and add your sentiment


CottageCutz Productions


Thanks so much for stopping by!  And I hope you are having fun making your Christmas cards for friends and family.  There is still a lot of time to shop for dies to make someone a very special card!

Blessings
Pam