Showing posts with label Carrot Patch Bunny. Show all posts

Saturday, September 21, 2019

Autumn On The Farm

Hi, Janja is here with you.
A little more, and autumn will come. This is the richest time of the year, enchanting us with beautiful autumn colors, juicy fruits and vegetables.
I tried to capture some of this on a card I share with you today.


CottageCutz dies - Lucky Leprechaun, Hats, Glasses & Mustaches, Old Farm Fence, Cornucopia, Ivy, Carrot Patch Bunny
- white card base: 5.3 x 5.3" (13,5 x 13,5 cm), folded
- patterned paper: 5 x 5" (12,7 x 13,7 cm)
- colored cardstock
- corrugated kraft cardstock
- colored ink pads
- watercolor brush
- glue, double-sided adhesive tape, self-adhesive foam pads
Cut out the central motif with Lucky Leprechaun die and add a mustache.


Now cut out the various autumn crops.


Cut ivy from watercolor paper. I colored ivy with Distress Inks, brush and water.


Prepare a card base and trim a patterned paper. From corrugated kraft cardstock cut a frame and a fence. The outer edge of the frame is the same size as the card base.


First, attach a pattern paper and frame to the front of the card. Then paste the central motif, a fence and ivy. Finally, fill the bottom of the card with all the vegetables and fruits.


Have a nice day.
Janja


Friday, May 10, 2019

Sending a Thousand Hugs

Happy Friday!  It's Jeanne today with a card that could be for Mother's Day or any occasion where you'd like to say "you're special."   I decided to use the layout from this week's sketch challenge on Splitcoaststampers.
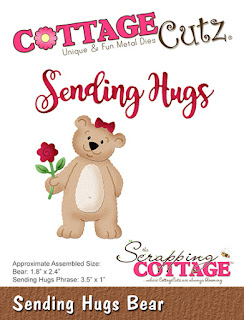
The focal image is the bunny from Carrot Patch Bunny. It also uses the flower from Sending Hugs Bear and Spring Grass.  I first cut all the pieces from white card stock which I then colored using blending tools and ink.
I originally planned to use just Distress Oxide ink and did so for the bunny - Pumice Stone for him and Tattered Rose for his ears.  However, I found that I had some regular dye inks that matched the patterned paper I planned to use so I went with those - Gumball Green, Pink Pirouette, Daffodil Delight and Melon Mambo.  I used a black Copic marker to color his nose and eyes.
I cut two panels using the second and fourth largest of the Double Stitched rectangle dies from patterned paper and white.
The white panel is centered on the patterned one and the grass is glued to the very bottom.  This allowed me to slip the assembled bunny underneath so he is standing "in the grass".
I used paper snips to cut the edges of the grass flush with the panels.
Next I made an A2 card base from white card stock and added a yellow strip of washi tape.  I thought this sentiment was perfect for multiple events including Mother's Day, birthday, thank you, etc.
To finish the card the I double sided adhesive to adhere the panels and added the extra flowers to the corners.  This is the type of card that you can make to have on hand and then finish the inside to fit the occasion!

Dies used:
http://www.scrappingcottage.com/cottagecutzcarrotpatchbunny.aspx

http://www.scrappingcottage.com/cottagecutzsendinghugsbear.aspx
http://www.scrappingcottage.com/cottagecutzspringgrasselites.aspx
http://www.scrappingcottage.com/cottagecutzdouble-stitchedrectanglesetbasics.aspx

Make sure to stop by the online store where there is a sale on some of your favorite dies for a limited time!

Have a wonderful weekend and a Happy Mother's Day!


Sunday, April 14, 2019

Bunny with Carrots

Hi!

It's Anja here. I have a very simple card for you today, using this adorable bunny with lots of carrots.


For this card I used:
- Cottage Cutz dies (Carrot Patch Bunny, Spring Potted Bunnies),
- Distress Inks (Spun Sugar. Barn Door, Dried Marigold, Antique Linen, Mowed Lawn, Peeled Paint, Vintage Photo, Walnut Stain, Spiced Marmalade, Stormy Sky, Broken China, ),
- white card base (10,5x21 cm),
- white card stock for die cuts,
- water color paper for background,
- white pen,
- black pen,
- heat gun, 
- brush, 
- paper glue.

First I cut and colored the bunny, carrots and pots. I use black and white pen for the eyes.


Then I glued the carrots in the pots.


Next I made the background, using Distress Inks and a brush.


And when the background was dry, I arranged and glued all the pieces on.


This is all from me for today.

Have a nice Sunday.
Anja Z.


Cottage Cutz dies I used:


Tuesday, April 09, 2019

Colorful Spring

Hi, Janja is here with you.
Daffodil is a harbinger of a colorful spring. Her flowers are cheering us with a strong and wonderful fragrance from the beginning of March to the end of May.
For today, I made a simple spring card.


- CottageCutz dies: Buster w/Spring Daffodil, Carrot Patch Bunny (soil)
- white card base: 4.25 x 5.5" (10,8 x 14 cm), folded
- patterned paper: 4 x 5.2" (10,2 x 13,2 cm)
- colored cardstock
- colored ink pads
glue, double-sided adhesive tape, self-adhesive foam pads

When we cut out all the pieces from a colored cardstock, shadow them around the edges with colored pads.
For this purpose I use makeup brushes.


Prepare a card base and trim the selected patterned paper for background. Stamp a sentiment.


Now, it's time to finish the card.


Have a nice day.
Janja


Tuesday, April 02, 2019

Hello Spring

Hi, Janja is here with you.
Because of many descendants, rabbits are a symbol of fertility and new life that awakens in the spring.
I made three cards with bunnies. I used dies from the spring release.


- CottageCutz dies: Bunny Carrot Car, Carrot Patch Bunny, Spring Bunny w/Cart, Hello Spring
- white scalloped card base: 4.6" x 4.6" (11,7 x 11,7 cm), folded
- white cardstock: 4.2" x 4.2" (10,7 x 10,7 cm)
- colored cardstock
- colored ink pads
- embossing folder
- white and black gel pen
- glue, double-sided adhesive tape, self-adhesive foam pads

Cut out all three bunnies from colored cardstock. For more depth shade all pieces on the edges with colored pads and paste them together.


Prepare the base for three cards. Cut squares and frames from a white cardstock. For embossed background I used a dotted lattice embossing folder.


Each square and frame paste on the card front with double-sided adhesive tape. Attach the bunnies with adhesive pads and we're done.


You can check all the amazing collection of dies at the CottageCutz Store. By the way, check out the BIG Anniversary Sale.

Have a nice day. 
Janja