Tuesday, October 31, 2017

Sweet Holiday

Happy Halloween everyone!  It's Jeanne posting today.  Normally I post on Friday but I switched with Janet because of last Friday's video blog hop.  Wasn't that fun?

Although today is Halloween, I have a Christmas card for you featuring one of my favorites - a gingerbread man!
This card uses the Gingerbread Baking set, the Cross-Stitched Squares set and the Sweet phrase.  The card is an A2 top fold  with landscape orientation.  I cut a piece of patterned paper 1/4 inch smaller - 4 x 5 1/4 inches.  This gives a nice 1/8 inch border all the way around.
I used the middle square from the Cross-Stitched Squares to cut the base for the gingerbread man.  He is cut from Crumb Cake card stock; the rest of his pieces and the sentiment uses white.  I colored his tie using markers.
To give him a "crispy cookie" feel, I sponged the edges in Crumb Cake ink.  I then used a multi-liner pen to color in his eyes and nose.
I glued on his tie and frosting but decided I would use glitter enamel dots for his gumdrop buttons.  The white square didn't stand out as much as I wanted so using my paper cutter I cut out a green square that was slightly larger than the cross-stitched one.
For the sentiment, the strip of red card stock is 5 1/4 x 1 1/2 inches and the green is 5 x 1 5/8 inches.

I used white embossing powder to heat emboss"have a" and "holiday".  To get the placement, I put the red strip in my MISTI and laid the SWEET die cut where I wanted it on the strip.  Then I positioned the stamps and closed the lid.  I removed the die cut and proceeded with the embossing.  "Sweet" is covered in three coats of Wink of Stella and really sparkles person.  When it was dry I glued it down in position.

The last things I did were adhering the square with the gingerbread to the front using foam dots and adding a ribbon bow in the corner.

http://www.scrappingcottage.com/cottagecutzgingerbreadbakingset.aspx
http://www.scrappingcottage.com/cottagecutzcross-stitchedsquaresetbasics.aspx

http://www.scrappingcottage.com/cottagecutzexpressionsplussweetphrase.aspx
Thanks for stopping by today!  See you Friday!

Monday, October 30, 2017

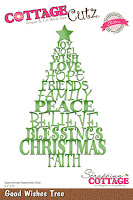
Good Wishes Tree


Hello Scrapping Cottage friends! Thanks for taking the time to stop and visit today. It's Mary Marsh here bringing you the Monday edition of the Blog.

Yikes, can you believe that October is almost a wrap? If you haven't started your Christmas cards yet, it's definitely time to get them started. I have about 10 or so made. Not nearly enough that's for sure. That's where my samples will be headed each week for awhile.

Today, I used a new die Good Wishes Tree, for my sample card. I wanted to show a card that would be fairly easy to mass produce using this new die. So let's get started with some details on how I created my card.

Step 1: I wanted to use red & green as the main colors and I found this paper in my Christmas collection. I thought the music background would work well with the Christmas words. I matched the designer paper with a pine green, a cherry red and kraft cardstocks.

The patterned paper had a nostalgic look to it so I decided to use burlap ribbon.
Step 2: I cut the good wishes words in the cherry red cardstock. I like the different style font that is used on each word.
I secured this to the patterned paper panel with glue dots. I used mini ones and rolled them into small lines.
Secured the image panel to the cherry red card base, I liked how the panels pop with the addition of the red card base.
Red Card base: 4 1/2" x 5 3/4"
Green Layering Panel: 4 1/4" x 5 1/2"
Patterned Paper Panel: 4 1/8" x 5 3/8"
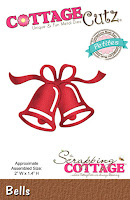
Step 3:  I thought the panel needed something else to complete it. I tried a small bow but that didn't work. So I cut some bells and added them to the corner and scattered some gold sequins. It completed the card nicely.
 
Well that's my card for this week. I hope I have given you some inspiration on a way to use the new Good Wishes Tree die. I will be back again on Saturday with another Christmas card idea for you.
 
Dies I used to create card:
http://www.scrappingcottage.com/search.aspx?find=good+wishes+tree

http://www.scrappingcottage.com/cottagecutzbellspetites.aspx


Sunday, October 29, 2017

A Cup of Christmas Florals

Hi!

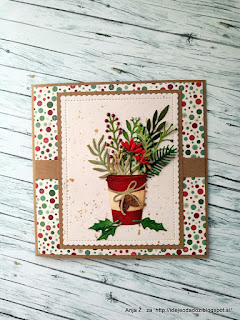
This is Anja again. Red and green are two of the traditional Christmas season colors. Today I pulled out all the red and green shades of Distress Inks I have and used it to make a cup of florals. I love coloring greenery and flowers so I die cut a little more and made a card and a smaller circle that can be used as a tag if we make a hole trough it.


For this project I used:
- Cottage Cutz dies (Christmas Floral, Nested Stitched Scallop Rectangle Set, Nested Stitched Scallop Circle Set, Pierced Circle Set, Sweet Spring Kitty),
- Distress Inks (Barn Door, Fired Brick, Vintage Photo, Walnut Stain, Peeled Paint, Forest Moss, Mowed Lawn, Pine Needles, Antique Linen, Bundled Sage, Shabby Shutters),
- craft paper base (13,5x13,5 cm),
- white and craft paper for die cuts,
- Nuvo Crystal Drops (Autumn Red),
- Liquid Pearls (White Opal),
- paper glue,
- design paper (13x13 cm),
- gold pigment ink,
- gold acrylic paint.

I cut a piece of design paper and two strips of craft paper. 


Then I die cut two circles and rectangles. I spritzed the lighter ones with gold acrylic paint.


I glued all the card and tag bases together.


Then I die cut all the other pieces from white card stock and colored it with Distress Inks.


I die cut all the florals in two pieces. First I colored every piece with lighter shade of ink and then put a darker shade around the edges.


I made 3D effect with liquid pearls in red and white and let it dry.


 When everything was colored and dried I glued all the floral pieces together.

And this is my final result from a bit closer.


Enjoy your Sunday and have a nice week.

Anja Z. 

Cottage Cutz products I used:


Saturday, October 28, 2017

Christmas Lantern


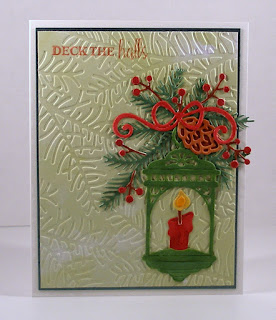
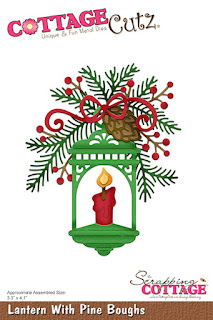
Hi!  Lois here on a Saturday with my weekly post.  I can't believe that it's the end of October already!  Can Christmas be close behind?  I've got another Christmas card today, using a brand-new die from CottageCutz called Lantern with Pine Boughs.  Be sure to check it out, as well as all the dies in the latest release from CottageCutz.


Before I explain how I made my card, I want to let you know that CottageCutz/The Scrapping Cottage is sponsoring a video blog hop that started yesterday (October 27th) and continues today (October 28th).  Janet Axtman, one of the CottageCutz DT members, as well as several other video artists will be featuring cards made with CottageCutz dies . . . and there will be prizes!!!    Each one of the hop participants will be presenting prizes to visitors who comment on her blog, and CottageCutz/The Scrapping Cottage will be giving a grand prize.  So be sure to check it out!

To start my card, I cut all the pieces for the lantern from white cardstock, which had been backed with a Scor-Pal adhesive sheet.


I colored  the pieces using Copic markers.


Then I cut my cardstock as follows:

White - 5 1/2" x 8 1/2", scored at 4 1/4"
Dark Green - 4" x 5 1/4"
Light Green patterned paper - 3 7/8" x 5 1/8"


After scoring the white cardstock at 4 1/4" and folding it in half, I glued the dark green cardstock onto it; and stamped the sentiment in the upper left-hand corner of the patterned paper.


I then embossed  the patterned paper with a pine bough embossing folder and glued it down to the card base.


All that remained was to build the lantern in the lower right-hand corner of the card base.  I allowed some of the pieces to extend beyond the edge of the card for some additional interest.


The CottageCutz die used on this card is:

http://www.scrappingcottage.com/cottagecutzlanternwithpineboughs.aspx


Be sure to check out the CottageCutz website.  The new release has so many nice Christmas dies, both religious and secular . . . Nativity scenes and Santa Claus!  


Friday, October 27, 2017

Hop Project - Christmas Cupcake Double Easel Card

Hi everyone and happy Friday! It’s Janet and I’m so over the moon excited to kick off the video blog hop of projects using the new holiday releases. On top of getting all kinds of inspiration, the prizes the ladies and CottageCutz are offering are amazing. Don't miss out!

To go to the CottageCutz hop project, just click on the YouTube thumbnail below. Don’t forget that to qualify for the CottageCutz channel’s prize ($20 credit) and the CottageCutz Grand Prize, you need to visit each video in the hop, comment and subscribe. The video’s description will have the links to all the other hop videos so you can visit each one.


Here's a summary of the hop details:
1) It will start with some videos being released today and some on Saturday.
2) The CottageCutz hop video can be found in the thumbnail below.
3) The video description will contain all the project hop video links so you can follow along.
4) The cutoff to comment and subscribe is Midnight, Saturday, November 4th. The winners will be drawn and announced within 24 hours after the cutoff.
5) The CottageCutz video channel will be giving a $20 store credit to the lucky winner who comments and subscribes to all the channels!
6) Doing #5 will also automatically enter you in the Grand Prize drawing for the hop. This is going to be something really special from the Scrapping Cottage!
7) Every artist will be giving something fabulous away as well. Make sure you watch their videos to learn what to do to qualify for their channel prizes.
8) I'll be giving away a 24 pack of Spectrum Noir markers to a lucky participant over at my channel!
9) Have FUN and be INSPIRED!


PRIZE WINNER ANNOUNCEMENT!!!!!
We had a lot of visitors who commented that they would be joining the hop on Tuesday’s haul video. Thank you so much for watching and letting us know you are as excited as we are! As promised, I drew a winner from those who commented and the winner is…………………..
LISA FROM CHARLISA’S CRAFTY CORNER!!


Congratulations Lisa! You’ve won the paper pad, card blanks and wreath pack. I’ll contact you soon to get your mailing address.


And now to my hop video. Today’s project highlights three adorable new Christmas Cupcakes, some delicate snowflakes and a bold Merry Christmas message highlighted by reindeer and a pine cone stopper. This is a double-easel card and I'll show you how to make this design into a card that will be treasured by your recipients. Please note that the Santa Cupcake die is already out of stock but new stock is arriving soon so you can still get it if you want it. Look for him back in the store soon. He really is adorable!


Dies used in this project:


Thanks again for visiting us here and I hope you have a wonderful weekend! See you at the hop!

- Janet