Showing posts with label sunflowers. Show all posts

Saturday, October 07, 2017

Give Thanks

Hello Scrapping Cottage friends! Thanks for taking the time to stop and visit today. It's Mary Marsh here bringing you the Saturday edition of the Blog.

Just as a reminder, CottageCutz has a new release of Halloween & Christmas dies that are now available in the online store for ordering. The DT has been showing lots of great samples and will continue to show them over the next couple of months to get your creativity flowing. There are plenty of beautiful new Christmas dies  and something for everyone's tastes.

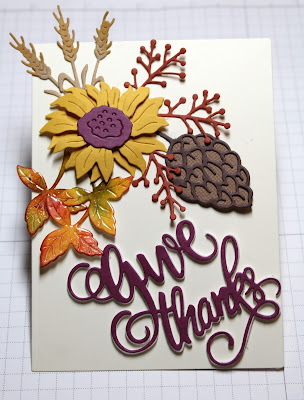
Today, I used a new Christmas die, Pine Spray, to create a Thanksgiving card. I  love celebrating the Thanksgiving holiday and making Thanksgiving cards to send out to family and friends.  So let's get started with some details on how I created my card.

Step 1. I found this Give Thanks word already die cut and placed on vanilla cardstock. The words are cut in a rich, purple shade and popped up on fun foam It gives great dimension. So that determined the other colors I would use on my card. The card base is the purple and my layering panel is a curry color. I think they make a great fall combo.
Razzleberry Card Base: 4 1/8" x 5 1/2"
Curry Layering Panel: 3 3/4" x 5"
Image Panel: 3 5/8" x 4 7/8"
Step 2: Since this is a fall card I wanted some fall leaves in addition to the other elements. I cut 3 leaves from the Pine Spray die in white cardstock. I sponged with various distress inks and then pressed them into a Versamark ink pad and clear embossed.
Step 3: Again using the Pine Spray die, I cut the pine cone and some sprigs. I cut the pinecone in 2 shades of brown cardstock and the sprigs in a cinnamon cardstock.
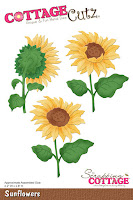
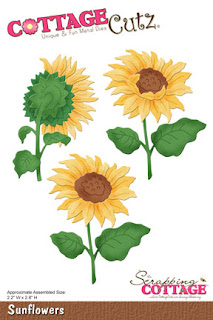
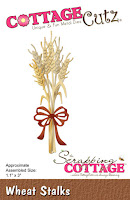
I also used the Sunflower and Wheat Stalks dies- these are older CottageCutz dies- for additional elements on my cad. The sunflower is cut in curry cardstock and the center is razzleberry cardstock. For the wheat, I used a kraft cardstock and then sponged with some fossilized amber ink. 
Step 4: On this step, I figured out the layout for all my die cut elements and adhered them to the image panel. Used dimensional adhesive on the sunflower to left it from the background. On the other elements I used glue dots and multi matte adhesive.
I attached it to the curry panel with double sided tape.
 
To complete my card, I attached it to the Razzleberry base and then scattered a few sequins. I hope I have given you an idea on a way to user the Pine Spray die other than for Christmas. Well, that's it for me for this week. See you next Saturday.
Dies I used to create card:
 
http://www.scrappingcottage.com/cottagecutzpinespray.aspx

http://www.scrappingcottage.com/cottagecutzwheatstalks.aspx

http://www.scrappingcottage.com/cottagecutzsunflowers.aspx
 
http://www.scrappingcottage.com/cottagecutzgivethanks.aspx


Sunday, June 18, 2017

Celebrate with Sunflowers

Hi!

It's Anja here with you on this beautiful Sunday. 

As long as I can remember sunflowers have been my favourite flowers. I love their bright colors and I often give them to others on their birthdays or other special occasions. And sunflowers made of paper can also be a beautiful gift. So I couldn't resist getting this gorgeous Cottage Cutz die and making a bunch of sunflowers. This is  my finished card.


I used:
- Cottage Cutz dies (Sunflowers, Celebrate Phrase, Pierced Circle Set, Picket Fence Border),
- Distress Oxides (Fossilized Amber, Spiced Marmalade, Peeled Paint, Vintage Photo, Walnut Stain, Iced Spruce),
- white card base (15 x 15 cm),
- Nuvo Crystal Drops (Dandelion Yellow),
- Wood veneer,
- Wink of Stella glitter brush pen,
- white card stock for die cuts,
- double sided adhesive tape,
- paper glue.

First I die cut the sunflowers and other parts for the card. I used Distress Oxides to color them.


Then I cut two squares (13x13 cm) from wood veneer. I have this roll that looks like wood on one side and has fabric on the other. It is not so easy to cut and I was struggling to make even edges. But I love the color and real wooden look of it. I adhere it with wide double sided adhesive tape.


Then I glued on all the sunflowers and added some enamel dots. I finished the phrase with some glitter using Wink of Stella brush. 


And this is how I decorated it inside.


I glued the fence only on the sides so it can be used as a gift holder.


Thank you for stopping by.
Anja Z.


Tuesday, May 30, 2017

Sunflowers

Hi, Janja here!

Tuesday is already here and my time for post on the Scrapping Cottage blog.
Beautiful sunflower heads are proudly displaying their beauty and invite our eyes to admire. This inflorescence composed of hundreds or thousands of tiny flowers simply deserve our admiration.

Today on a thank you card.


Supplies:
- CottageCutz dies: Thanks Phrase, Sunflowers, Wheat Stalks, Pilow Box Plus (ladybug)
- white card base: 5.3 x 5.3" (13,5 x 13,5 cm), folded
- kraft cardstock: 5 x 5" (12,7 x 12,7 cm)
- watercolor paper
- Distress oxide pads: Fossilized Amber, Peeled Paint, Vintage Photo
- Distress ink pads: Wild Honey, Vintage Photo, Twisted Citron
- ColorBox pigment ink pad Frost White
- stamp with handwriting for background
- glue

From watercolor paper cut out elements for sunflowers. Color them with Distress oxide pads. Sprinkle with water and shape with a flower shaping tool.


Cut out Thanks phrase, some wheat stalks and ladybug.
Trim kraft cardstock. Stamp on it handwriting with a white pigment ink pad. Nothing serious if we cannot evenly cover the entire background as the focus is on sunflowers. 


Use only the sunflower leaves. Cut off the stems with scissors. Glue each flower separately on the background and arrange them with leaves and wheat stalks. 
Finally glue Thanks phrase and attach a ladybug for luck on it.


Memorial Day Sale going on now at the


Also, CottageCutz now has an Instagram account
Follow us on Instagram.

Thank you for coming over and have a lovely day. 


Friday, May 26, 2017

Expression Plus Phrase Die and Sunflower Shaker card

Hello to all !!!!
This is Anita here.
Summer is at its peak and so are the beautiful sun flower blooms .
CottageCutz has come up with amazing set of Expression Plus dies 35 in total and all of them are awesome. You can check them out here.

There is also a video showcasing the dies made by our design team mate.
Here in this video she shows the beautiful dies and how she has used them on the cards.


For my card today, I have used the beautiful sun flower die and have created a shaker card . Also see how I have added the expression WISH in a 3d way.


Start by die cutting all the designs in white card stock. Cut two foam frames from the stitched round rectangle frame. Cut the Wish frame three times and the sun flower die two times.

Colour all the die cuts as shown with Archival inks


 Adhere the two sponge frames together. Cut another backing frame from a pattern paper. Adhere a transparent sheet of the same size as the frame with glue. Adhere one sunflower face down as shown. Add the sequins and mini glitter balls. Cover with the backing paper.


Distress the frame with Peeled Paint ink. Add the other sub flowers.

Adhere the wish die cut colouring two with green ink giving a little shading and adhere to the last white piece , offsetting a little. Adhere this shaker panel on a card mat. Add twine and the wish phrase. Adhere the whole panel on an A2 card base.

the finished card


Do visit the CottageCutz blog to see the inspirations and stop by at the store for all your die cutting shopping.

Thanks for stopping by.