

Hello CottageCutz friends! Thanks for taking the time to stop and visit with us today. It's Mary Marsh here bringing you the Monday edition of the Blog.
It's new release time!!! We have new dies in the online store. It's our Strawberries and Bees release with 16 new designs. You can pick up the individual dies are 30% off.
The new dies are perfect for all your cardmaking needs. They would work for so many occasions as our design team have been showing.
Today for your viewing pleasure I am featuring the new Strawberry Cottage, Strawberry Gnome Boy and the Fresh Strawberry Patch dies. I created a pop and twist fun fold card. I have step by step instructions below but if you like to watch a video. Here is a link to one I found on YouTube. So, let's get started with some details of how I created my card.
Design Steps:
I started with my card front and cut the Strawberry Cottage using the colors from the packaging.

white image panel is cut at 4 1/8" x 5 3/8"
I used stencils and created some background clouds with broken china distress ink and a little grass with mowed lawn distress ink.

Stamped a sentiment in blueberry ink. This ink matches the doors and windows of the cottage.

red card base 4 1/4" x 11" and scored at 5 1/2"

I started with decorating the four inside panels. I decided to use the Strawberry Gnome Boy and the Fresh Strawberry patch dies for 2 of the panels. Then I added 2 sentiment panels. The cupcake is from the Lady Bug Cupcake die.
I layered these on a white cardstock panel measuring 10" x 3 1/2". I scored and burnished it at 2 1/2", 5" and 7 1/2".

Next, I started on the pop-out mechanism. I cut a piece of white cardstock at 8" x 3 1/2". I scored it at 1 3/4" on the short side. then on the long side I put a tick mark at 2 1/4"& another at 5 3/4".
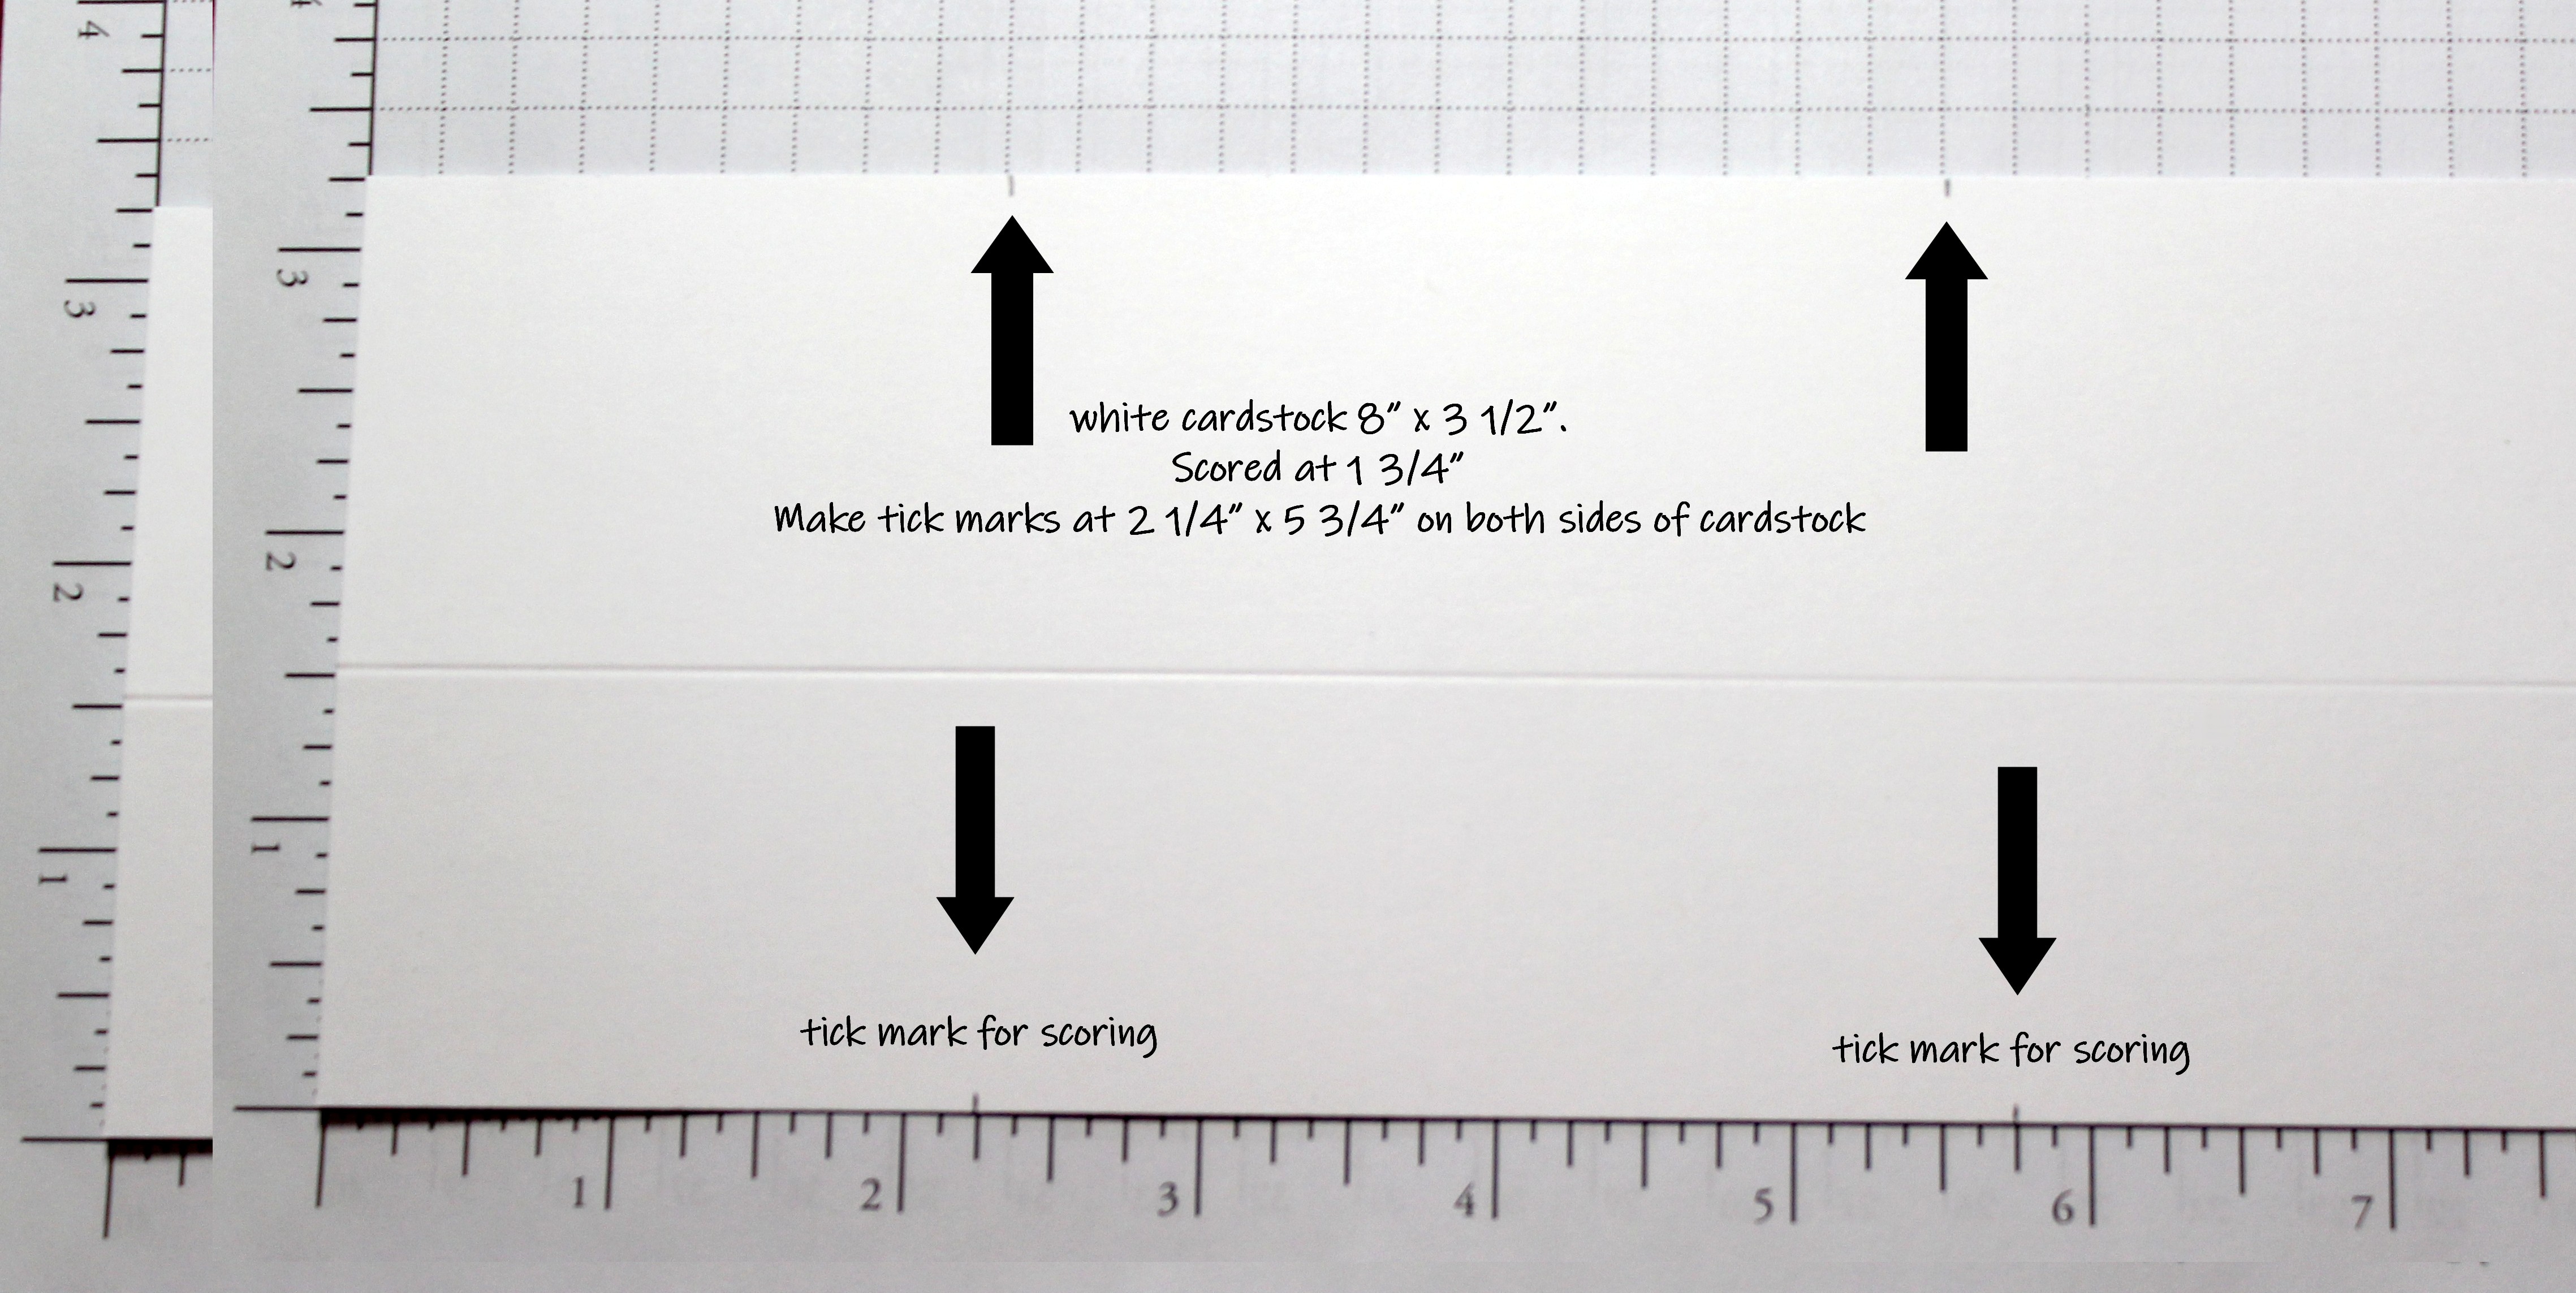
I used the scoring blade on my paper trimmer to make the next score lines. It's easier for me to line up at an angle on the paper trimmer. You score on both sides of this panel. Tick mark to tick mark.

When it's finished you will have an "X" pattern.


This is what it looks like when it's opened.

I made a short video to show you how it pops up when you open the card.
And that's my card design for this week. I hope I have given you a fun idea for a way to use these new dies. See you this coming Saturday with another fun fold idea.
Reminder: Our YouTube channel is active again. Check out the latest video from Jen Hartsgrove for a chance to win the die she used. Click here

Dies I used to create card:


2 comments:
Adorable fun fold Mary! Great directions too!
Such a FUN interactive card Mary, love it❣
Post a Comment