Saturday, September 30, 2023

Holiday Window Tag With New Christmas Release Die

Happy Saturday crafty friends,
Melinda here and today I am sharing a quick, easy but super fun Christmas Tag. I used a beautiful new die from the new Cottage Cutz Christmas release. Here it is.


I started by adding the backer sheet to the back of the window outline. It is a bit shorter but snow covers it up from the front.


Here's the back of the yellow colored back piece. I put some adhesive to apply the black outline.

I used the window die outline to outline the outside so I can cut it out.


After adding the black back, I added some foam tape to the back. I also added the cute beads with the wire for the tie/hook. I also added a cute bow.


Holiday Window


Be sure you head over to CottageCutz.com and check out all the amazing dies from both new releases!
Hurry this is a limited time sale!


Well that about covers it for today. Be sure to head over to the Cottage Cutz You Tube channel. They have some amazing projects on there. Until the next time, have a wonderfully crafty day!

Friday, September 29, 2023

CottageCutz Christmas 2023 Release


I am so excited to share this card that I created using the new CottageCutz Christmas release. I have been anxiously awaiting this release that is a split between vintage and classic CottageCutz cute. I have so many ideas and wasn't sure where I wanted to start, but eventual landed on the "Vintage Holiday Lantern." I paired it up with some pattern paper in my stash to add non-traditional colors with an old-fashioned flair and I think it worked. Let's get started.


I die cut all of the pieces using white cardstock. Next, I colored them using Catherine Pooler inks as follows: Lantern, Cotton Candy with white gouache painted on top. Candle, Butter Cream and Sauna. Holly, Skylight and spattered with Spruce. Small leaf, Spruce. Ribbon (cut twice), Polished and Pebble. Twigs, Mocha. Berries, Polished and Cotton Candy. I added both water splatters and white gouache splatters to some of the pieces. For the bow, I used the white gouache with a paint brush to mute some of the color and add distressed interest.


When I assembled the lantern, I chose not to use the wick for the candle that is available, and I added vellum behind the first lantern layer to mute the patterned paper from behind. I then added one more lantern layer behind the vellum for a little dimension.


To assemble the card, I began with a 4.25" x 5.5" white top folding card base. I used two pieces of patterned paper.  The first piece was cut to 4" x 5.25 and the second was cut to approximately 1.5" x 5.25" and hand torn on the right edge to add a distressed look. I then adhered the pieces to the center of the card panel.

I glued my finished lantern down to the right of center and arranged my foliage around the top ring of the lantern. I added a couple sprigs flowing down on the right side creating a visual triangle. Then, I off set my gray and red bows using a small foam dot in between each piece for dimension. Finally, I added "Crystal" Stickles to the twigs and berries for added sparkle.


That completes this card. I hope my card inspires you to create something new today. The vintage pieces included in this release really warms my heart.  If you missed my review of the new "Old Fashioned Ornaments" you can head over to the CottageCutz YouTube Channel to see a sample of each ornament fully assembled.  


Until next time.... Marla


Thursday, September 28, 2023

New Release Christmas 2023!

Hello Friends 

It is Pam sharing with you today!

It is time to show off our new RELEASE!  It is called Christmas 2023 just in time for you to get started on making all those wonderful holiday cards and scrapbooks! 

The new dies are in the online store.  There are 40 designs many with a very vintage look.  You can order the entire release at 50% off.  Or you can get the individual dies at 30% off.  This special offer is for a limited time only.

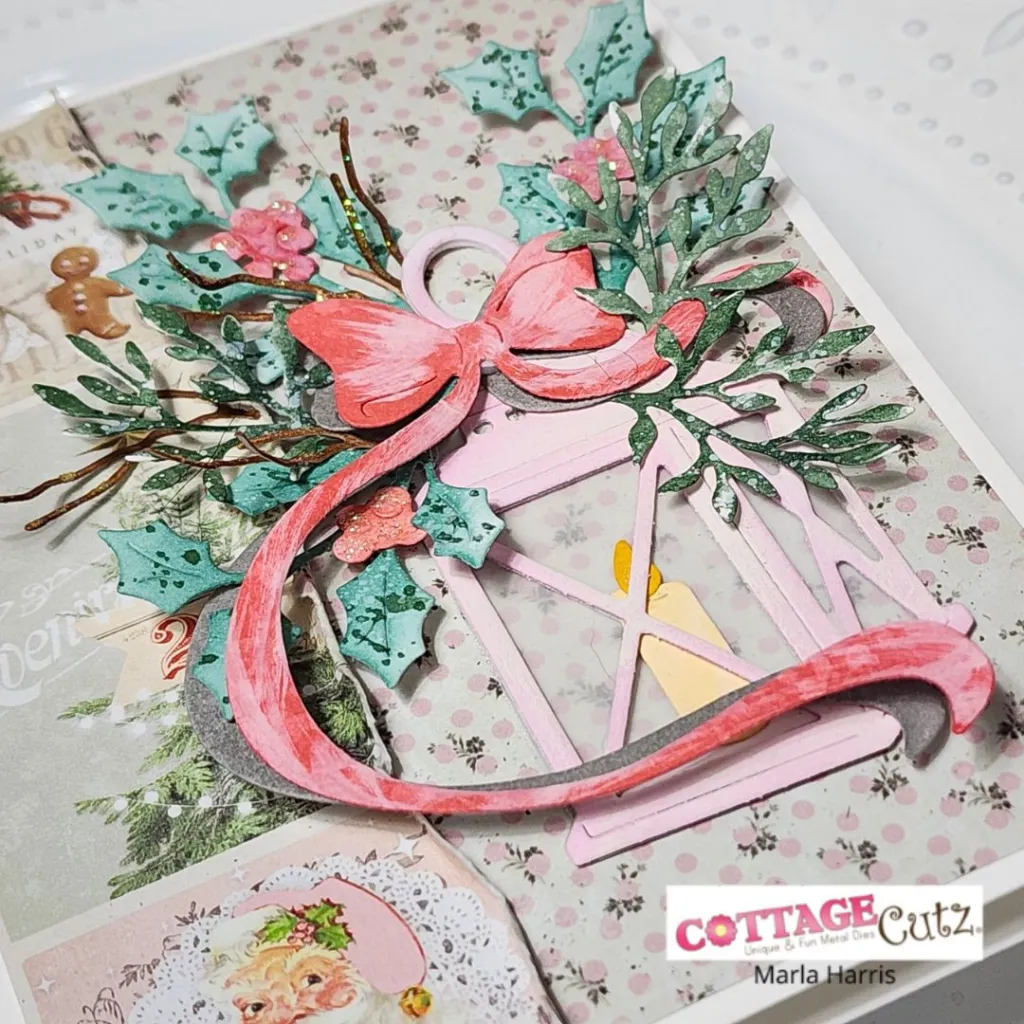
To display some of these beautiful new dies I designed a side step card (shown below).  The card features 4 of the new release dies: Clock TowerPine Tree SlimPine Tree Full, and Vintage Horse and Sleigh.


Design Steps: If you would like to see a video this link will take you to Splitcoaststamper side step tutorial.  HERE

1.  Line up the short side of the card stock at 3 inches on a paper cutter.  Start at 1 inch and cut all the way to 6 1/2 inches

2.  Score the 2 1/2 wide section of the card at 4 1/4 inches

3.  Score the 3 inch wide section at 1 inch, 2 inches, 3 1/4 inches, 4 1/2 inches and 6 1/2 inches

4.  Fold the score line on the 2 1.2 side at the 4 1/4 mountain style

5.  On the other side fold the first score line mountain, then valley, mountain, valley, mountain.  It will look like the picture above

6.  To decorate the side step card cut 3 strips of white 5 1/2 x 1 1/4, 3 x 1 1/2 and 3 x 2 1/4. Die cut all of the top of the pieces using the Hills Slimline die.  Cut a piece of DP 2 1/2 x 4 1/4

7.  Glue the pieces to the side step card as shown above
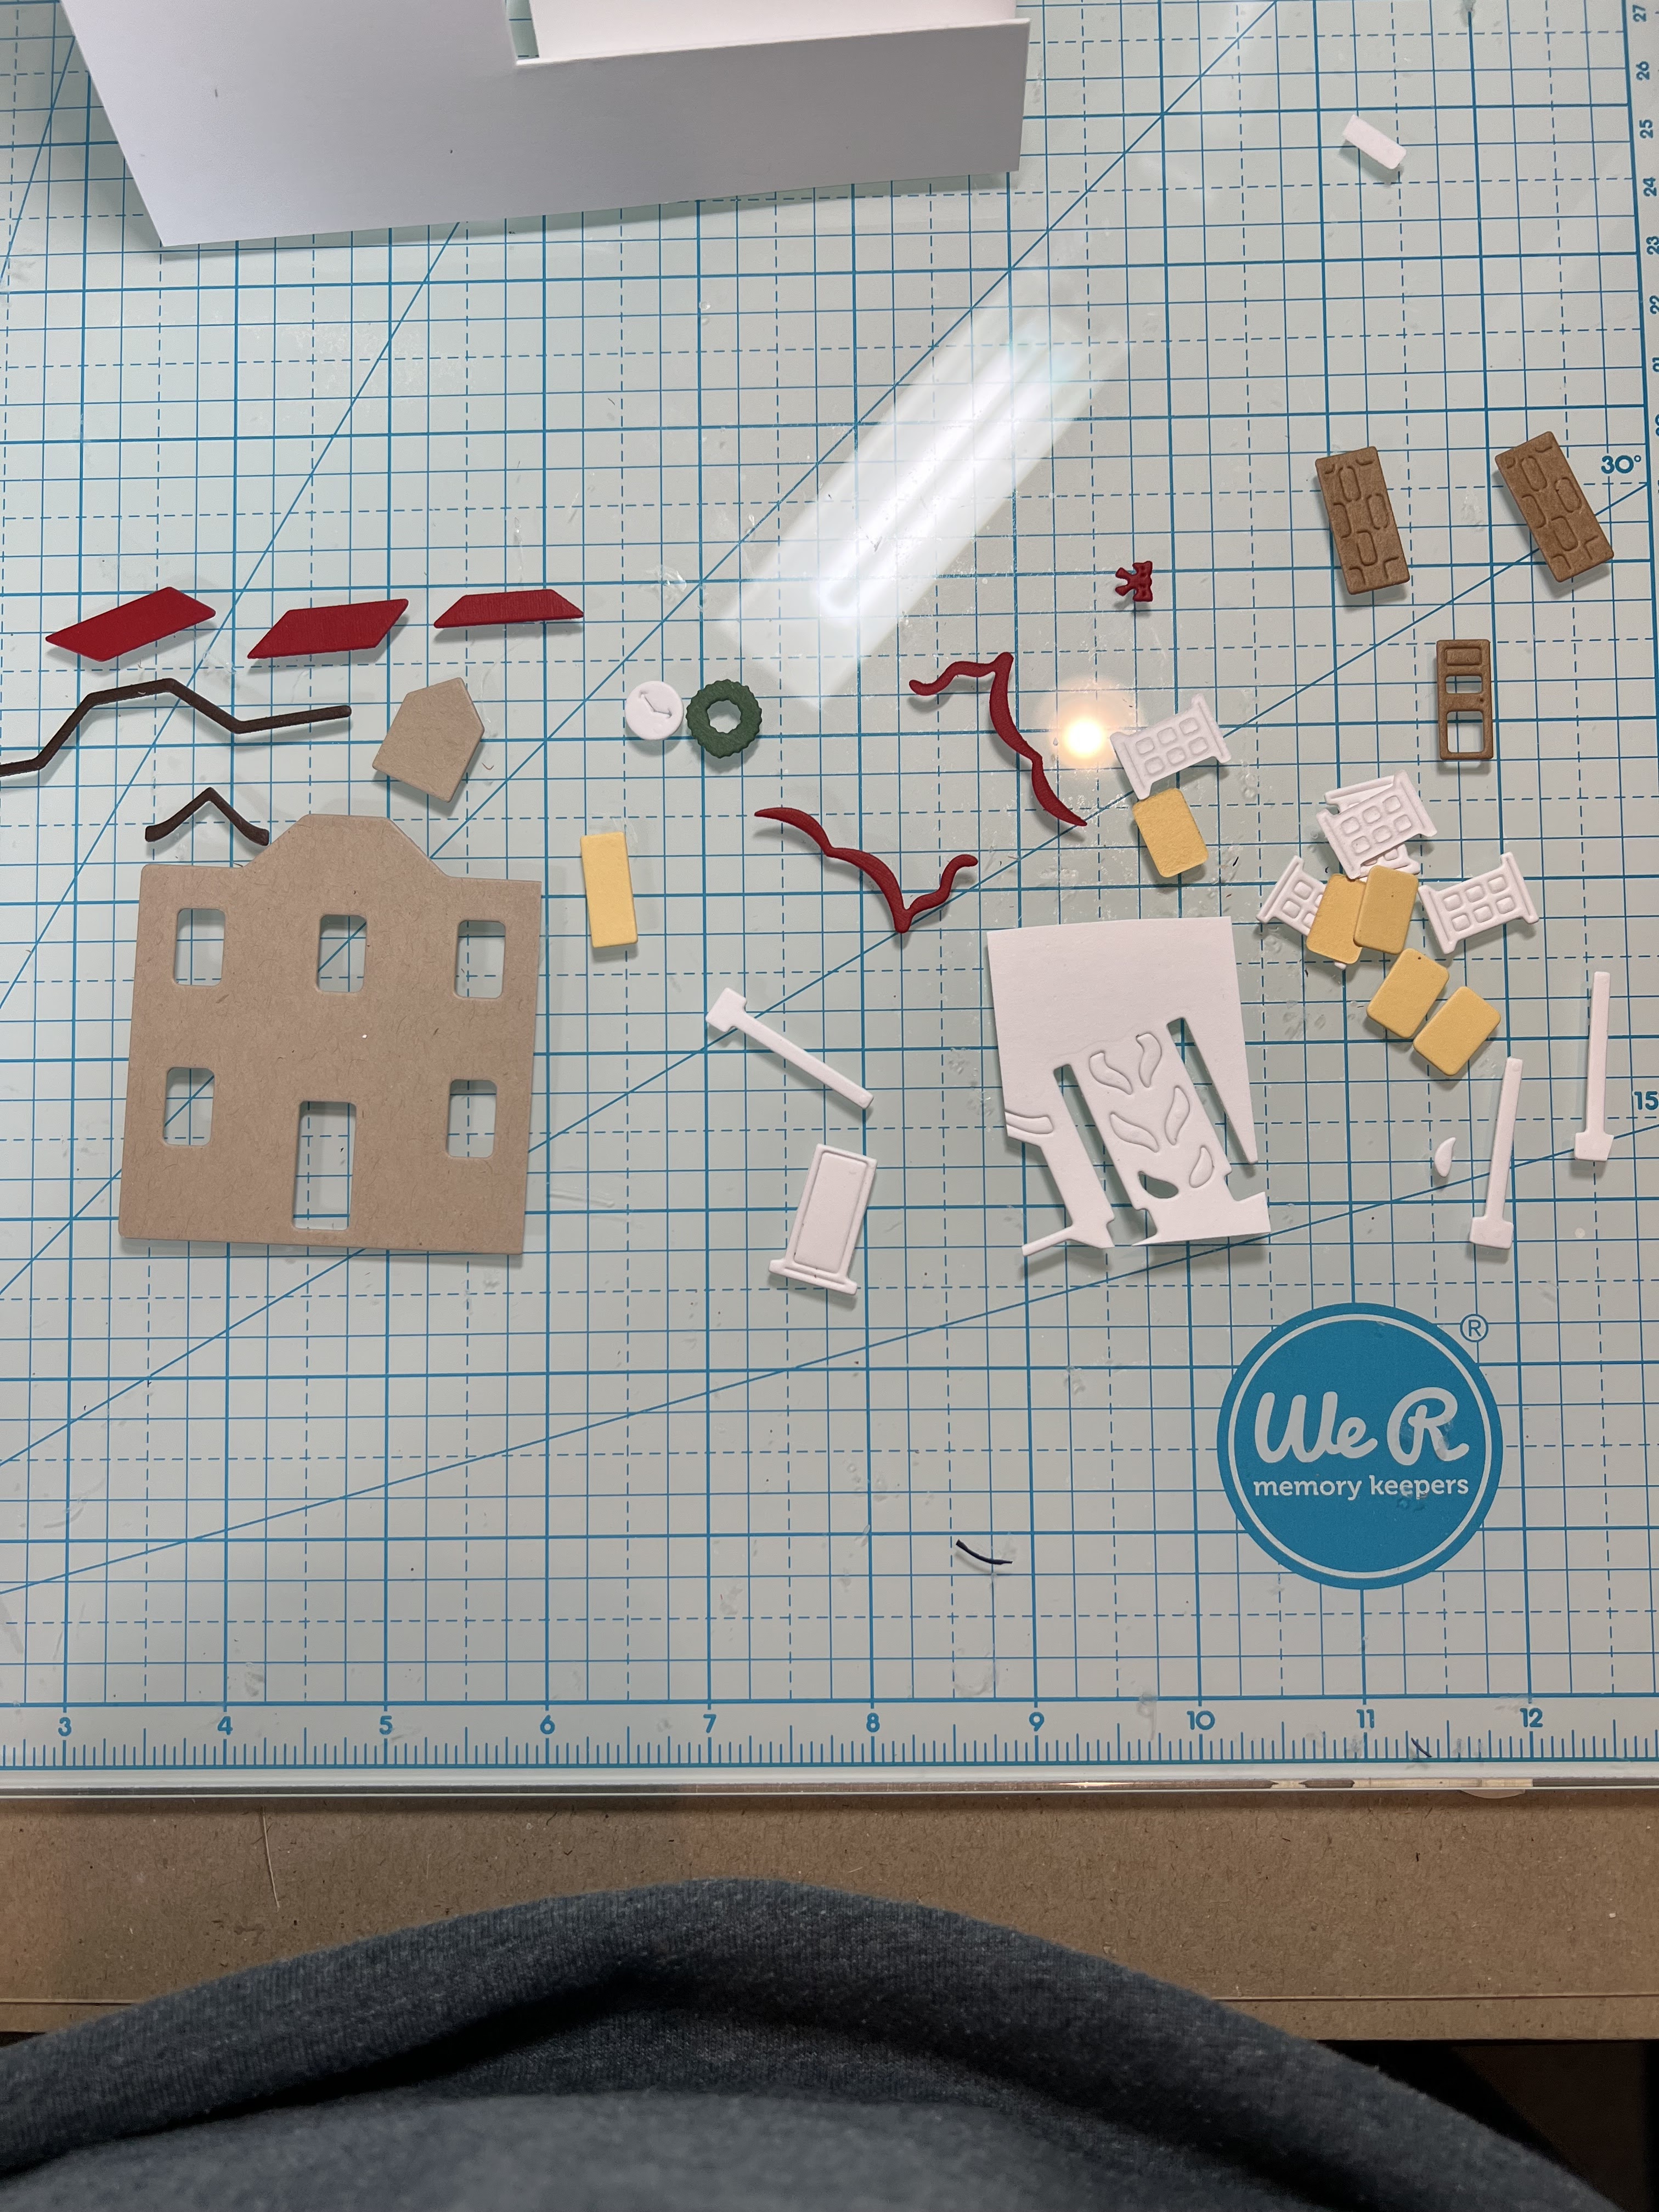
8.  Using the Clock TowerPine Tree SlimPine Tree Full and the Vintage Horse and Sleigh cut out the following colors of card stock: red, dark brown, brown, light brown, black, silver, white, yellow, and green.  Assemble the pieces with a fine tip glue.  As shown below

9.  Places the finished pieces on the card as shown below and add your sentiment


We have more inspiration on our YouTube Channel check it out HERE

Thanks so much for stopping by!  And I will see you next Thursday.

Blessings and Take Care


Wednesday, September 27, 2023

"Old Fashioned Ornament"


I'm super excited to share today's CottageCutz YouTube video with you.  As you know, the highly anticipated CottageCutz Christmas release is here and there are five, yes five amazing retro ornament dies within the release.  I thought it might be nice for you to see the scale of each of the ornaments and then build a few simple Christmas cards using a few of the new dies. I have shared a "teaser" card above. If you would like to see the ornaments assembled and get a better sizing perspective head on over and join me.  I will also be sharing how you can enter to win one of these beautiful dies.

I will link the products I used in my video below for easy shopping.  Until next time... Marla