Monday, October 31, 2022

Poinsettia Wreath Easel

Hiya CottageCutz friends! ☺ 

Kris here with more Christmas inspiration. Yes, I do realize it's 'Halloween' today, and my team and I wish you a fun and safe evening!!  

My card, however, is showcasing the new Christmas Release Part 2!  I'm loving the non-traditional colors of pink, teal, gold and white for the holidays! The star of the show today is the new Poinsettia Floral die that I made into a wreath!


And of course it folds flat-ish to fit inside an envelope! ☺

I LOVE these new dies from the Christmas Part 2 Release and there's a great variety with a whopping 36 dies in this collection!   There's also a Christmas 1 Release so there's a ton of options and variety from cute snowmen to gingerbread kids to rustic wreaths, traditional poinsettias and more! The best part... all the individual dies from both of these releases are 30% off for a limited time!  

CUTTING & SCORING:

Thick white cardstock:  
(1) 4" x 10-1/2"- scored the longest side at 2-5/8" and 5-1/4"
(2) Die cut largest of the Pierced Wide Circle Frame

Medium Teal cardstock:  
5-1/2" x 4-1/4"

Gold cardstock:

Die cut Poinsettia Floral from the following colors:
(2) Medium Team
(1) Dark Teal
(2) White 
(2) Gold foil/metallic
(2) Vellum

DESIGN STEPS:

1.  With the white card, I folded the 2-5/8" end up to the 5-1/4" score line and I placed the 2nd largest Pierced Circles die halfway over the fold,, hen I taped with low-tack tape and cut it.


2.  I folded the white card in half and adhered to the medium teal card base.

3.  I glued the 2 Pierced Wide Circle Frames back-to-back.  

4.  I added glue just underneath the bottom half of the circle opening on my card front as shown below, then attached the circle frames, centering them on the card front.


5.  I added some Distress Oxide inks to my leaves and poinsettias, then misted with water to get that distress look.  White they were still damp, I rolled the poinsettia leaves around something round like the handle of my pokey tool, or water brush etc to make them curl and give dimension before attaching together.  To make them pop, I gave them white gel pen veins and highlights.


6.  I arranged my pieces onto the white ring (circle frame) and when I was happy with the layout, I started gluing them down.  

7.  I decided where I wanted my holly leaves to be (to hold up my wreath) and added dimensional tape to the back (see photo below for placement).

8.  I then glued my gold "Merry Christmas" to the bottom center and Voila!  


I hope you are inspired to get crafty with your favorite CotageCutz dies! 
Have a blessed week ☺

~Kristine

PRODUCTS USED:


We have more inspiration on our YouTube Channel check it out HERE

Saturday, October 29, 2022

Camping Snowman

Hello CottageCutz friends! Thanks for taking the time to stop and visit with us today. It's Mary Marsh here bringing you the Saturday edition of the Blog.

It's new Christmas release time!!! We have new dies in the online store. Our Christmas Part 2 release with 36 new designs is available and ready for shipment. 

The individual dies are on sale for 30% off. It's only for a limited time so don't delay. You are going to love all the whimsical designs that are available in this release. There is something for everyone to make your Christmas cards extra special this year.

The Christmas Part 1 dies are also available with 21 new designs and on sale for 30% off individual dies. 

Today, I am featuring the new Camping Snowman w/Trailer and the Tis The Season dies. I have friends who have a camping trailer, and this card would be perfect for them. I loved the trailer colors on the die packaging, but their trailer is light & dark gray. Since I was creating this card for them, I thought I should stick with those colors. Although I really like creating Christmas cards in non-traditional colors. That will be for another day. 

So, let's get started with some details of how I created my card. 

Card Details:

I started by cutting the trailer, snowman and mailbox in different colors of cardstock. The light that are strung across the trailer I colored with Copic markers. 
Then as I was deciding on how to create the background panel for my images, I remembered this designer paper with a winter snow scene. That made it really easy. The paper is so pretty I didn't want to cut a lot of it away so I made my card a 5 3/4" square. 

White card base: 5 3/4" square
Designer Paper Layer: 5 3/4" square
Next, I cut the Tis the Season sentiment. I thought red would be a standout, but it just didn't look right so I decided on a navy blue to compliment the background. I think it works nicely. 

Now that my card elements are prepared, I am ready to start card assembly. 

I attached the designer paper to the card base with double sided tape first. I thought this would make it easier to attach the images. 
For the images I used dimensional adhesive to lift them off the background slightly. 
To finish off the card I secured the "tis the season" sentiment with clear drying glue. There are snowflakes with this die, so I used them as embellishments on the card. 
And that's it for me for this week. I hope I have given you an idea for a way to use this new die. If you are a trailer owner or you know people with trailers this die is for you. You can pick it up for 30% off right now. 

See you next Saturday!!

Reminder: Our YouTube Channel has a new video from Marla Harris. There is a giveaway for being a subscriber, liking the video and leaving a comment. Click here

dies I used to create card:


Thursday, October 27, 2022

Winter Window

Hello Scrapping Cottage Friends

It is Pam sharing with you today!

We have Part 2 of the Christmas release available today! This amazing release has 36 designs!  This time we have Gingerbread Cookies, Gnomes, Santa in a Cadillac and much much more!!  Check it out HERE.  The best part about this new release is that it is on sale now!!

The die I used to create my card today is Rustic Winter Window.  


Design Steps:

2.  Using the Rustic Winter Window die cut all the pieces out in the following card stock colors:  White, black, red, 3 shades of green, yellow, yellow DP and white glitter card stock


3.  Cut a piece of white card stock 4 x 5 1/4 and emboss with wide strips.  Glue the window with the yellow DP glued to the back of the window to the white embossed panel. (as shown above). Begin to add the greenery first to the left hand side of the window.  Also glue the glitter card stock snow to the top of the window 
4.  Finish adding the cardinal and the poinsettia to the window and then add the snowbank on the bottom of the card.  I cut some white glitter card stock with the Slimline Hills die to create the snowbank

5.  For the card base use an A2 white base and a piece of gold card stock cut 4 1/8 x 5 3/8.  Glue the gold to the white card bass and then add the window panel
6.  Place dimension dots or squares to the back of the lanterns and place them next to the sides of the window ( as shown below)
7.  Stamp your sentiment and layer onto gold card stock and your card is complete

CottageCutz Products


Please take a peek at this Cheery Christmas collection!  I promise you will want every single one of this incrediable release!!! Click HERE to see all the cuteness!!

We have more inspiration on our YouTube Channel check it out HERE

Thanks so much for stopping by!  And I will see you next Thursday.

Blessings and Take Care


Wednesday, October 26, 2022

Getting Creative With Your Dies


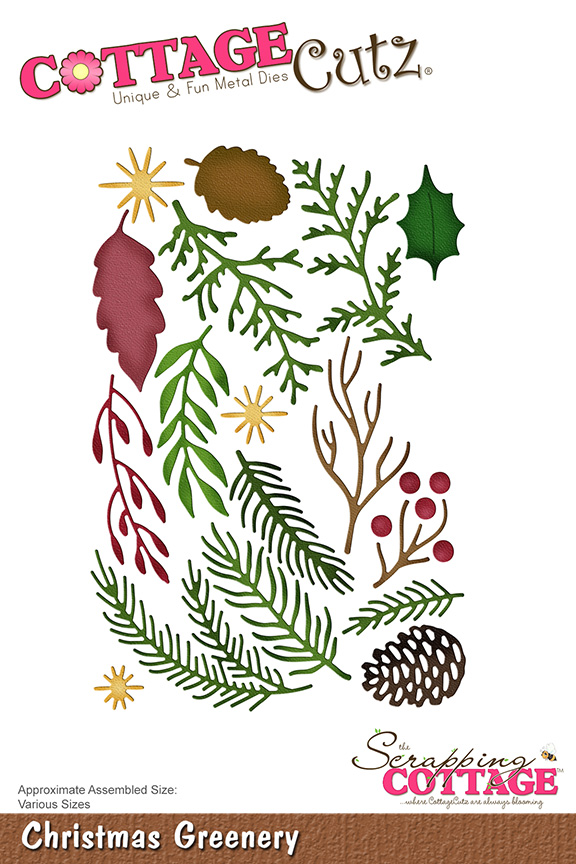
Welcome back my crafty friends, Marla here with more Christmas inspiration from the "Christmas Part II" release.  I'm up on the CottageCutz YouTube Channel today with a colorful Christmas card. I am a huge fan of greenery for my Christmas cards. I love the delicate elegance of these types of dies and the new release is filled with many beautiful designs that fit that bill.   I also like to create cards that use the CottageCutz dies in an unexpected way.  

At first glance, the "Christmas Greenery" does not seem like the "perfect" pairing with the "Polar Bear Trio and Igloo", but as you can see, with a little creative imagination they worked together beautifully.  I hope you'll head over and join me as I put this card together.  Not only will I be sharing some tips and thoughts on this design, but there is also a chance for you to win the "Polar Bear Trio and Igloo" die.

All of the products that are available in "The Scrapping Cottage" are linked below for easy shopping.

Until next time...... Marla


Tuesday, October 25, 2022

Quick and Easy Gift Card Holder Card

Happy TuesDIE Cottage Cutz Friends!
Melinda here with you on this terrific Tuesday. Today I am sharing a quick and easy gift card holder - card with a Christmas theme. It features dies from the FABULOUS Cottage Cutz Part2 Christmas release!


How To Make The Holder
Start with a piece of paper measuring 5.5 x 11 inches

You will then score it on the 11" side at 4.25, 5.5 and then turn it and score again at 4.25 on the other side. I believe that would be the 6.75" mark if you go straight across.

You will then fold it in half at the 5.5 mark and then do a valley fold on each of the 4.25 scored lines. Your fold will look like the photo above. Next  you will want to put adhesive along one edge of the 4.25 score line as pictured above. You could also go along just the sides if you want but with a good adhesive, this is not necessary.


With your adhesive applied, you will want to fold the base in half. Essentially, one side onto the other. Here is what it looks like opened after folding.

Here is what the "Inside" will look like once it is folded. You will fold the two flaps back over.

Next you will want to slice off the center fold just a bit. I start 1" from top and slice about an 1/8" or so and then stop 1" from the bottom. You want to slice just enough to cut the fold. This will become the opening that the card sits in.


Here is what a gift card stuck inside the slit looks like. the card sits snuggly in there. This is why you don't put adhesive anywhere else except along the bottom edge when folding the base.


Here is a top view of the inside to show how the card sits in there. I added some patterned paper and then one double stitched rectangle die cut mat to write my greeting.
Here is one more view of the inside. I also added a 1 x 5.25 strip of red cardstock along the holder pocket. There are a limitless amount of ways you can dress it up.


Here is a closer look at the adorable Santa Gnome w/Cookies die cut. He was so much fun to piece together! You could whip out several of these for co-workers, teachers, etc. For a final touch I added a strip of green cardstock with some green and white polka dot ribbon and a bow. I also hand wrote Merry Christmas on the smallest double stitched rectangle die cut in white for my sentiment.


Don't forget to head over to the CottageCutz YouTube channel and check out all of the amazing projects on there. Our video team is doing a wonderful job of filling the channel with all sorts of creative content! You don't want to miss it!


Dies I Used


Double Stitched Rectangle Set


Here's a look at the entire release. Be sure to head over and grab them while they last!

Well that about covers it for today! Until the next time, have a wonderfully craft-die day!
Melinda Beltran