Monday, August 07, 2023

Oh No Kitty w/ Pop Up

Hey crafty friends!

It's Kris here to share some Monday inspiration with you!  I've got an interactive card for someone under the weather or has had an injury -- it's sure to make them *SMILE*  Featured on my card is Oh No Kitty, First Aid KitOuch w/ Tooth, and the giraffe from Safari Adventure Gang!


**I got the idea for this particular interactive feature from a crafty gal I follow on IG:  Srushti Patil (@srushtipatil on Instagram) and it was meant to be an interactive album page, but as you can see, I've used it as a fun element inside my card.  I've changed up the measurements (to inches) to make it easier.  I hope you'll give it a try!

DESIGN STEPS:

I started by cutting all my base card elements:  

Grey cardstock:
---(Card Base)  8-1/2" x 5-1/2" scored at 4-1/4" 
---(inside cover mechanism) 2-1/2" x 4-1/2" - scored at 1/2" and 1" on one end
---(pop out mechanism) 1-5/8" x 7-1/2"
---(pop out image panels, x2) 2-1/8" x 2-1/2" 
---(left inside panel) 2-1/2" x 3-3/4" (not pictured below)

Pink/white patterned paper #1 (gingham):
---(front of card)  5-1/4" x 4"
---(inside cover mechanism)  1/4" x 2-1/4"
---(left inside panel) 2-1/4" x 3-1/2" (not pictured below)

Grey/white patterned paper:
---(inside layers x 2)  5-1/4" x 4"

Pink/white patterned paper #2: 
---(pop out image panels)  1-7/8" x 2-1/4"

White cardstock:
---(inside cover mechanism)  2-1/4" x 3-1/4"


1.  Adhere the pink gingham paper to the front of card and the grey/white patterned layers (2) to the inside of your card. 

2.  Adhere the white cardstock to the largest portion of the inside cover mechanism.  Glue the narrow pink/white patterned strip between the 2 score lines of cover mechanism.  (see photo below)

3.  Adhere the 2 pink/white image panels to the 2 grey image panel mats.  Set aside.


4.  With the pop out mechanism (1-5/8" x 7-1/2") vertical in front of you, measure and mark w/ pencil  at 3/8" and 1" across the top and bottom.  Draw a line both lines vertically.

5.  Turn mechanism so that the 3/8" tab is at the top horizontally, and measure and place a mark at 2-1/2" and 5" across top and bottom, draw lines vertically to connect as shown below.

6.  Along the bottom line (at 1" line) measure and place a mark at 3-1/8" and 4-3/8" as shown below.


7.  Using the photo below for reference, Draw diagonal lines from corner to those marks you just drew.


8.  Cut away the 4 corner sections as shown in photo below by scribbles.


9.  SCORE along the bold lines in photo below (the diagonal lines and 2 horizontal lines)  


10.  Push in on the diagonal score lines which will cause the mechanism to fold like this:

11.  Open it back up.  With the 3/8" tab at the top, apply glue to the outer arms as shown.  Be sure NOT to add glue clear up to the diagonal line... try to stop with the edge of the tab.   

12.  With the image panels horizontal, line up the TOPS of them with the top edge of the glued arms.


13.  Pull the 2 panels together so they overlap, and turn mechanism over and apply glue to the back section as shown.  Turn it right side up and position it into the center fold of card.  

**TIP:  It helps to lift the left side of card to form a 90 degree angle so that you make sure not to go over the score line.  


14.  Add glue to the angled portion on top --- be sure not to get glue on the scored tab!  Close the card and rub fingers over the mechanism to adhere. 


15.  Open card up flat and fold the 3/8" flap down.  Apply glue to tab and attach the short edge of cover (not the tabbed end) so the edge lines up with the edge of tab.


16.  Apply glue to the far right tab as shown and tuck it under to adhere.


Mechanism is done!!  Time to decorate!!

Die cut the following:
Oh No Kitty from grey and white cardstock
First Aid Kit from white cardstock
Ouch! from Ouch w/ Tooth
 the giraffe from Safari Adventure Gang from white c.s.
Hugs w/ Shadow from both pink and white c.s.
the 2-3/4" Stitched Squares die from pink patterned paper
the 3-1/8" Nested Scalloped Square die from white c.s.

I colored the white die cuts with Distress Oxide inks and a blending brush.


I thought it'd be cute to take this giraffe's temperature with the thermometer from First Aid Kit.  ☺


I hope you enjoyed this pictorial and will give it a try!  

Have a CRAFT-tastic week!

~Kristine


Saturday, August 05, 2023

Thank You Card


Hello CottageCutz friends! Thanks for taking the time to stop and visit with us today. It's Mary Marsh here bringing you the Saturday edition of the Blog.

Our new Folk Art release is still available in the online store at 35% off individual dies. There are 19 new designs that are so perfect for cardmaking, journaling, and scrapbooking.

They allow you to add a beautiful touch of folk art to whatever you may be creating - birthday, thank-you, new home, thinking of you and even Christmas. The design team has featured many creative ideas using these dies so take a look back at our posts for inspiration.

For my card today I am doing a throwback to some older dies from a 2018 release. I used the Stitched Jars & Stitched Fruit dies to create a thank you card. My neighbor always sends us a jar of her homemade pear butter each year and I want to be prepared with a thank you card. The pears are on her tree now and will be ripe in a few weeks. 

Design Steps:
I started my card with an old sketch I had saved on my computer. 
 I looked through my designer paper to see if I had any pear themed paper. I found this one that I have had for years and thought it would work for my card layout. 

Chocolate Chip Card Base: 4 1/4" x 5 1/2"
Curry Layer: 4" x 5 1/4"
Designer Paper Layer: 3 7/8" x 5 1/8"
Next, I cut the jar and pear. I used vellum for the jar and a metallic silver for the jar lid. The pear is cut in olive card stock. 
For the rectangle panels on the sketch, I used the Stitched Rectangle Set on the choc chip panel.  It's the 3rd largest die (2 7/8" x 3 7/8"). The curry panel is cut from the Rectangle Set. I used the 2nd largest die (2 5/8" x 3 5/8"). 
I used the Thanks w/Shadow die for my sentiment. The shadow is cut in choc chip and the thanks phrase in olive. 
My elements are all cut. I am ready to start assembly. I attached the card base and both layering panels w/double sided tape.
For the image panel I attached the jar w/clear glue- adding it behind the lid and where I was placing the pear image. The pear image is lifted slightly off the jar with dimensional adhesive. I used a border die cut in chocolate chip and added white pearls for interest.  I also added some chocolate chip ribbon. 
To finish off my card I attached the Thanks phrase with glue dots and scattered a few more pearls. 
Well, that's it for me for this post. See you next Saturday.

Reminder: Marla has a video up on the CottageCutz YouTube channel. She has a giveaway. Click here. 


Thursday, August 03, 2023

God's Promise

Hello Friends

This is going to a friend to brighten her day.  I chose a lot of vivid colors to bring some cheer!

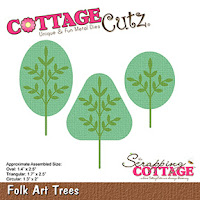
I am using the Folk Art RainbowFolk Art Trees and Folk Art Houses.   This die is from our Folk Art release!  There are 19 wonderfully detailed dies in this collection.  Each die can be used together or separately. These are fantastic versatile dies.


Design Steps:

1.  Start by using the Folk Art RainbowFolk Art Trees and Folk Art Houses dies.   Cut the following colors of card stock:  red, yellow,  mint, light blue, dark blue, purple, orange, and brown
2.  Prepare the card base: A2 white base, 4 1/8 x 5 3/8 blue, 2 1/4 x 5 3/8 green cut with the Hills Slimline die, white cut with the Clouds Slimline
3.  On the blue layer arrange the clouds and hill (do not put glue on the very top edge so you can tuck in the rainbow) as shown above
4.  Tuck the rainbow down into the grass as shown and glue
5.  Add the trees to the left of the rainbow and the small layer of grass at the bottom as shown above
6.  Add the ribbon and sentiment to the clouds.  Then tuck in the small house to the right of the trees.  Your card is complete 


We have more inspiration on our YouTube Channel check it out HERE

Thanks so much for stopping by!  And I will see you next Thursday.

Blessings and Take Care


Wednesday, August 02, 2023

Birthday Die Cut Banner

Happy Wonderful Wednesday crafty friends!
Melinda here with you. I hope your mid-week/hump day is going fantastic so far! Today I am sharing a fun little birthday banner I created with some beautiful cottage cutz dies! Here's what I created.
I made this pretty little mini birthday banner to celebrate a co-worker's birthday. 


I started by cutting out my scalloped ovals from white cardstock. I then used my double stitched ovals to cut out a size smaller some patterned paper. 


I then glued the patterned paper to my scalloped bases for mats.


I then cut out all of my various die cuts n white cardstock and then colored my various pieces in in a variety of shades of pink. Here I am coloring in my Happy letters.


The following are closeups of each little panel I created.

For this one I used my Happy Birthday Shadow die along with the pretty filigree bow die.

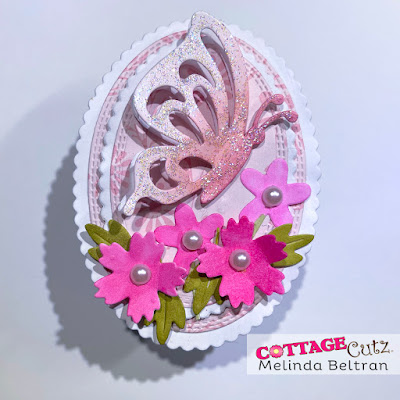
For this one I used the Folk Art Butterfly and the Folk Art Mixed flowers. For the butterfly, I cut out two of them and layered them onto each other and then lifted the top layer to give the illusion of the butterfly in a side view.


For this one, I used the swirl cupcake die cut.

For this panel, I used the Folk Art Mixed Flowers die set. I actually created two panels like this one. 

Here is a view of the little banner hanging from my desk. In between each panel I added a little strng of beads and then some tulle. I strung it all on some thin white ribbon.


Folk Art Flowers Mixed


Spring Butterflies


Fligree Bow


Cupcake w/ Twists


Happy Birthday w/Shadow
Currently out of stock

Double Stitched Oval Set

Nested Scallop Oval Set

Well that about covers it for today. I hope you were inspired to have some fun and pick up some of these wonderful dies!

Don't forget to check back often and see what the rest of the design team is creating. Until the next time, have a wonderfully crafty day!