Tuesday, June 13, 2023

Fun Fold Patriotic

Hello CottageCutz friends! Thanks for taking the time to stop and visit with us today. It's Mary Marsh here bringing you the Tuesday edition of the Blog.

We have a brand-new release in the online store. It's our Patriotic 4th of July release with 12 amazing patriotic designs and bundle pricing at 40% off for a limited time. You can pick up the individual dies at 30% off . If you love making patriotic cards to honor a veteran, to celebrate the 4th of July or to display your love for America, we have you covered with this new release.

My card for today is a fun fold. It's a diagonal joy fold card, and I am featuring the new Patriotic Eagle w/Top Hat, USA Phrase and the Fireworks dies. I have a complete tutorial so stay with me to the end. 

Design Steps:

I started with a 4 1/4" x 11" red cardstock for my card base. It's scored at 5 1/2". Used my paper trimmer to make the diagonal cut on the card front. Start at the center top left and cut to the bottom right corner.
This is what the card should look like after you make the cut.
Next, I cut the designer paper I used for the diagonal panel. I started with a piece 4 1/8" x 5 1/4" and cut it on a diagonal. 
I secured the designer paper to the card panel and also to the card inside. The inside piece is 4" x 5 1/4".
Now for the card insert I used red cardstock measuring 8" x 3" and scored at 4". 
I stamped a sentiment. I decided to add some fireworks to this panel. The die is the new Fireworks die. 
I cut the Patriotic Eagle w/Top Hat & the USA Phrase images in red, white and blue. 
Next, I added the Eagle image and some stars to the front of the card insert.
To finish off this fun fold, I secured the USA phrase to the diagonal panel with liquid glue. The insert is attached with double sided tape.
This photo shows the insert attached to card base.
This last photo shows the card closed.
That's it for me for this post. See you next week with another patriotic card.


Monday, June 12, 2023

4th of July Camper

Welcome to this Monday edition of the blog!

We've got a fantastic NEW PATRIOTIC RELEASE just in time for those 4th of July celebrations, scrapbook layouts etc!  There are 12 designs in this collection and the Bundle is currently 40% off, and the individual dies from this release are 30% off for a limited time!  

It's Kris, sharing some inspiration with you today featuring the new Patriotic Camper and Happy 4th of July Phrase


Design Steps:

I started with a 5-1/2" square card base and layered a piece of red/white striped paper that was cut to 5-1/4" square.  I then cut a white "frame" by die cutting the largest die from the Nested Wacky Stitched Rectangles (using the extend-a-die technique) to make it square0.  I then cut a smaller square out of the middle of it.


I used the square that was cut from the middle of my frame to sponge clouds and add ground with Distress Oxide inks.  


Next, I die cut my Patriotic Camper and Happy 4th of July Phrase in red, white and blue cardstocks and assembled images.  I sponged the blue windows and door, and blue banner pieces, then adhered the camper to my cloud stenciled layer and onto the front of my card.  


 Next, I popped up the frame with foam strips to give it more dimension and placed it around the camper. 


And lastly, I glued my phase to the popped up frame and added some white gel pen highlights to the lettering and the red curtains, and DONE!  


PRODUCTS I USED:


I hope you enjoyed my project today!  
I wish you all a CRAFT-astic week ☺  
~Kristine

Saturday, June 10, 2023

Group Post Day 2 (Folk Art Dies)

Hello CottageCutz friends! Thanks for taking the time to stop and visit with us today. This post is day 2 of  cards using the new Folk Art release.   There are 19 new designs in this release and are so perfect for cardmaking, journaling, and scrapbooking. They allow you to add a beautiful touch of folk art to whatever you may be creating.

We have had a good response when we do a group post on a new release. It gives you the opportunity to see more card samples from the Design Team. There are 3 samples in today's post and we also showed  3 samples yesterday. See Day 1 samples here.

Also just released is our Patriotic 4th of July release with 12 amazing patriotic designs and bundle pricing at 40% off. If you love making patriotic cards to honor a veteran, to celebrate the 4th of July or to display your love for America, we have you covered with this new release. The DT will begin showing samples starting Monday and continue for the month of June.

Now onto our Folk Art Samples for today.

Card 1:  Our first sample today is from Kristine Breach.  She used the Folk Art Deer, Folk Art Trees, Stitched Alphabet and Hills Slimline dies to create a fun fold bridge card. It's such a beautiful Christmas card and it shows you how easily these dies can be taken into the Christmas season.
 
The use of non-traditional colors are so perfect way for a folk-art design card. This would also be a great home decor piece to display at Christmas. 

Card 2: Our next sample for today is from Marla Harris. She used the Folk Art Rooster, Folk Art Flowers Mixed, Folk Art Egg and the Fence & Grass dies to create a stunning mixed media thinking of you card. 
Her images are colored with distress inks. She splattered with water as well as white gouache to the images. She has captured the folk-art design in such a unique and beautiful way. 

Card 3: Our last sample for today is one that I (Mary Marsh) created using the Folk Art House (small and medium) and the Folk Art Trees dies to also create a Christmas card. I was inspired by Kristine's sample, so I decided to try a Christmas theme using these dies. I thought the house and trees would work well in a snow globe. 

For the globe I used the largest Circle Set die and then embossed with a snowfall folder. For the base of the globe and ribbon I used and old die -Snowglobe w/Fawn. I covered my images with a plastic window sheet. 
The Peace and Joy phrase is a die from last year's Christmas release. 


That's it for our samples for today. I hope we have given you some ideas for ways to use the new Folk Art dies.

Reminder: Marla has a new video on the CottageCutz You Tube channel and there is a giveaway. 

Dies used to create cards:


Friday, June 09, 2023

Group Post Featuring Folk Art Release

Hello CottageCutz friends! Thanks for taking the time to stop and visit with us today. This post is featuring cards using the new Folk Art release. There are 19 new designs in this release and are so perfect for cardmaking, journaling, and scrapbooking. They allow you to add a beautiful touch of folk art to whatever you may be creating.

We have had a good response when we do a group post on a new release. It gives you the opportunity to see more card samples from the Design Team. There are 3 samples in today's post and tomorrow we will have another 3 samples. 

Also just released is our Patriotic 4th of July release with 12 amazing patriotic designs and bundle pricing at 40% off. If you love making patriotic cards to honor a veteran, to celebrate the 4th of July or to display your love for America, we have you covered with this new release. The DT will begin showing samples starting Monday and continue for the month of June. 

Now onto our Folk Art Samples for today. 

Card 1: Our first sample today is from Pam Mackay. She created a beautiful slimline card (8 1/2" x 3 1/2") to send to a friend that she hasn't talked to in a while. Her card is featuring the new Folk Art Cat, Folk Art Rabbit and Folk Art Flowers dies. 

She placed her images on black cardstock and then onto a pink layering panel. These colors really make the images pop. I like how she circled the images with hearts and stems and then her middle panel is more flowers. She has really captured the essence of folk-art design with this card. Her friend will love it and, it's a great way of reconnecting. 


 Card 2: Our next sample today is from Melinda Beltran. She used the Folk Art Hen die and the Folk Art Egg die to create this beauty. The colors she used on the hen and egg give it a vintage flair. 

Her background designer paper has a rustic look and framed with the Scalloped Rectangle die helps completes the vintage style. The punny sentiment certainly will produce a smile for the recipient and is a perfect ending for her card.  It will be a great pick-me-up card for someone who need a little cheering. 
Card 3:  Our last sample for today is one that I (Mary Marsh) created using the Folk Art Heart die.  I used the colors from this week's color challenge #951 on Splitcoaststampers. 
We were to use berry burst, lemon lolly and shaded spruce for our color trio.
 

I made this card for my good friend who is dealing with a "C" diagnosis on her hubby. I want to let her know that I am supporting both of them. 

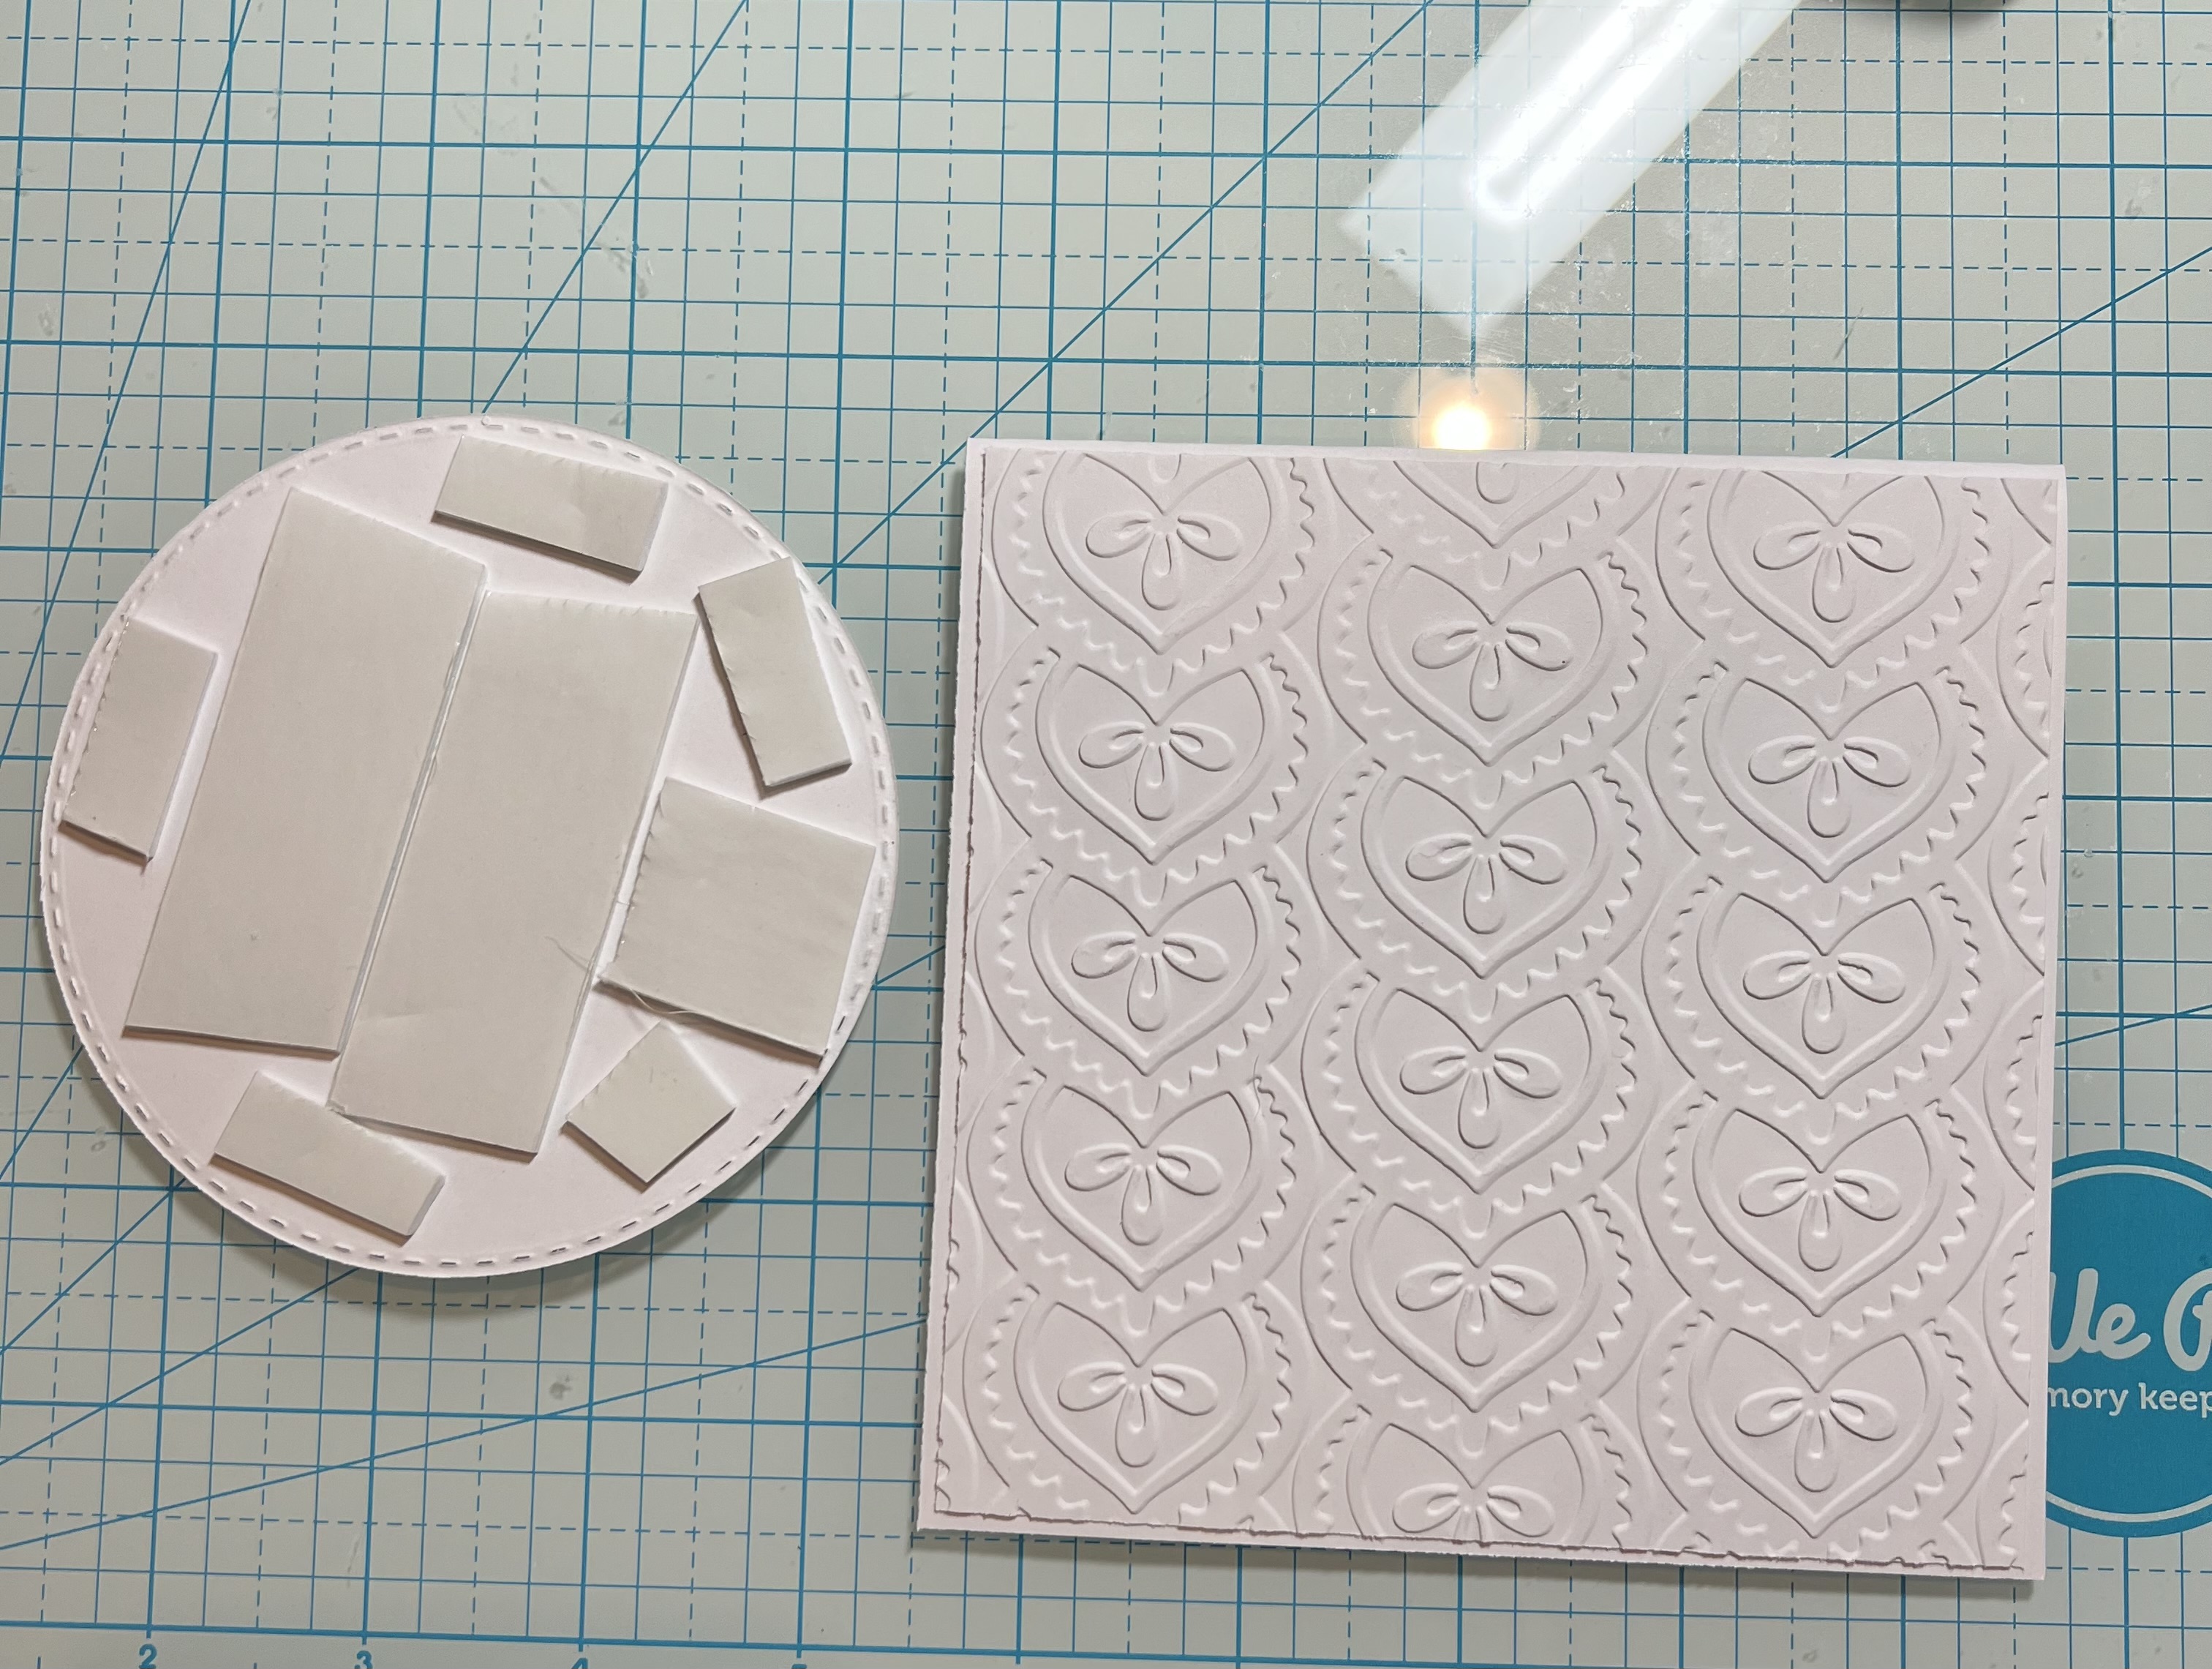
I embossed the card base with a floral embossing folder for added interest since this card is a bit more on the clean and simple side. The heart is cut in the required challenge colors. I stamped my sentiment in berry burst ink on lemon lolly cardstock. Added a few sequins to finish off the card.
 
That's it for our samples for today. Stop back again on Saturday to check out what the other designers have created. 

Dies used to create cards: 


Thursday, June 08, 2023

New Release - Folk Art Designs!!

 Hello Friends,

It is Pam sharing the new release with you today!

The collections is a beautiful, whimsical group of Folk Art dies!  There are 19 wonderfully detailed dies in this release.  Each die can be used together or separately and can be utilized for multiple occasions.  Right now the individual dies are 35% off!!!

I am using the Folk Art Fox as my focal point with a mix of the new dies to decorate the card.


Design Steps:

1.  Using the Folk Art Fox I cut all the pieces on white card stock and then colored them with a variety of inks and blending brushes


2.  After I was done coloring I cut a 4 inch white circle.  I began my design by placing the fox in the center and then add all the decorations
3.  You can add as many decorations or as little to the circle as you wish.  I used decorations from the Folk Art Butterfly and the Folk Art Rabbit
4.  The card base is square white card stock 5 x 5 inches.  Add an embossed white piece measuring 4 7/8 x 4 7/8.  Glue the pieces together
5.  When your center circle is complete add dimension tape to the back of it and pop it to the card front.  Stamp your sentiment and layer it onto red.   Glue the sentiment to the card front and it is complete

CottageCutz Products


Here is a quick peek at the new release dies make sure to check them out in our online store!

We have more inspiration on our YouTube Channel check it out HERE

Thanks so much for stopping by!  And I will see you next Thursday.

Blessings and Take Care