Friday, September 07, 2018

A Country Christmas

Good morning Cottage Cutz fans!  It's Jeanne today with a card featuring dies from the Christmas Part 2 release.  The Christmas dies (Parts 1 and 2) are on sale for a limited time so be sure to stop by the online store!
This card would be perfect for the car enthusiast or anyone who likes a good old-fashioned Christmas.

I started by die cutting all the pieces in colored card stock.  I often use white when I have several small pieces.
In this case it was the tires and the blinkers.  I used Copic markers to color those.
I assembled the car.  To give the tree and wreath a bit of dimension, I sponged the edges in a dark green.  I also has cut several packages in different patterned papers so I could pick the ones I liked best.
Finally the assembled truck.  This die would be so cute at any time of the year.  Just remove the tree, wreath and presents, then fill with something else.  Or add more presents and make it a birthday truck!
Next - the background.  I cut a vanilla piece of card stock 2 3/4 x 5 1/2 inches and antiqued the edges. Then I cut pieces 3 x 5 1/2 inches from green, 4 x 5 1/2 inches from plaid paper and an A2 (4 1/2 x5 1/2 inches) panel in dark red.
The assembled panel.
I cut the sentiment from a piece of green card stock with an adhesive backing.
And the final card.
I hope you enjoyed this card today.  This was a fun and quick card to make.

Dies used:
http://www.scrappingcottage.com/cottagecutzholidaypickuptruck.aspx
http://www.scrappingcottage.com/cottagecutzcountrymerrychristmasphraseelites.aspx
Thanks for stopping by today!  Have a fun and creative weekend!

Thursday, September 06, 2018

Adorable Snowmen!!

Good Morning Scrapping Friends!

It is Pam sharing with you today from Stamper At Heart Blog!

 Make sure your check out the store because part 2 of the Christmas release is in the house! The card I made for you today is from Christmas part 1.   All of these new Christmas dies are so amazing and the detail is unbelievable! The best thing about all these wonderful dies is that right now they are 25% off but just for a limited time! Don't miss out on this fantastic sale!


Design Steps:
 1.  Cut out all of the pieces using white card stock and the Snowman Lane die.  Color all of the pieces with your favorite pencils or markers
 2.  Use an A2 white card base and then cut a slightly smaller piece of snowflake DP.  Using the Wacky Stitched Rectangle second from the largest cut out the center of the DP
 3.  Mount the frame made from the DP to the front of the card using Dimension tape next glue the cut rectangle flat to the center of the frame
 4.  Begin to add the pieces into the frame add the snow, snowman then the fence as shown
 5.  To add dimension place one of the snowmen outside of the frame and continue to all the rest of the pieces: Mailbox, sign and the third snowman
 6.  Add all of the snow to the scene and the small pieces to the mail box.  I added some additional snow to the base of the card
7.  I added some small black pearls for the snowmen's eyes and some Stickles glitter to the piles of snow for some sparkle.  Stamp your sentiment and the street sign and your card is complete!


CottageCutz Products


As always we love it when you come to visit us!  Thanks again and make sure you take some time out for yourself to be crafty!
Blessings
Pam


Monday, September 03, 2018

Woodland Scene

Happy Labor Day!  Lois here for my Monday visit.    CottageCutz is having a HUGE Labor Day Sale -- up to 60% off (25% off on the new Christmas release) and FREE SHIPPING on orders over $50.  Be sure to check it out.

And now, on to my card for today.  Even though there are three layers on this card, it almost looks like a one-layer card.


To start, I cut my cardstock as follows:

White - one piece 5 1/2" x 8 1/2" (scored at 4 1/4") and one piece 4 1/4" x 5 1/2"
Red - one piece 4" x 5 1/4"


Using various Ranger Distress inks (Mowed Lawn, Scattered Straw, Dried Marigold, Red Lipstick, Tumbled Glass) and sponge applicators, I created my background on the smaller white piece of cardstock.  I had cut this piece larger than what I would ultimately need so that I could trim the edges and remove the dark marks along the sides.


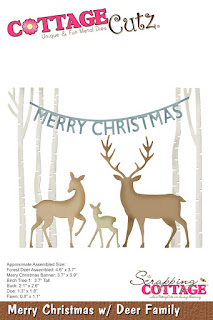
I then cut my die-cut images from red (for the sentiment banner) and tan (for the trees and deer).  Prior to cutting the sentiment, I adhered a piece of double-sided adhesive sheet so that it would be easier to attach the sentiment to my card.


Using Ranger Distress Vintage Photo ink and a sponge dauber, I sponged around the edges of the deer and trees (lighter on the trees than on the deer).


After running the trees through my Xyron sticker maker, I constructed my cardbase and began to make my scene.


Once the trees were attached, I ran the deer family through my Xyron sticker maker -- although I had to use the next-size larger one for the buck, who was too large to fit through the 1" sticker maker.


After adding the deer to my scene, my card was completed.


Only one CottageCutz die was used on this card:

http://www.scrappingcottage.com/cottagecutzmerrychristmaswdeerfamily.aspx


Sunday, September 02, 2018

Christmas Floral


Hi!

This is Anja. I have a simple Christmas card for you today. I used new Christmas Floral dies and made a simple card.


For this card I used:
- Cottage Cutz die (Christmas Floral #2, Merry & Bright),
- Distress Inks (Aged Mahogany, Mustard Seed, Fired Brick, Barn Door, Crushed Olive, Peeled Paint, Pine Needles),
- white card base (15x15 cm),
- patterned paper (14,2x14,2 cm),
- white card stock for die cuts,
- scissors,
- Wink of Stella glitter brush,
- paper glue.

First I cut and colored the flowers and greenery. I cut two flowers and four sets of greenery.


Then I cut the sentiment. I used scissors to cut off the lights.


Then I cut the paper for the background and used the scissors to distress the edges.


I used glitter brush t +o finish the sentiment. And this is my final product.


Don't forget to check the store. There's a labor day sale going on. 
Thank you for stopping by and have a nice Sunday.
Anja Z.


Cottage Cutz dies I used:


Saturday, September 01, 2018

Christmas Fawns Walking in Winter Wonderland

Hello Scrapping Cottage friends! Thanks for taking the time to stop and visit with us today. It's Mary Marsh here bringing you the Saturday edition of the Blog. 

Our  Christmas Part 2 dies are available, and on a 25% sale,  in the online store.  There are 29 new designs in this release. The Christmas Part 1 dies are still on sale as well.  The design team will be posting samples with the Part 2 dies shortly. Again, we are hoping to give you lots of ideas for your Christmas cards.

For my card today, I am using the Christmas Fawn die. This is in the Part 1 release and was sold out for awhile but it is now back in stock. Also the Journey to Bethlehem was another popular die and it is also back in stock.  


So let's get started with some details on how I created my card.

Step 1:  I started my card with the colors this week. I used the colors from the Splitcoaststampers color challenge #702 or my card. The colors are cherry cobbler, early espresso and so saffron. I was able to incorporate them nicely into my card.
so saffron, cherry cobbler, early espresso
Step 2: Once the card colors were chosen, I started the stenciling for my background. I used a snowfall stencil and some shimmery white embossing paste. There is lots of sparkle on the snowflakes. I set that aside to dry and started the die cutting.
 
I cut the fawns in a baked brown sugar cardstock (medium brown) and did a bit of sponging for some contrast.  The tree branch is cut in the early espresso shade, the ornament in so saffron and the birds in cherry cobbler. What I have learned doing color challenges is that you don't have to emphasize all colors equally.  And, neutral colors like white, brown gray etc. help to balance the other colors.
Step 3: Next I cut a snowbank for my fawns to stand on. I used glitter glue and chunky glitter to give a bit of sparkle to the top of the bank.
I stamped my sentiment in early espresso ink. I love this rich brown shade of ink and it's also another way to incorporate the colors from the challenge.

Attached the snowbank to the stenciled base with dimensional adhesive..
Once that was in place I began attaching the images. I used a combination of dimensional adhesive and glue dots. I decided I didn't want a yellow bird so I changed it out to both in the cherry cobbler color. Used some light yellow metallic glue dots for a little added bling. Again, another way to get the challenge colors onto my card.
To complete my card, I attached the image panel to the cherry cobbler card base. I hope I have given you some inspiration for a way to use this sweet new die. They are on sale in the online store and there is also a big Labor Day sale with savings on other dies of up to 60%.

See you next Saturday!

die I used to create card:
http://www.scrappingcottage.com/cottagecutzchristmasfawns.aspx