Pages

Monday, July 31, 2023

Paper Snowflake Ornaments 2-Ways

Hello!  Welcome back to a new crafty week here at the Scrapping Cottage!  

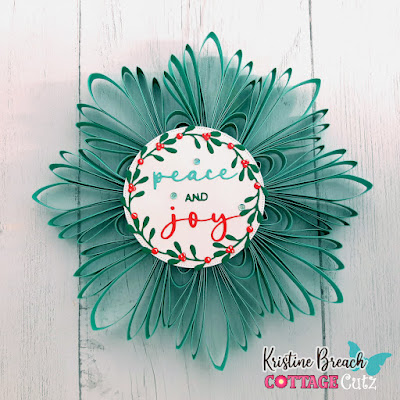
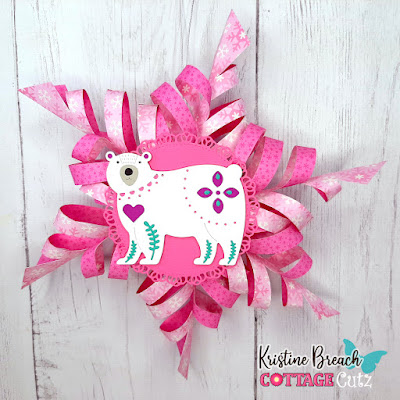
Kris here to share 2 different styles of paper snowflake ornaments that feature the Folk Art Bear and the Peace & Joy Wreath!  I figured since today's the last day to create a Christmas in July project I would jump on that bandwagon  ☺ 

Don't forget... our CHRISTMAS SALE is still going on -- you can SAVE 65% on ALL CottageCutz Christmas designs!!


They are both easy to make, however the 2nd took a bit longer and needed more explanation, so I did a quick 5 min. video on part of that one.  

DESIGN STEPS for the PINK SNOWFLAKE

1.  Cut 6 pieces of 4" x 4" paper (patterned or solid... not too heavy) and fold them all in half on the diagonal.


2.  Measure 1 cm (or about 1/2") on the 2 sides perpendicular to the fold and draw a light pencil line to connect as shown below.  

3.  Make 6 equal cuts up to the drawn line.  Then erase your pencil line.


3.  Open up your square, and starting at the top, bring the top 2 flaps together in front, overlapping them and glue to adhere.  (You could use small staples instead to make it go quicker.)

(See next 2 photos)

4.  SKIP the next set of flaps and glue the 3rd set and 5th sets.


5.  Flip it over and glue the remaining flaps together.  You should have something that looks like this...


6.  Make 5 more!


7.  Alternate the colors (if you used 2 patterns or shades of double sided papers) then staple 3 of them at the base as shown below.


8.  Repeat with the other 3 pieces, then staple the 2 halves together to make a whole snowflake!


9.  Die cut a Nested Stitched Doily in pink and the Folk Art Bear in white, magenta, teal, and the muzzle in grey.  Assemble and pop her onto the doily with foam tape.

10.  Glue doily onto front of ornament.


DESIGN STEPS for the TEAL SNOWFLAKE ORNAMENT:

1.  Cut (2) strips that are 1 cm x 30 cm and glue them end to end.  

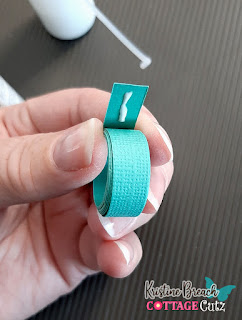
2.  Wrap around a cylinder that is about the size of your mini glue bottle, or the plastic lid of the Stampin' Mist etc. adding glue every so often so it holds in place and especially at the end of your roll. 


The rest of the steps to this snowflake ornament are in the video below.  If it doesn't play for you, you can see it on YouTube here - https://youtu.be/vOY3Ptw3q6c

3.  Cut 3 strips that are: 
11 cm x 1 cm
9 cm x 1 cm
7 cm x 1 cm

(you'll need to make 8 total)

4.  Cut (1) strip 21 cm x 1 cm
(2) 19 cm x 1 cm
(2) 18 cm x 1 cm
(2) 16 cm x 1 cm

(you'll need 8 total)


PRODUCTS:


I hope that was easy to follow & that I've inspired someone out there to give it a go!

Happy crafting! 

~Kristine

Saturday, July 29, 2023

Trifold Miura Card

Hello crafters!  

It's Kris here, sharing with you the Saturday edition of our blog with a fun fold card featuring our Folk Art collection.


This card style was a first for me... it's called a Freestanding Trifold Miura card.  I will say in all honesty, this card does have that wow factor as most fun folds do, however I found it a li'l fussy to get it to stand up on it's own.  The trick is to not stretch it out while displaying it... try to keep it half-way folded.  


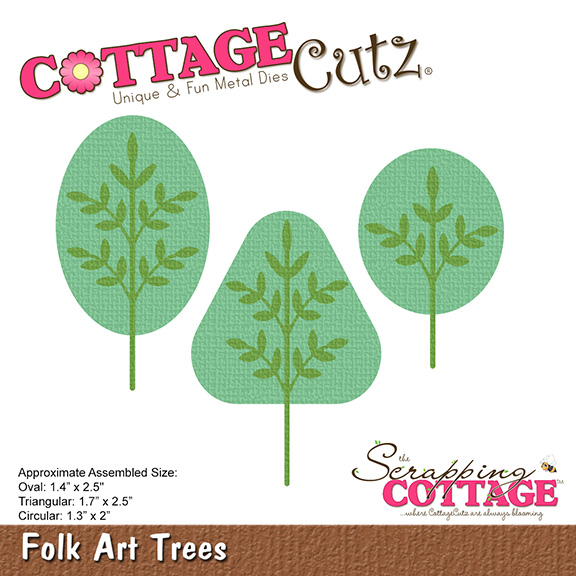
I choose some beautiful Fall papers (Doodlebug Design) to use with the Folk Art Fox and Folk Art Butterfly and Folk Art Trees.  

CUTTING:
Card Base (Lemon-Lime Green) = 10-1/2" x 5-1/2"
Patterned Paper #1 (Leaves) = (cut 2) 5-1/4" x 3-1/4"
Patterned Paper #2 (Plaid) = (cut 2) 3-1/4" x 1-3/4" 
White cardstock = 5-1/4" x 3-1/4"

DESIGN STEPS:

Card Base--
--  Score along the 10-1/2" side at 3-1/2" and 7"

-- On the 3-1/2" score line, measure down 2" and place a pencil mark.  Score from the top left corner of card down to the 2" mark.  Score again from that 2" mark up to the top of the 7" score line.

-- Turn cardstock 180 degrees and repeat Step #2

-- Fold and burnish on score lines so that one "V" folds back and the other folds inside the card.  

** Below is a pic of the back side of my base, just to show you better where the score and tick marks are  (I didn't want to draw on the front side) 


-- With patterned paper #1 vertical, measure down the right side and place a pencil mark at 2".  CUT diagonally from that 2" mark up to the top left corner.

**IF your pattern has a random pattern like mine, you can repeat the same process with the other patterned paper #1 piece.  

**IF your pattern has a definite up and down pattern, you will need to cut the OPPOSITE angle to fit the right side of card.


6.  Adhere to card sections as pictured.


-- With white piece vertical, measure down 2" on right side and place a mark. CUT from that 2" mark up to top left corner.  

-- Turn 180 degrees and repeat.  Adhere to center of card.


-- With pattern #2 vertical, CUT diagonally from top left corner to bottom right corner.  

-- On the 2nd one, CUT from top right corner to bottom left corner.  (Even if the 2 pattern pieces are the same pattern, you will need to cut opposite diagonals.)  


--Adhere to triangle sections on card base.


-- Die cut Folk Art Butterfly , the Folk Art Fox and Folk Art Trees and assemble.


-- I decided I wanted something for the fox to stand on to break up the patterned paper a bit so I cut a piece of woodgrain paper to 3-1/4" x 4" and followed the same instructions (measured 2" and cut diagonally to the corner) and then I die cut the top with the Hills Slimline die.


-- I chose some stamps and stamped a couple of them following the angles of the papers ☺  Hello Beautiful and Just a note are from the Butterfly Gala set (SU!) and the You Foxy Thing came from Foxy Thing stamp set (La-La Land Crafts).


Thank you so much for looking!  I hope you are inspired to get crafty with your favorite CottageCutz dies!

~Kristine

PRODUCTS:


Thursday, July 27, 2023

Birthday Flowers

 Hello Friends

I am catching up with my Birthday cards.  I don't have any birthdays in August so I thought it would be a good time to restock.  I get a little over whelmed in September because I have 8 birthdays.

I am using the Folk Art Tulip  This die is from our Folk Art release!  There are 19 wonderfully detailed dies in this collection.  Each die can be used together or separately.  They are perfect for people's birthdays of all ages!

Design Steps:

1.  Begin by using the Folk Art Tulip to cut out the flowers on the following colors of card stock: red, yellow, black, green and orange.  Assemble with a fine tip glue
2.  Next using Sentiment w/ Shadows Happy Birthday cut on black and white card stock.  Glue together

3.  For the card base use a white slimline 8 1/2 x 3 1/2.  Use the Lattice Slimline die and cut it out of white.  Glue the lattice to the front of the white slimline card base
4.  Glue the flowers as shown above and add the sentiment as shown.  I also added a few silver sequin
5.  To add a little to the inside of the card I glued a flower to the right and then stamped the sentiment.  My card is complete


We have more inspiration on our YouTube Channel check it out HERE

Thanks so much for stopping by!  And I will see you next Thursday.

Blessings and Take Care


Wednesday, July 26, 2023

Welcome Fall


Happy Wednesday.  Marla here back with a new CottageCutz YouTube video tutorial.  Today, I'm bringing a little relief today from the dog days of summer with a fall themed card.  I pulled out my muted jewel tones of cardstock to use with the cute "Folk Art Fox" and "Folk Art Trees."  I have been so inspired by this "Folk Art" collection because it can be used for any season.  

You can find more specific card details and see how you can enter for a chance to win the "Folk Art Fox" in my video.  Until next time..... Marla