Pages
Saturday, July 31, 2021
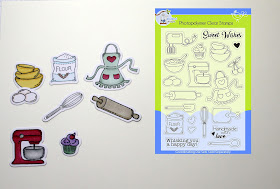
Whisking You a Happy Day (new stamps & die)
Friday, July 30, 2021
O-fish-ally Awesome
Happy Friday! It's Jeanne with today's card. Before I get to my card I'd like to let you know about the wonderful Christmas in July sale that is going on right now in the online store. You can save up to 65% on select dies!
And another big announcement - the Scrapping Cottage is now offering great stamps and coordinating dies from Lil' Bluebird Designs! I can't wait to begin coloring and designing with these adorable images. Be sure to check them out in the online store.
Now for today's card.
A few weeks back I mentioned that I had saved an extra strip of watercolored paper (click here for those instructions) and extra fish for another card. Well...here is that other card! With a few extras.I used my leftover strip and fish (I ended up using only one fish) and added a crab and jellyfish. I struggled with what color to use for the jellyfish, then hit upon using vellum. I love it because he really does look like a jellyfish!
Using the Circle Windows Slimline die I cut a panel from wood grain paper. I also used the largest of the Nested Slimline Rectangles in dark brown as a backing panel because the Circle Windows die has rounded corners and I knew these would show on the card. I cut three portholes from brushed gold cardstock using the middle of the Stitched Wide Circle Frames dies.To get everything placed I laid the wood grain panel over the dark brown and used a pencil to outline the circles. I then placed my water panel over this (it is slightly narrower than the circles so I could see the tops and bottoms of the circles), placed a frame over the middle circle and traced the center on the water panel. In this way I knew exactly where to stamp my sentiment.After gluing down the water panel, I placed the wood panel on top without adhering it. One at a time I placed my creatures underneath and gently lifted the wood panel. I marked where to place the creature in pencil where it could not be seen.This method allowed for me to place the critters exactly where I wanted them. I glued the wood panel to the base and trimmed the jellyfish tentacles (they were a bit long.) You can see here that the water strip is narrower than the height of the openings for my portholes.But not to worry, it was covered up when I added the porthole frames. Finally I used a few gems as rivets. A fun card for an awesome friend.
Dies used:
Thanks for visiting today! I hope you have a fun and creative weekend!
Thursday, July 29, 2021
Gnome Birthday
Hello Scrapping Cottage Friends
WE HAVE A BIG CHRISTMAS IN JULY SALE WITH SAVINGS OF UP TO 65% ON SELECTED COTTAGECUTZ DESIGNS. DON'T MISS THIS EARLY SALE AND SHOP EARLY FOR THE BEST SELECTIONS!
ALSO........ We have a HUGE SLIMLINE DIE RELEASE with 20 fantastic dies. The dies are at a savings of 25% off right now in the store. The new designs are just so amazing. They are sure to put your imagination into overdrive!! Check them out right HERE.
I am using the Whimsical Heart Slimline today! I have 8 birthdays in September so I am getting a jump start with this cute little gnome birthday card!
2. Glue the heart panel to the white card base
3. Using the Flower Power Tomte die cut out all the pieces in: green, tan, white, blue, yellow and dark brown. Shade the pieces then assemble the Gnome
4. Cut out the balloons using yellow, red and blue card stock. Tie a white string to each balloon
5. Pop dot the gnome and balloons to the front of the card. Stamp and layer the sentiment then pop it just under the gnomes feet. Add a few sequins and your card is complete
CottageCutz Products
Wednesday, July 28, 2021
What a Tweet-heart!
Hello! This is Sukie with this week's design team post showcasing the newly released Slimline dies. This release is a wonderful selection of slimline dies that are perfect for creating all occasion cards. They are all on sale too! Also, there is a huge Christmas in July sale going on right now!
The Leafy Background Slimline die set was used to cut out the background for my card. I created an ink blended background and spritzed it with water. Once it was dry, I used the die to cut it out. I also cut out the adorable Bluebird and the Nested Stitched Scallop Oval and shaded them with Oxide Inks.The die cut panel was adhered to a white slimline card base. The contrast of the colors really makes the leafy background pop.The bluebird and branch were nestled inside the die cut oval fitting almost perfectly.
The oval was then affixed to the center of the card base.
I stamped a whimsical sentiment on a piece of card stock and trimmed it into a hand cut flag. The flag was added underneath the oval.Here are the die sets used on my card, available in the store:
Tuesday, July 27, 2021
Introducing Lil' Bluebird Designs
Monday, July 26, 2021
Wedding Slimline
IT'S NEW RELEASE TIME! We have a new collection of Slimline Designs. Your slimline cardmaking is going to get a lot easier. We have 20 new designs and they are on sale. You can get each individual die for a limited time 25% off. The dies have appeal for all styles and occasions of cardmaking. So check them out and make your selections.


