Sunday, September 04, 2022

Labor Day SALE and a Bday Box Card

Happy Labor Day Weekend friends!  Kris here with a Birthday Box Card that I made for my daughter who loves cows and she was so excited to get this!  Before I get to it, I want to remind y'all of the BIG LABOR DAY SALE!! Up to 65% OFF so many dies -  Sale ends Thursday, September 8, 2022 at 9:00 PM Pacific Time so HURRY OVER and save!!!  

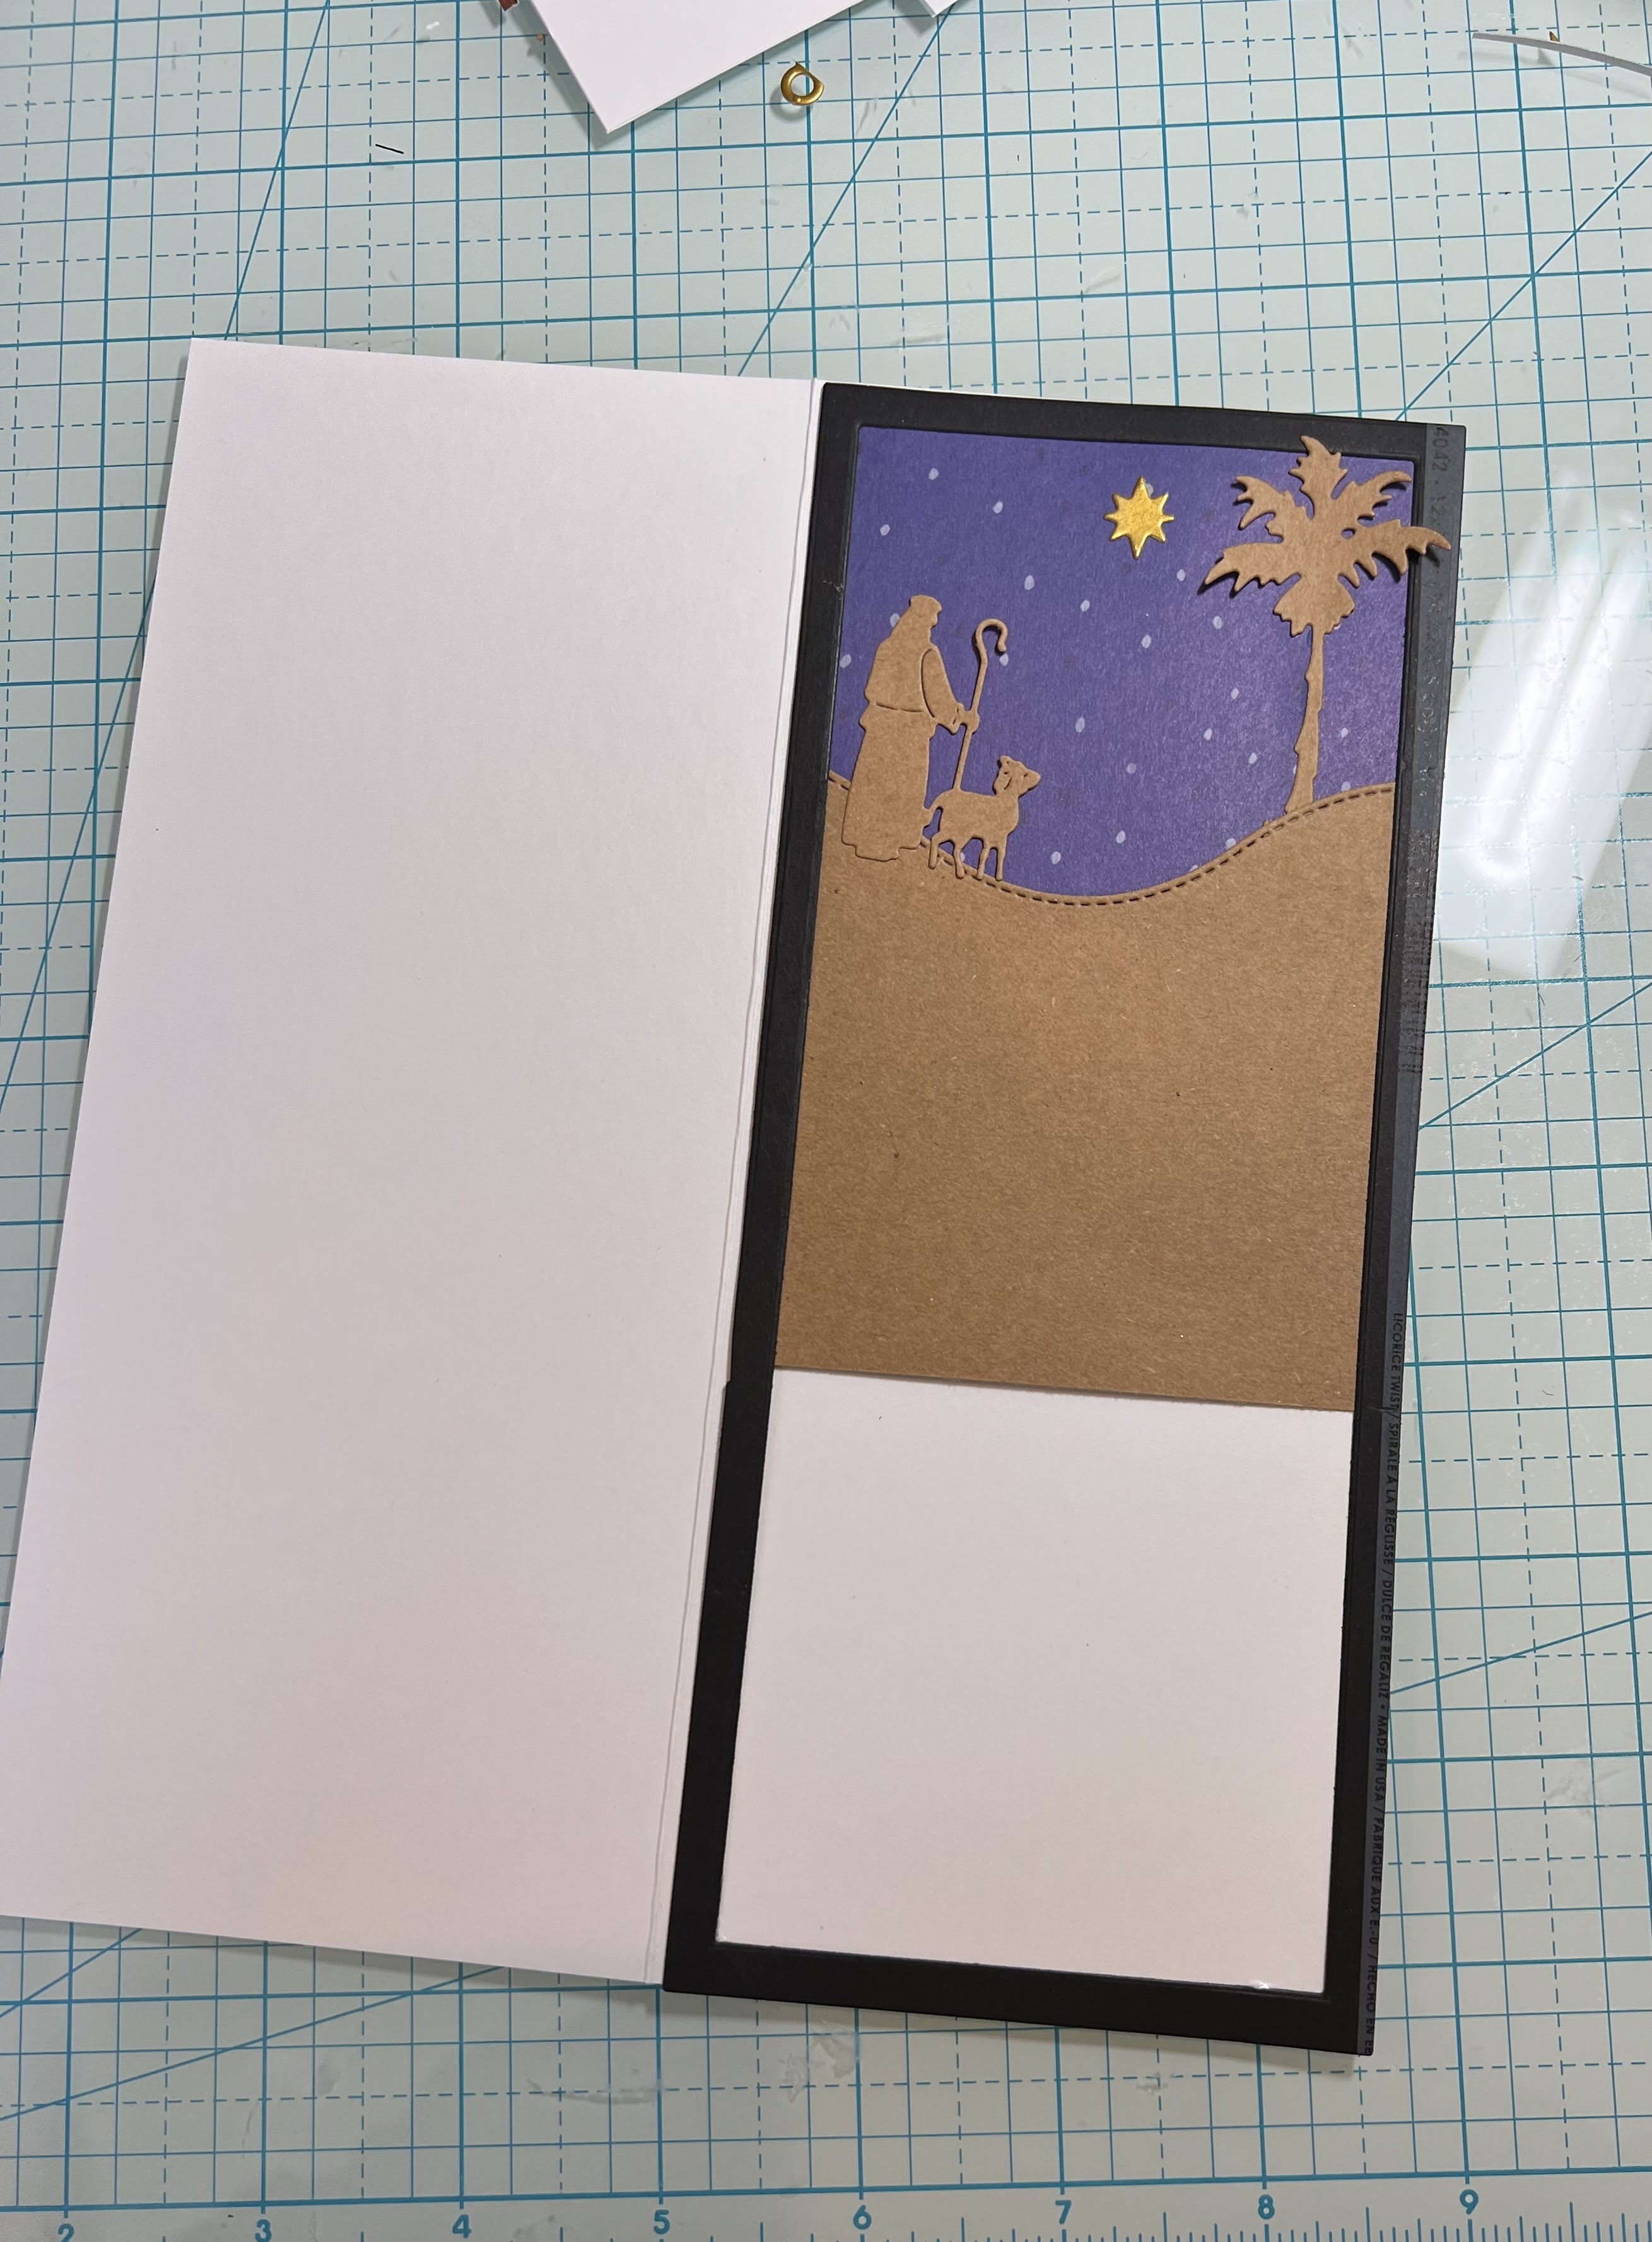
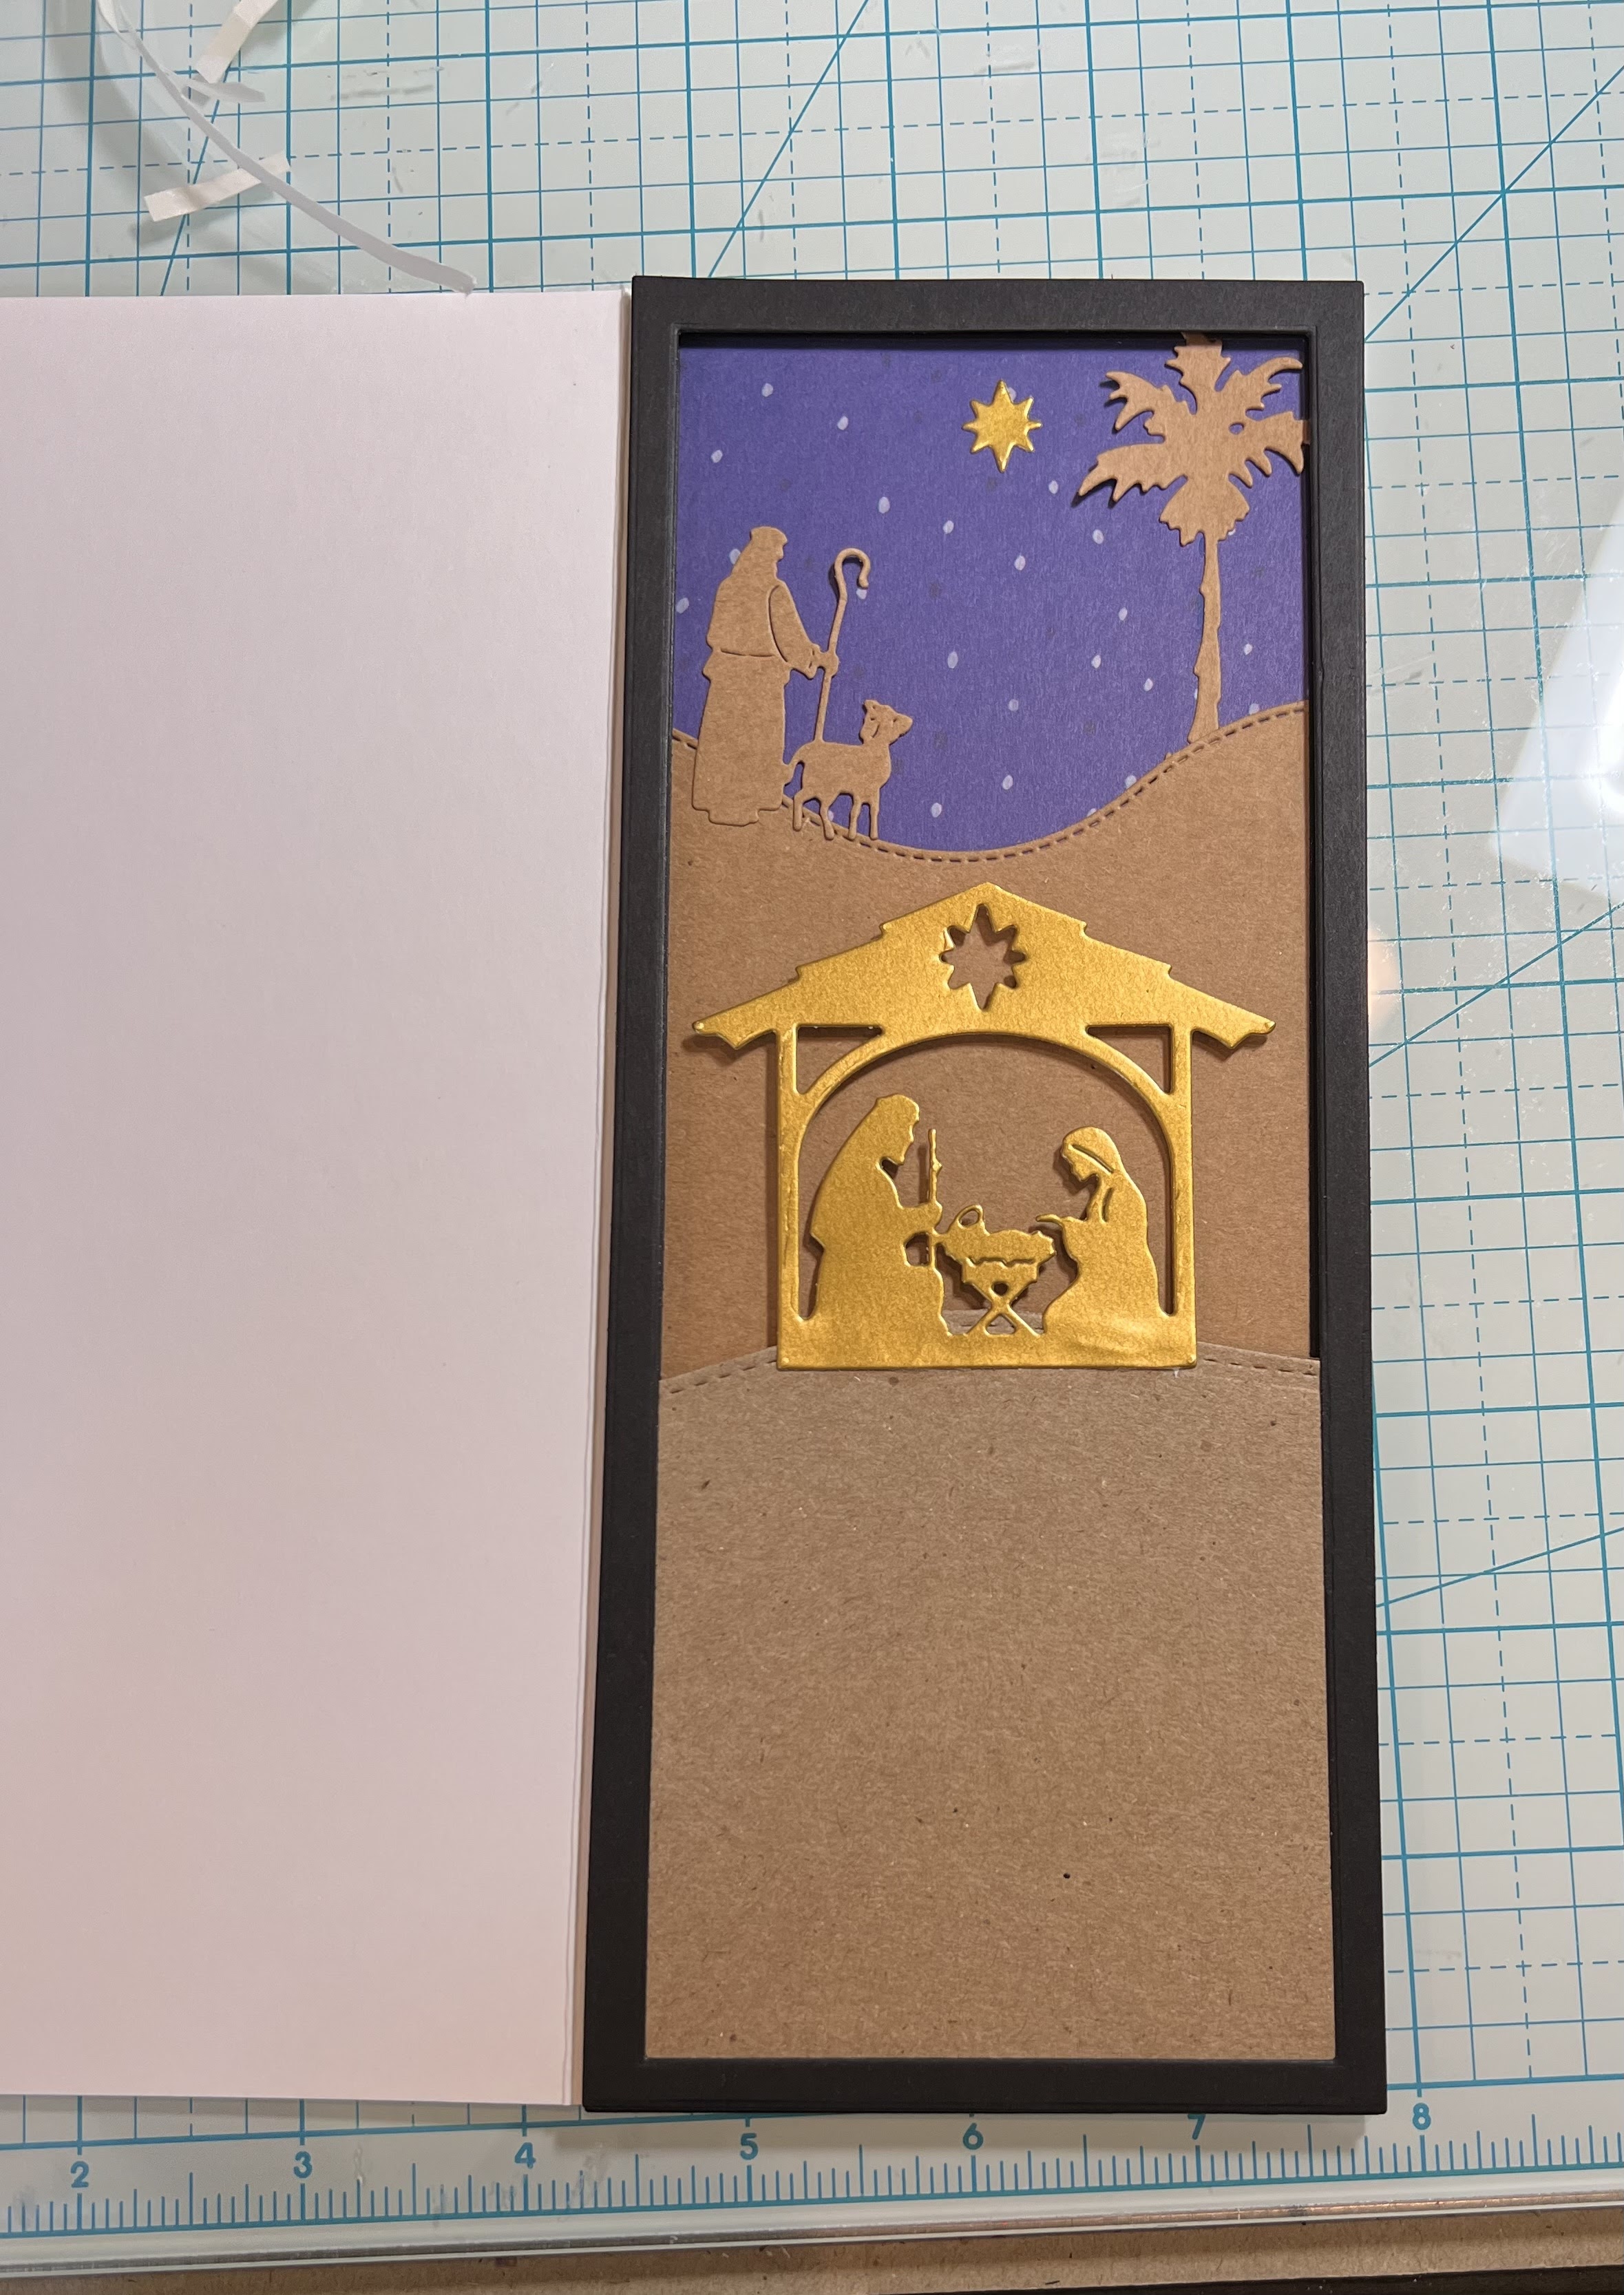
Also - be sure to check out our NEW CHRISTMAS RELEASE which is also on SALE!

I purchased these adorable Country Farm Cows at last year's Labor Day Sale & right now ALL of the dies I have used on my card today are 40-60% OFF (except the balloon on the back as it's retired.)  I have listed and linked all the products I've used on my card at the end of this post! ☺


This next one is of the BACK of my card - empty space to write a personal message.

And yes it does fold flat to fit into an envelope! 


Design Steps:

1.  I cut a white rectangle using the largest die from the Nested Wacky Stitched Rectangles - then stenciled some clouds with Tumbled Glass Distress Oxide ink.  *Optional:  I then cut off 5/8" from the bottom of my rectangle to fit the size card I was wanting to make, but it's not necessary.


2.  I cut a piece of blue cardstock at 3-1/4" x 4-7/8" and mounted my cloud layer on top.  *If you didn't want to cut the bottom off of your cloud layer in step #1, then you would cut your blue piece at 3-3/4" x 4-7/8" ☺


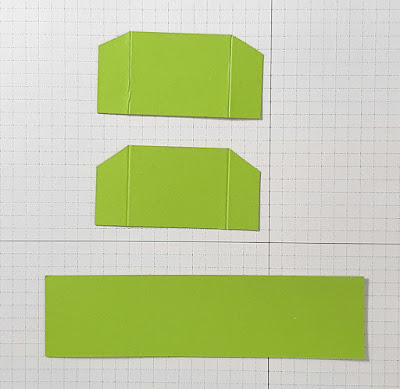
3.  I cut (2) pieces of green at 2-1/2" x 1-1/4" - then scored 1/2" from each end and mitered the top of flaps.  These are my side pieces.

4.  I cut a piece of green for the front of box at 1-1/4" x 5"


5.  I cut a couple different colors of green (can be all one shade) into strips at 5-3/4" x 1-1/2" and scored 3/8" in from each end.  These are the inside "shelves" that we will attach our cows to later. 


6.  I then used various dies from the Hills Slimline set to cut the very tops off of each shelf piece.  


7.  I then cut the side flaps down along the score line as shown below:


8.  Next, with my 2 side pieces, I glued the left flap to the bottom left edge of my cloud piece, and the right flap to the bottom right edge of same piece as shown below.


* For the next few steps, we're not going to do anything with that right flap.  Just going to work on the left side.

9.  I added glue to the left flap of my side piece and attached the left side of my front piece.


10.  Decide which hill you want to be furthest back and add glue just to the left flap and bump it up to the score line of your side piece as shown below, making sure the flap is below the top edge of your side piece.


11.  Fold that hill over to the right and add glue to just the left flap of your middle hill.  Then attach it up to the scored line of the back hill as shown below.


12.  Fold that hill over to the right and repeat for the front hill.


13.  Add glue to ALL 3 tabs on the hills fold your right side piece over onto them.

14.  Add glue to the flap of your right side piece and attach your front panel onto it.


15. Die cut a fence using the Farm Fence Slimline die.  Add glue to the back leaving the top horizontal beam w/out glue as it will be sticking above your green front piece a li'l bit.  Attach to the front panel. 


16.  Die cut, color and piece together Savanna trees, Country Farm Cows, and Happy Birthday w/ Shadow.


17.  I added glue just to the lower portion of my sentiment and attached it to the top of my card base as shown below.

18.  I attached my die cuts to the various hills as shown.


19.  For the back of card, I cut a white piece as in step 1, cutting off 5/8" from bottom.  Then I cut a piece of green cardstock cutting the top with a Hills die and the bottom portion with the same Nested Wacky Stitched Rectangle die.  I also cut a cute balloon and done!

Here are the Products I Used:


THANK YOU for taking time to visit today!  I hope I inspired you to make a box card with your favorite CotageCutz dies!  

I'll be back tomorrow with a card from the NEW CHRISTMAS RELEASE!

~Kristine

Saturday, September 03, 2022

Ho Ho Hoooot Holiday!

Hello CottageCutz friends! Thanks for taking the time to stop and visit with us today. It's Mary Marsh here bringing you the Saturday edition of the Blog.

It's new release time!!! We have new dies in the online store. It's time for our Christmas release and we have 21 new designs for Christmas Part 1. You can pick up the entire bundle at a 50% off retail. It's just for a limited time so don't delay. You can also get the individual dies for 30% off retail.

There is a great selection of religious, whimsical and some super cute birds and animals. All of your Christmas card making ideas are covered in this release. Today for your viewing pleasure, I am using the new Christmas Owls die. I have a friend who loves owls so this one will go to her for Christmas. So, let's get started on some details of how I created this card. 

Design Steps:
Since I knew the die I was going to use, I looked for a Christmas themed designer paper in my collection. I found one with snowflakes and gold accents. I thought it would work perfectly. 

Green Card Base: 4 1/4" x 5 1/2" 
Designer Paper Layer: 5 1/4" x 5 3/8"
White Image Panel: 2nd largest Stitched Rectangle (2 7/8" x 3 7/8") die 
Next, I cut the owl images in different shades of cardstock. The Merry Christmas phrase is from a 2018 Christmas release - Merry Christmas w/Deer Family. It's part of the Labor Day sale and is 50% off
For added interest on the image panel I used a swirling snow embossing folder. The sentiment is stamped in red ink.  
Now that my card elements are prepared, I am ready to start card assembly. I attached the designer paper and the image to the card base with double sided tape.
Next, I attached the owl images with clear drying glue. 
To finish off my card, I added the Merry Christmas phrase.  And I have a Christmas card finished with the new dies of the season. That's it for me for this week.
We are having a huge Labor Day sale with savings of up to 65%. It runs through Thursday, September 8. Shop early for some great buys on dies that may be on your wish list. 

Reminder: Our YouTube Channel has a new video from Jen Hartsgrove. There is a giveaway for being a subscriber, liking the video and leaving a comment. Click here.


Thursday, September 01, 2022

O Holy Night

Hello Scrapping Cottage Friends,

It is Pam sharing with you today!

We have a NEW RELEASE FOR AN EARLY START ON YOUR CHRISTMAS CARDS!!  I am giving you a peek at a number of Nativity dies available in this release and they are just gorgeous.  The release is Christmas Part 1 and has 21 fantastic dies. The release includes everything from Gnomes to Reindeer!! Check it out HERE it is on sale now!!

I have seen a number of scene builder sets lately and I love them!  So I decided to create my own scene builder with the new dies. I am really excited about how it turned out!  Each layer is popped up and there is so much depth.  I wish you could see it in real life!


Design Steps:

1.  Using the following dies: Nativity Camel, Palm Tree & AngelNativity Stable, Shepard & Animals and Stable Nativity Ornament cut out of gold, brown and tan card stock

2.  Use Nested Rectangle slimline dies the largest and the second to the largest.  Tape the two together to create a frame cut out 3 frames.  For the base use white card stock cut 3 1/2 x 8 1/2 

3.  For the top layer use one of the frames.  For the ground I used the Slimline Hills die on a piece of brown card stock which measures 3 1/2 x 1.  Glue the ground to the back of the frame and then add the camels as shown above

4.  For the middle layer use another frame.  For the ground use the Hills slimline die on a piece of kraft card stock 3 1/2 x 3 1/2.  Glue the ground to the back of the frame and then add the Nativity scene on top of the hill

5.  For the bottom layer use the last frame.  For the ground use the Hills slimline on a piece of tan card stock 3 1/2 x 3 1/2.  Glue the ground to the back of the frame making sure it will meet up with the second frame and that no white will show through.  Use a piece of blue DP for the sky measuring 3 1/2 x 3 glue it to the back of the frame.  Add the Shepard, the palm tree and the gold star

6.  Starting with the bottom frame which is the one with the Shepard glue it flat to the white card base. (I wish I would have used a black card base so if I didn't get the frame just right the white would not show)

7.  Place dimension tape on the back of the middle and top layers 

8.  Take the middle layer and tape it down to the bottom layer as shown above.  (You might want to just remove one side of the dimension tape backing and get it lined up then remove the other backing as you go)

9.  Add the top layer and your card is complete.  The card has great depth love how it turned out!


CottageCutz Products


Don't forget to check out all of the new release Christmas dies! You don't want to miss out on the great prices!


We have more inspiration on our YouTube Channel check it out HERE
Thanks so much for stopping by!  And I will see you next Thursday.

Blessings and Take Care