Friday, August 12, 2022

Gnome for Christmas


Hi everyone! My name is Linh and I'm honored and excited to be here as a guest designer. I have a new video up on the CottageCutz YouTube Channel. I've combined several dies from the Strawberry & Bees Collection along with Snowy Gnome Home to create this filmstrip slimline card.

Watch this video to see how I created this card.


Thursday, August 11, 2022

New Release - Play Ball!

 Hello Scrapping Cottage Friends,

We have a NEW RELEASE which is perfect for all those sports fans in the family! It is called Baseball & Golf! It has 16 fantastic dies which will make your card making and scrapbooking pages look great! The release has special pricing right now so go and check it out HERE!

I live in Arizona home of the Diamond Backs!  We have tons of baseball.  We host a number of times for spring training so the state has a lot of opportunities to see some fantastic games.

The easel card for today is using 3 of the new dies. They are All Stars with a ShadowBaseball, and Baseball Batter Silhouettes.


Design Steps:

1.  Use the Baseball die, the Baseball Batter Silhouettes, and the All Star with Shadow and cut out of black, white, and red.  
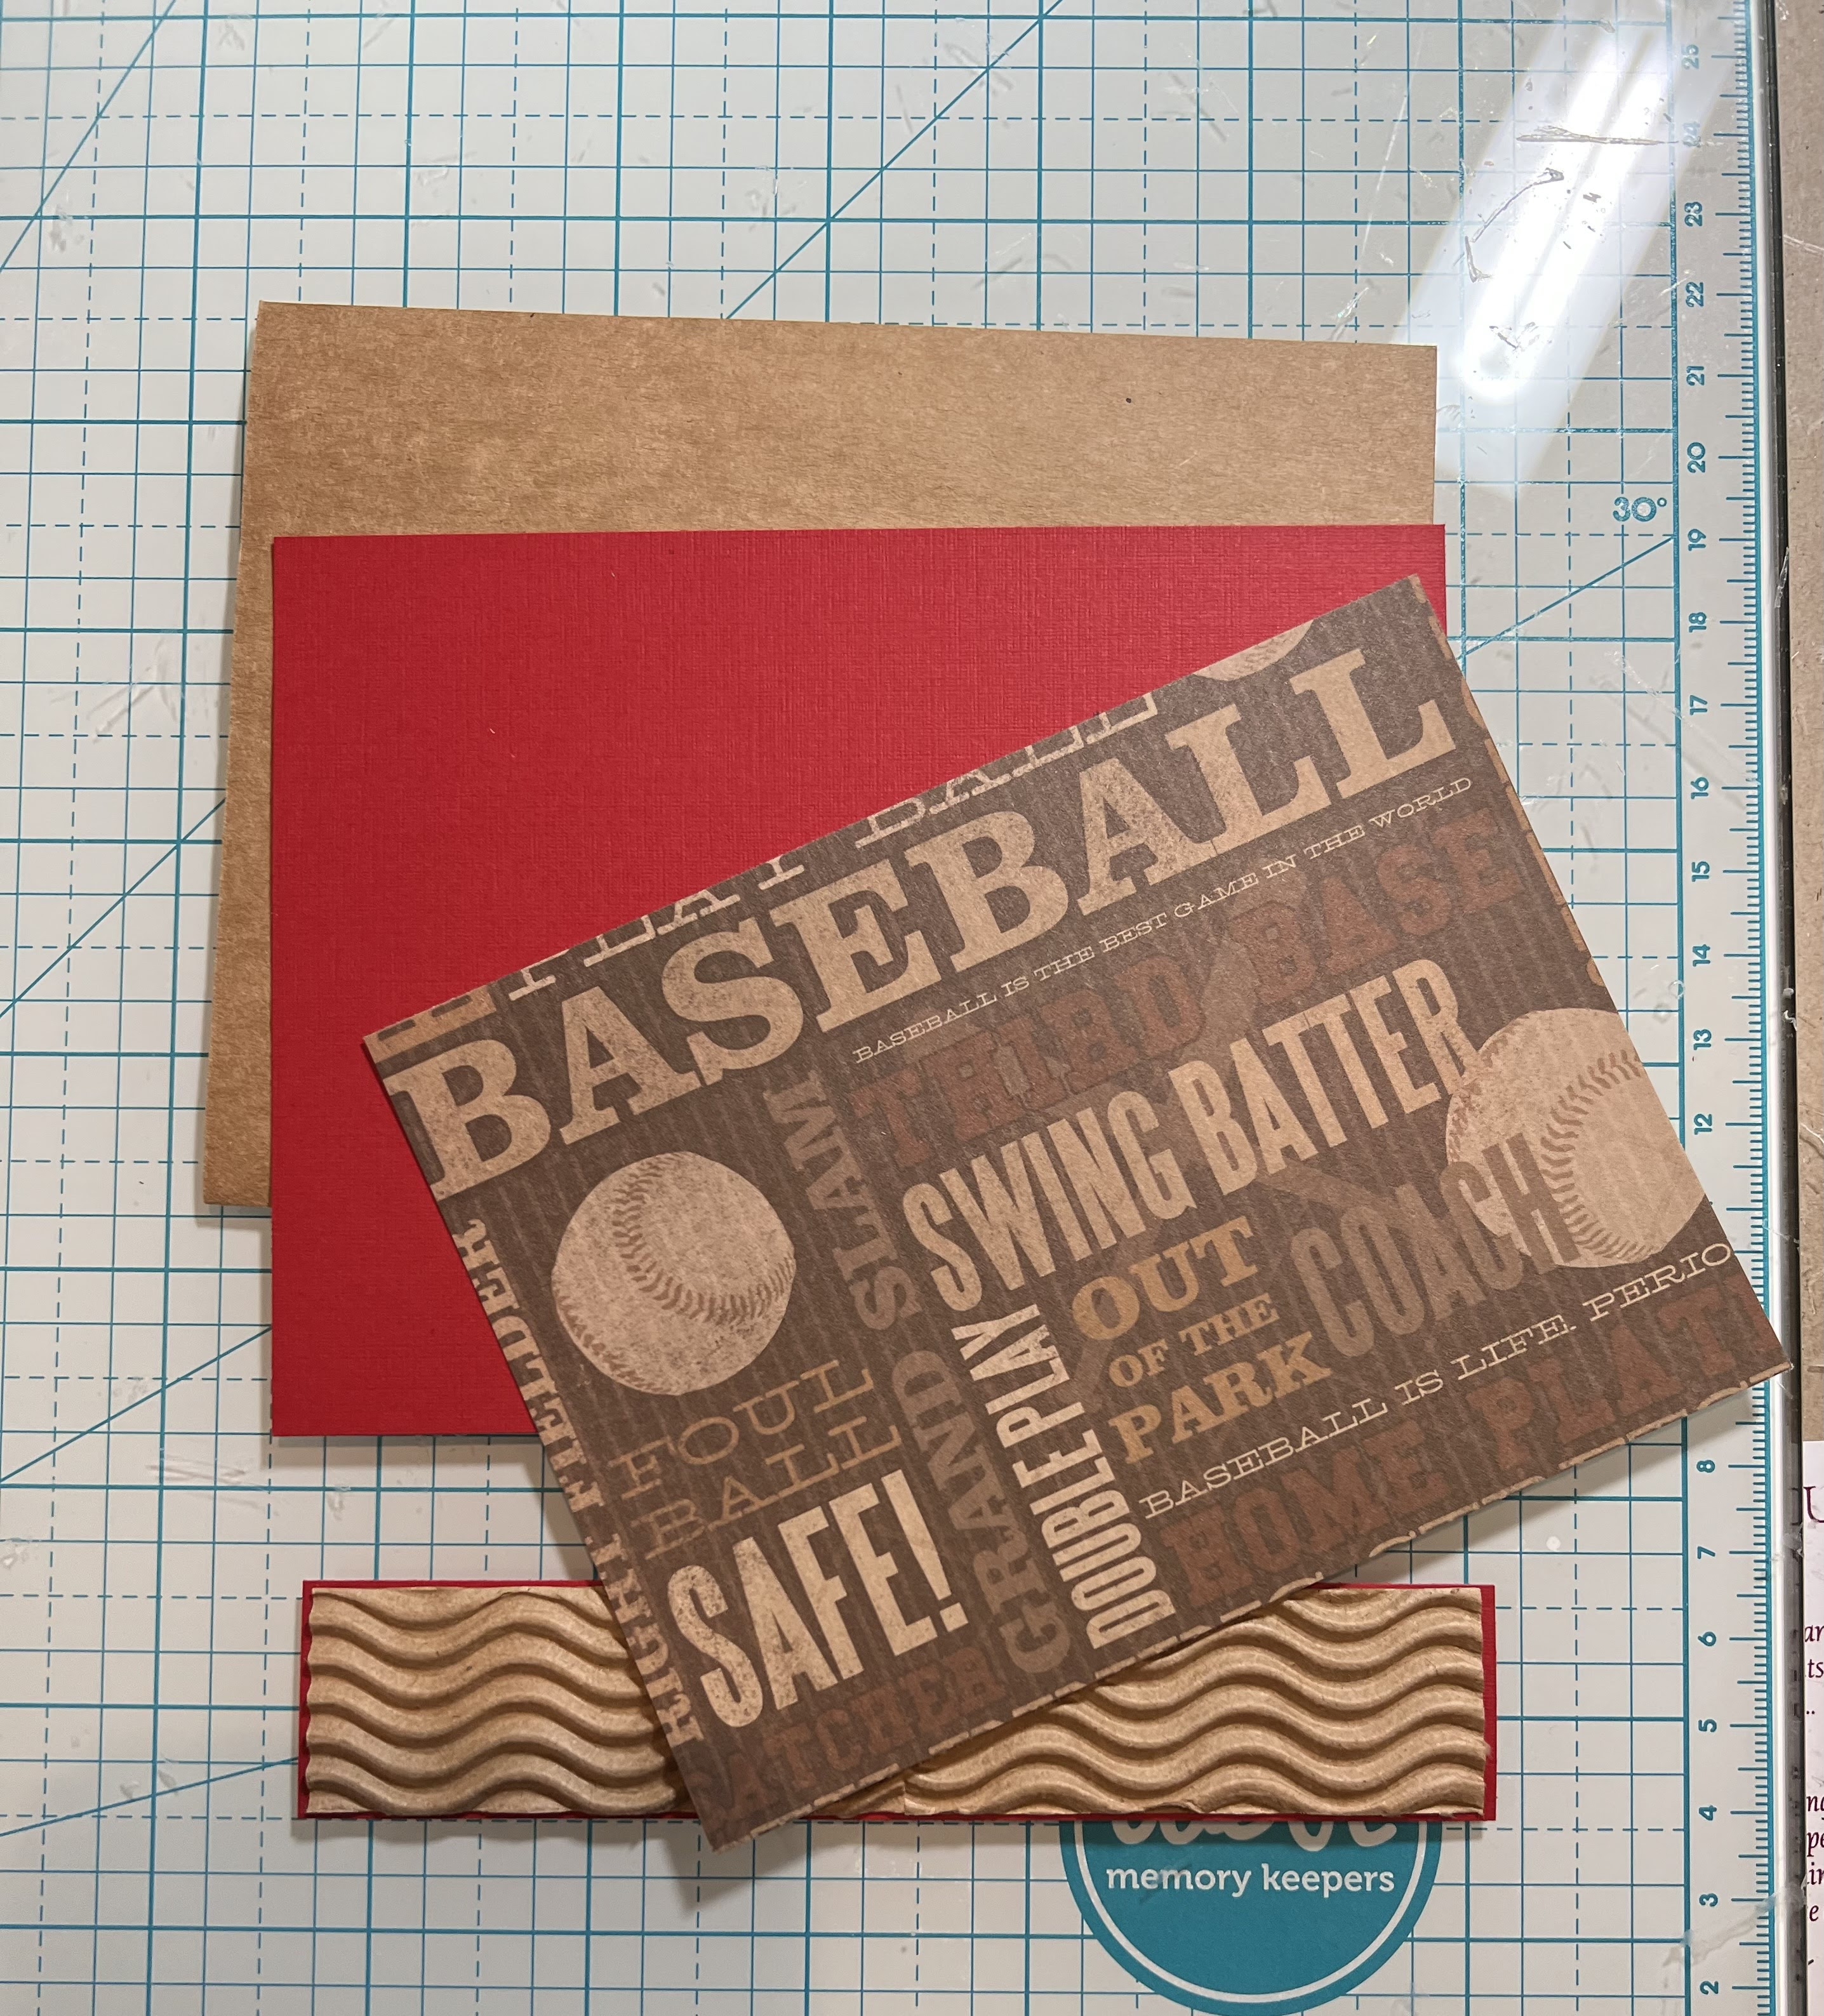
2.  Cut the following: Kraft 5 1/2 x 4 1/4, red card stock 5 3/8 x 4 1/8, Baseball DP 4 x 5 1/4,  a strip of red 1 x 4 1/8 and a piece of corrugated Kraft 7/8 x 4
3.  Glue the red to the kraft base, glue the Baseball DP to the red and next glue the red strip just slightly below center and then add the corrugated kraft strip to the red strip
3.  Put pop dots on the upper and lower part of the baseball and adhere to the card as shown.  Then put pop dots on the player and ball and add him just on top of the baseball

4.  Put glue on the lower half of the front flap and attach the front panel with the baseball

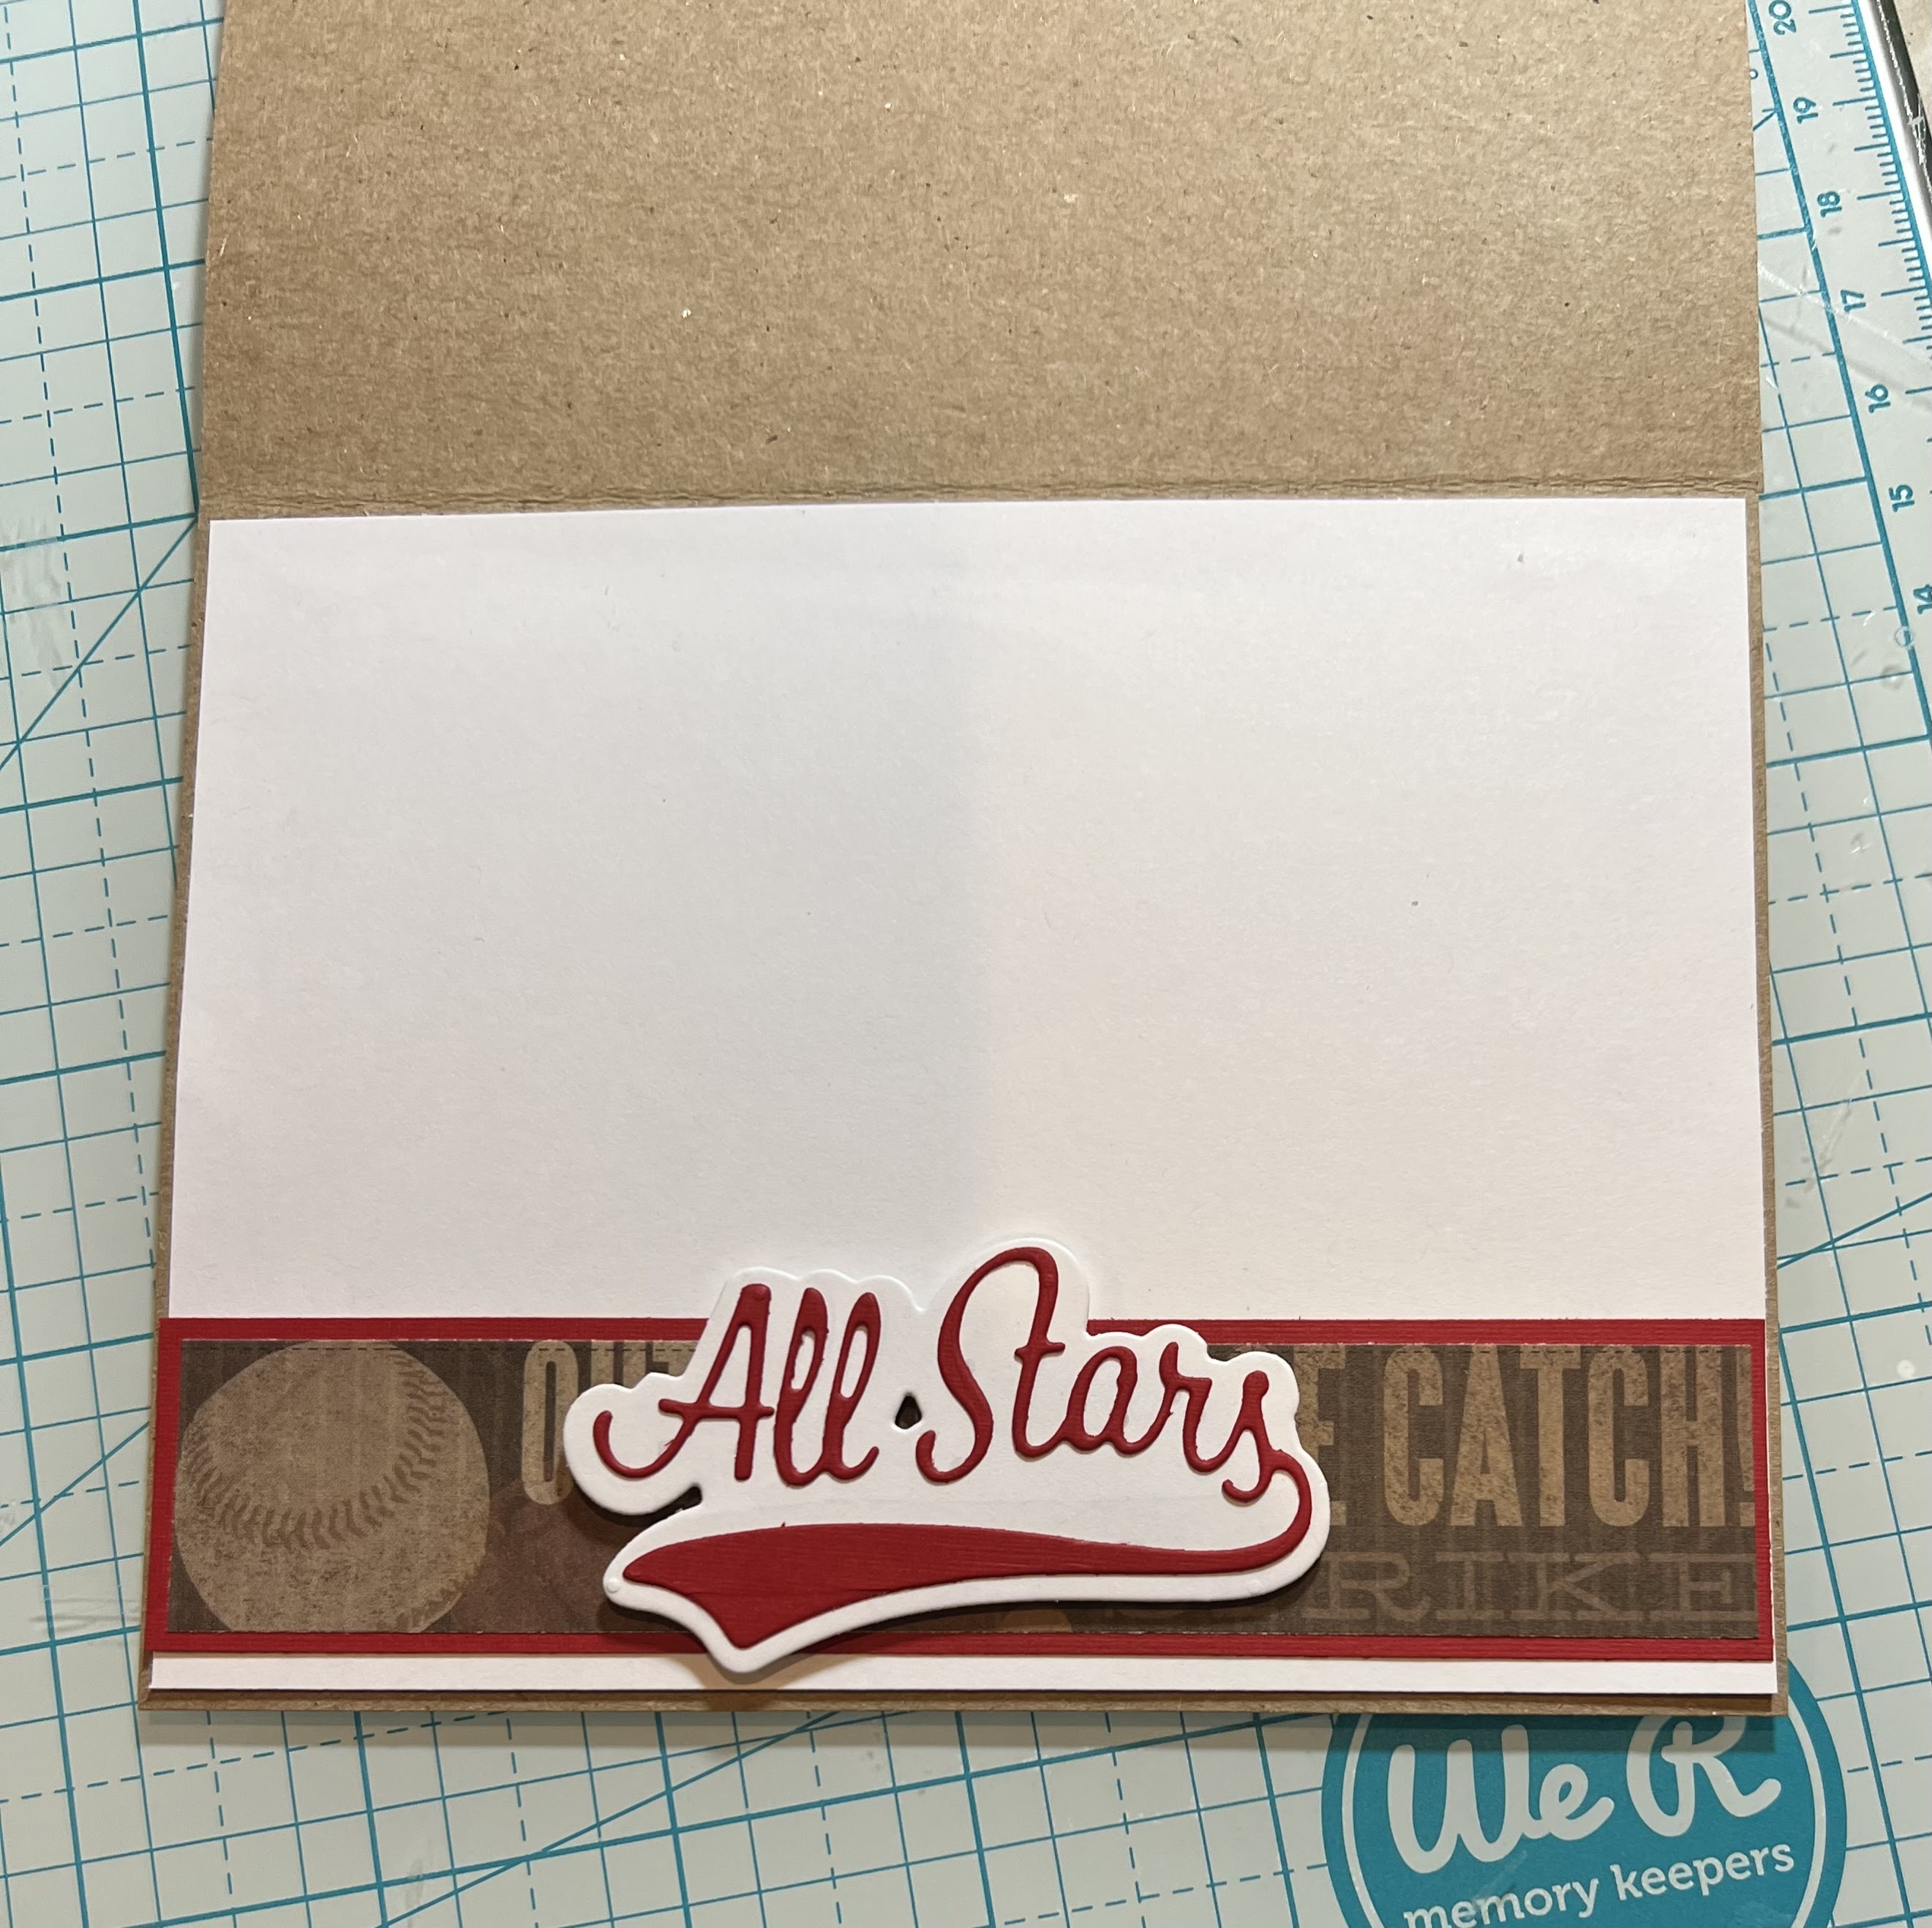
5.  For the inside Cut a piece of white card stock 4 x 5 1/4, red 5 1/4 x 1, and Baseball DP 5 x 3/4 and Assemble the All Star with Shadow
6.  Glue the white card stock to the inside, glue the red strip 1/8 of an inch from the bottom, glue down the Baseball DP to the red strip and then pop up the All Star (This will become the stopper for the easel pop up as seen below.  I added a couple of tickets that I stamped and cut out for additional interest.  The card is complete

CottageCutz Products


Here is the new release so please check it out in our store today!!


We have more inspiration on our YouTube Channel check it out HERE
Thanks so much for stopping by!  And I will see you next Thursday.

Blessings and Take Care


Wednesday, August 10, 2022

Down on the Farm


It's time for another CottageCutz YouTube video and today, I am bringing you something a little different.  Did you know that CottageCutz has scene dies?  Not only are they a quick and easy way to create a card on their own, but if you make a few adjustments, you can add other images to them for an entirely different look.  

That's what I have done today.  I used the "Fall Farm Scene" die and paired it with the "Kitties w/Daisies and "Fresh Strawberry Patch" dies.  I thought it would be fun to keep my scene white (even easier), you certainly can color it in.  I think the pop of color to images I added, really amplifies the sentiment.  What do you think? I hope you'll head over to watch my video to see I used to really make the background stand out even though it's white.

I will leave you with the links to the products I used for easy shopping. Before I go, I want to mention the new release "Baseball and Golf"  which is available now in the Scrapping Cottage.  It's perfect for creating cards for those guys in your life, both big and small, who enjoy sports.

Until next time.... Marla


Tuesday, August 09, 2022

Donut Worry Be Happy Card

Happy TuesDIE Cottage Cutz Friends!
Melinda here with you on on another sweet TuesDIE. Today I am sharing a super cute card I created, featuring dies from the Strawberries and Bees release
Here is a look at my completed card. It is a top folding A-4 Card. The base is a white cardstock. 
I used some fun patterned papers from Doodlebug.

I started by cutting out some donuts and coffee cup from the Strawberry Treats 3 die set. I cut them in plain white cardstock. I then set to coloring my pieces in.

Once they were colored, I assembled them onto a Pierced Circle Set mat. These pierced circle mats came from that die set. I layered that mat onto the largest circle cut from white cardstock.

I then added the donut paper mat and a strip of tiny hearts to the center.


I added a twine bow and put a Dew Drop in the center for an extra decorative touch.

Here you can see I added some foam tape between the circle layers from the Pierced Circle Set to give them some lift.

Here is a closer look at the cute sentiment I added. I printed from my computer and then attached it to the smallest rectangle in the Nested Scallop Rectangle Set. It truly is a motto to live....and maybe eat by....lol!


Dies I Used


Be sure to check it out and all the amazing creations from the design team!


Also, don't forget to head over to the CottageCutz YouTube channel and check out all of the amazing projects on there. Our video team is doing a wonderful job of filling the channel with all sorts of creative content! You don't want to miss it!


Well that about covers it for today! Until the next time, have a wonderfully craft-die day!
Melinda Beltran

Monday, August 08, 2022

Golfing Double Z-Fold


Happy Monday ~ I hope you all had a craft-astic weekend!  Guest Designer Kris here with a Double Z-Fold Box Card FORE you!  I love a good pun!  Today I have used 7 dies from the new AUGUST RELEASE!  This release is so great for those masculine cards - especially if they like golf or baseball!  And for a limited time you can get the whole release bundle at 50% OFF!!  Individual dies from this release are 30% off! 


The Z-Fold card is so easy to make, and this one is a step up because I added "shelves" in the li'l corner box to adhere even more images/die-cutz to!  

HOW I MADE IT:

1.  I cut a piece of light blue cardstock at 4-1/4" x 11" - then scored at 2-3/4" (mountain fold) and 5-1/2" (valley fold)

2.  I cut a green strip (for the front Z) at 2-1/4" x 11" and scored at 2-3/4"(valley fold) and 5-1/2"(mountain fold)  See photo below.

3.  I used the die pictured below from the Grass Slimline set to cut the top of the green Z strip.  The strip will be a bit longer than the die, so I cut to one of the score lines, then moved the die down to cut the rest.


4.  Next, I cut a piece of patterned green paper to 3-1/4" x 11" and scored at 2-3/4" and 5-1/2".  

5.  I used the die pictured below from the Hills Slimline set to cut all the way across the top of that strip, by doing the same technique.... cutting to one of the score lines, then moving the die down and cutting the remainder.  (see photos below)


6.  I attached the patterned paper to the blue card base, aligning edges at sides and bottom.  


7.  Next, I added tape to the sections pictured below on back of the green grassy strip.  You don't want tape to extend past that first score line on your card base, so if it helps, you can place a pencil mark on the backside of your grassy layer at 2-3/4" so you know where to stop taping.  ☺


8.  Adhere to card as pictured below.


9.  Cut 2 or 3 shelves to insert in that "box" that the short Z creates.  I cut (3) at 1-1/4" x 3-3/4" and scored at 1/2" in from each end.

10.  Miter the top of the side flaps.  Then cut the tops using the straightest section of the grass die.


11.  I added glue to the side flaps and (I tried to) evenly space them from back to front of the "box"


12.  If you want, you can cut a piece of cardstock to 4" x 5-1/4" for the back side of card for writing a message.

13.  All that's left is die-cutting my pieces. gluing them together and adhering to my card!  
  • For all the front Z panel die-cuts, I added foam dots to the backs to adhere them
  • For the elements on the shelves inside the "box" I glued them to strips of heavy acetate so I could place them up a li'l higher and provide more stability to them.  
  • For the words and silhouette golfer, I glued them directly onto the card base. 


PRODUCTS I USED:


I hope you enjoyed my card today!  
Have a craft-astic week :) 

~Kristine