Thursday, April 07, 2022

Black Swan

 Hello CottageCutz Friends

We have a new release and it is on sale!!

for a limited time...
Australian Friends Release
Save 50% on Bundle
Save 30% on Individual Designs
14 New CottageCutz Designs

Today, I am using the new Swan die and I just love how this card turned out!
Design Steps:
1.  Use the Swan die and cut out the pieces: black, blue, white, green, brown, and grey.  Shade the swan and the other pieces with inks and Copic Markers.  Use the Pierced Wide Circle Frame die (the largest) and cut it out of white and black card stock.  Use the center of the white circle and blend in grass and sky using inks
3.  Glue the pieces of the swan, rocks, pond and grasses to the inked circle as shown above
3.  Back the inked white circle with the black circle and glue the black frame on top of the white frame.  I did this for a little more stability 
4.  I used a black A2 card base and some DP cut 4 1/8 x 5 3/8.  Glue the patterned DP to the black card base
5.  Glue the circle to the middle of the DP.  Stamp your sentiment and layer onto black card stock.  Glue the sentiment to the card as shown below and your card is complete

CottageCutz Products


We have more inspiration on our YouTube Channel check it out HERE
Thanks so much for stopping by!  And I will see you next Thursday.

Blessings and Take Care


Tuesday, April 05, 2022

Happy Birthday Slimline Baby Animal Cupcakes Card

Happy Terrific TuesDIE Scrapping Cottage friends!
Melinda here with you for another fun Tuesday. My project is my first ever slimline card! Here's what I made.

I just loved having a go of this great sized card!

This card is very easy to duplicate!

I started by scoring my base. I took an 8.5 x 11 paper and scored it right down the middle at 4.25.


I went on to cut out some mats as well as the scallop stitched slimline piece.


Here are those pieces assemble.

Next I cut all of the main facial features with white cardstock. I was then able to color the pieces I wanted.


Here's a look at  my completed baby animal cupcakes. I added those toppings to each. Super cute!


Here's a shot showing how I assembled them onto the scallop stitched mat. You can see in this photo that I added some of the candles and a whole bunch of the little circles that cutout. I just used my markers to color them all.


Here's a closer look at the finished card.


And another view as well. These cupcakes are adorable! So many uses for these pieces! Like I said, this is one card that would be super easy to reproduce and have a lot of fun doing it. 
Here is one last look at the card again! I enjoyed making this slimline card and see many more in my crafty future! These dies make it so  much fun to create!


And speaking of fun dies.... Have you seen the newest release!!! 
ADORABLE FROM DOWN UNDER!
Hurry for a limited time...
New CottageCutz 
Australian Friends Release
Save 50% on Bundle
Save 30% on Individual Designs
14 New CottageCutz Designs


The Dies I used to create this project:


In case you didn't hear, The CottageCutz YouTube channel is filling up with beautiful projects and great how-tos!  Head over and check out the latest video! 

Well that about covers it for today! Until the next time, have a wonderfully crafty day!
Melinda Beltran

Monday, April 04, 2022

Spring

Hi everyone welcome Monday.  I am here sharing my card using Hello Spring Bunny Cottage.

I scored my white card to 5x6 and then used a gingham patterned paper to cover my card front.


I die cut the pieces on XpressIT paper and colored the images using my copics but not all the images 

I used teal cardstock to mat the cottage with to bring the color to life and then colored the rooftop and door with my copics.


Saturday, April 02, 2022

Easter Pop-Up Card

Hello CottageCutz friends! Thanks for taking the time to stop and visit with us today. It's Mary Marsh here bringing you the Saturday edition of the Blog.

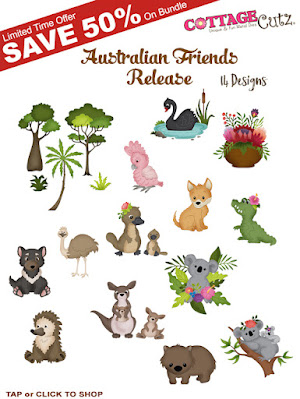
It's release time!!! The Australian Friends release is in the online store.  You can pick up the bundle at 50% off the list price or 30% off each individual die. These cute little animals are so perfect for all your cardmaking styles and occasions. The DT will begin showing samples in the next week. 

For your viewing pleasure today, I am featuring a pop-up card using the Bunny Express Engine die. So, let's get started on some details of how I created my card.  

Design Steps: 

I started my card by cutting the bunny engine. I used the packaging as an assist to help with the colors. I use colored cardstock on my card creations, but you can also cut in white then color with your favorite coloring medium. 
Then I looked through my designer papers for a fun pattern that would work for a whimsical Easter card. I found this dotted paper that I thought was cute and decided to go with it. The coordinating light purple cardstock would work well on the card inside to display the engine when it pops-up. 
Freesia Card Base: 4 1/4" x 5 1/2"
Misty Moonlight Layering Panel: 4 1/8" x 5 3/8"
Designer Paper Layer: 3 7/8" x 5 1/8"

Next, I worked on my pop-up panel mechanism. I started with cardstock that measures 3 1/2" x 4 1/4". I scored it at 3/4", 1 1/2", 2 1/4" and 3". I used my bone folder on the score lines. 
Then I added some red line tape to the end of the score lines- it's the 1/2" part at the end of the cardstock. 
I removed the top layer to expose the tape and then closed the cardstock to form the mechanism for the pop-up. It should look like a cube of sorts. 
Before I attach the pop-up mechanism, I worked on the inside of the card. I stamped a sentiment on white cardstock and added a small panel of designer paper to the bottom. 
White cardstock: 4" x 5 1/4"
Designer Paper: 1/2" x 4"
Misty Moonlight layer: 5/8" x 4"
Now I can attach the pop-up mechanism. I added red line tape to the section that I wanted to face down on the card. It's the part where the seam is, and I didn't want that to show. 
I then attached the mechanism to the inside of the card. It should sit just below the score line, so it doesn't interfere with the card when it opens. I added more red line tape to the back of the mechanism that will attached to the card base. 
Removed the tape and closed the card to secure the back of the mechanism to the card base. 
I moved back to the card front to attach the designer paper. I added the Happy Easter sentiment from the Spring Sentiments die. It's cut in the misty moonlight cardstock. I cut an oval from the freesia cardstock and attached to the card front, with dimensional adhesive. 
I finished off the inside of the card by adding my train images to the pop-up mechanism. I decided to add some clouds as the background for the train. I stenciled with distress inks. 
And, that's my sample for this week. See you next Saturday.

Reminder: Our YouTube Channel has a new video from Jen Hartsgrove. There is a giveaway for being a subscriber, liking the video and leaving a comment. Click here.


dies I used to create card: