Friday, March 25, 2022

Patients


Hi everyone, I am here on Friday after being under the weather so I thought it would be perfect making a card with these adorable bears.
How cute are these Bear Patients ailing with Stitched Mushrooms

These cuties come with little soup cans, cast for your arm and more.  I used the stitched mushrooms just because to me they were so cute

I used acetate to make a completely see thru card and added patterned paper to the inside of the card

I hope everyone enjoyed my post and I will return Monday when I am more together. 


Thursday, March 24, 2022

Spring Sheep

 Hello Friends

It is Pam sharing with you today!

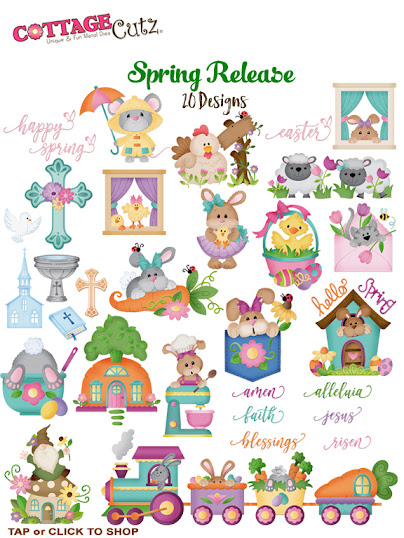
I have one more Easter card to share with you today.  I am using the sweet little Spring Sheep die set to create the card.


Design Steps:
1.  Start by cutting a rectangle out of white card stock using the Pinking Shear Edge Slimline second from the largest. Leaving the die in place, to create a nice white border, use a blending brush and some blue and soft green inks to blend out the background
2.  Cut out some green grass using the Grass Slimline die and cut it down to create the grassy hills
3.  Using the Picket Fence Slimline cut it on white then trim to fit the card.  Cut the Tree of Nature die with brown for the trunk and green for the leaves
4.  Glue the tree in the background and then add the fence tucked under the grass
5.  Cut out the flowers using the Spring Meadow die and pink card stock.  Glue the flowers and leaves to the tree.  The little sheep are cut from the new release Spring Sheep die.  I cut them in white, grey, pink and black.  I assembled with a fine tip glue and added a Sakura Glaze black to the eyes and hooves.  Tuck the little sheep into the grass as shown
6.  To finish the card glue to a white card base which measures 3 1/4 x 8 1/4.  I added Stickles to the flower centers. Stamped my sentiment then layered onto pink card stock.  Glued sentiment to the front as shown above and last made some little bluebirds to sit on the sentiment and the tree 

CottageCutz Products


We have more inspiration on our YouTube Channel check it out HERE
Thanks so much for stopping by!  And I will see you next Thursday.

Blessings and Take Care


Wednesday, March 23, 2022

Create a Coordinating Background Without Stencil


Hello my crafty friends.  Marla here with another YouTube Video tutorial and GIVEAWAY.  On the channel I will be sharing my tips and tricks for creating a custom background to coordinate with your CottageCutz images.

The Spring Gnome Cottage, which is part of the Spring Release is the anchor to this delightful card.  If you would like a chance to win this adorable die, head over and watch the video to see how you can win.  

If you watched my last video and entered, I will be announcing the winner of the Easter Cross w/ Flowers die.  Who knows, it could be you.

Until next time...... Marla


Tuesday, March 22, 2022

Lollipop Box and Cards Set

Happy Terrific TuesDIE Scrapping Cottage friends!
Melinda here with you for another fun Tuesday. My project features a couple of dies from the marvelous new SPRING RELEASE along with some others!  Here's what I created.

I created a set of three 4.25 x 4.25 note cards and a little "Lolli Box"

To create the Lolli Box

I started with a square piece of paper that measures 3.75". I scored it on all four sides at 1.25"
Once all four sides are scored, I proceeded to make some cuts.


Here is how I trimmed it. I cut a slit up to the first line on the score line that is to the right. I then snipped a slight angle off on both sides of the corner. Then I turned the piece a quarter turn to the right and repeated this process. I did for all four sides. I also trimmed just a bit off of each corner. This way it will fold up much easier and remain flush.

Once all the cutting was done, I added adhesive to the opposite side of the cut flaps. See photo. Notice the tabs are bent forward. You can see the adhesive and the way I cut them at an angle.

I then layered a white home onto a kraft cardstock home. The only reason I did this is so that looking at the finished box from the back side will make this seem much more cohesive.

Here I am coloring the bird houses.

Here's a view of the box once it is assembled. It does fit the lollipop pretty good. It is a tootsie roll lollipop. 


Here is where I added mats to 3 of the sides. There are just 1" mats.

Here's a look as I was assembling the die pieces to create the adorable Bunny Cottage. Once I finished, I glued it to the front of the box.

Here is the finished Lollibox. I added the "tree and sign" from the Spring Chicken die set. The top of the tree is from the Carrot House die. I cut it out in some cute Doodlebug patterned paper.

Here's a closer look at the Pink Home. I put a sweet little brown bunny in this one. I added some dew drops to the top left corner of each card. Just for a little something extra~


Here's a closer look at the Purple Home. I went with a gray bunny here.


Here is a closeup of the card with the Yellow home. I did another little brown bunny here.


Here is one last look at the cards and the Lolli box. I think this set turned out very nice. 


The Dies I used to create this project:


In case you didn't hear, The CottageCutz YouTube channel is up and running.  Head over and check out the latest video! There is a giveaway for subscribing too!

Well that about covers it for today! Until the next time, have a wonderfully crafty day!
Melinda Beltran

Saturday, March 19, 2022

Carrot House

Hello CottageCutz friends! Thanks for taking the time to stop and visit with us today. It's Mary Marsh here bringing you the Saturday edition of the Blog.

The Spring Release with 20 new designs is in the online store. There is a nice combination of both religious and whimsical designs. So perfect for all card makers out there.

And there is still plenty of time to order and get them for your Easter cardmaking. Today for your viewing pleasure, I have a whimsical card for Easter using the new Carrot House die. So, let's get started with some details on how I created this card. 

Design Steps:

I started my card by cutting out the Carrot House image. I used the coloring from the packaging as my guide. I thought they were perfect colors for a Spring card. I also use cardstock for my images. You can also cut in white cardstock then use your favorite coloring medium. 
Next, I cut the bunny phrase from the Spring Sentiments die. I used a grape cardstock.  
I wanted to do something a bit different on the card front, so I looked through my embossing folders for one that would work. I found this older Scrollwork folder from Provocraft. I embossed with a medium blue cardstock. 
Blue Embossed Panel: 4 1/4" x 5 1/2"
White card base: 4 1/4" x 5 1/2"
Now that my elements are prepared, I am ready to start card assembly. I attached the carrot house image with dimensional adhesive. The walkway stones are attached with Art Glitter glue. After I attached the image, I realized I placed it on the debossed side. I still think it looks okay though. 
 

I attached the Bunny & Home phrase with the Art Glitter Glue. The Home phrase is from a retired die - Home Sweet Home Phrase. I didn't realize it wasn't in stock any longer. But we do have another die with similar font. It's the "Our New Home" die. And it is on the website. 

To complete my card, I added a few bunny images from the Spring Sentiments die. 
Reminder: Our new YouTube video artist has just made her debut on the CottageCutz YouTube channel. There is a giveaway for being a subscriber, liking the video and leaving a comment. Click here.

dies I used to create card: