Monday, February 21, 2022

Shaker Slimline

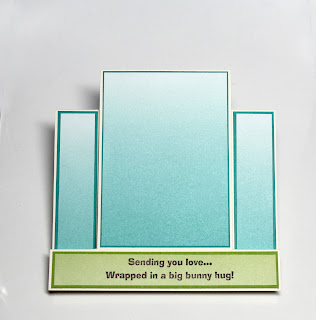
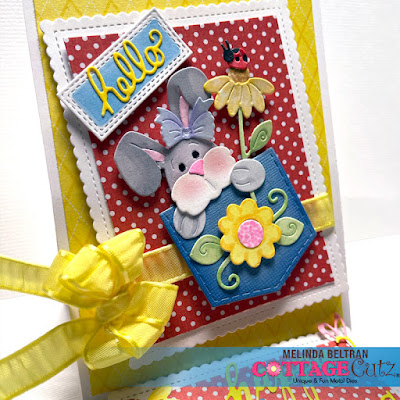
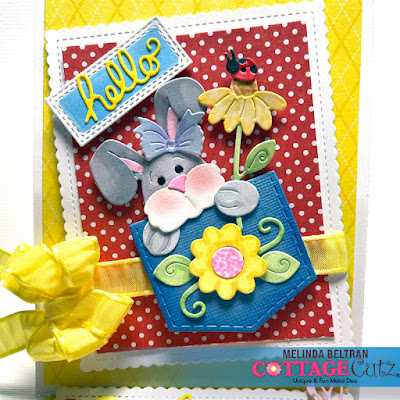
Welcome back to the Scrappin Cottage blog.  Today I have created a slimline shaker using Miss Spring Bunny with the Whimsical Heart slimline die.

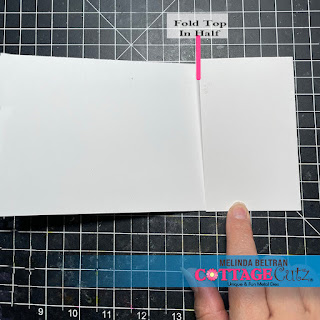
1.  Diecut using a white piece of cardstock using the slimline die.  Next punch out the hears that may be remaining.  I chose to leave a few hears sparingly along the slimline for a different look.


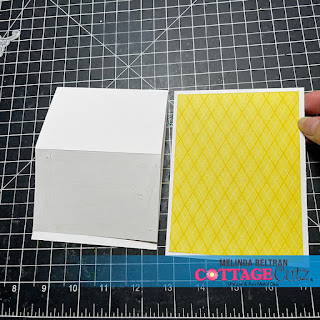
2.  I next diecut the slimline die using a piece of black foam.  This allows for height when creating the shaker portions for the card.

3.  Add your shaker piece in the hearts as desired.  You could have made the entire card a shaker by adding the foam along the outer edge the die.

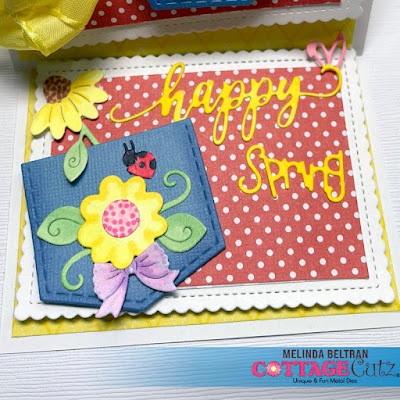
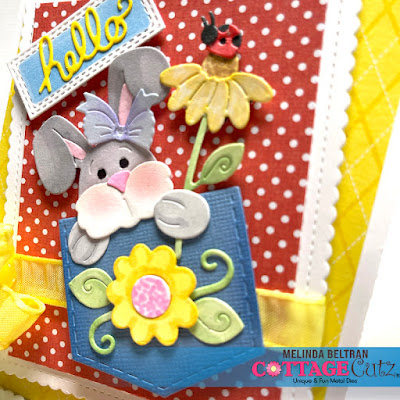
4.  Now take your Miss Spring Bunny and diecut and embellish as desired.  I used some mulberry paper to make my bunny to give it a furry look and feel, but the weight of the die machine actually pressed the mulberry paper.
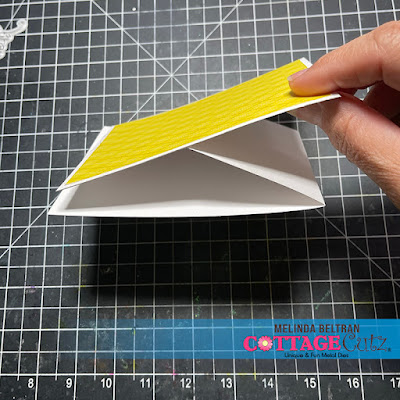
To complete my card I pieced and glued all the parts together. 

In case you didn't hear, The CottageCutz YouTube channel is up and running.  Head over and check out the latest video! There is a giveaway for subscribing too!

Saturday, February 19, 2022

Miss Bunny Sends Hugs

Hello CottageCutz friends! Thanks for taking the time to stop and visit with us today. It's Mary Marsh here bringing you the Saturday edition of the Blog.

IT'S NEW RELEASE TIME! The Spring Release with 20 new designs is in the online store. The individual dies are currently at 30% off. There is a nice combination of both religious and whimsical designs. So perfect for all card makers out there.

And the dies don't have to be used strictly for Spring or Easter. The team has done Valentine, Birthday and Thinking of You cards with these new dies. Take a look back on the Blog for lots of ideas.

And because it's President's Day weekend, we have a sale going on with up to 60% off selected dies. So, check out the store early for best selections. 

Today, I have for your viewing pleasure a whimsical card for Easter featuring the new Miss Spring Bunny die. So, let's get started with some details on how I created my card. 

Design Steps:

I decided to make a fun fold card for today's post. This fold is called a center step. I bought these precut cardstock panels at my local stamp store. I felt it was a bonus when I spotted them.  But I will give a link that shows how to cut this particular fold. Here is a link to a Splitcoaststampers tutorial- there are photos as well as a YouTube video. 

I cut blue and green ombre designer paper for the center and side panels and layered with the coordinating cardstock. The center panel is 4 3/8" x 3 1/4" and the side panels are 1" x 4 3/8". 
I attached the panels to the card base with double sided tape. 
I cut my bunny image with various colors of cardstock. I used colors that would coordinate with the designer paper panels and also project a spring vibe. 
Next, I stamped my sentiment in a grape ink. It was a bit tricky because the panel was already attached and I didn't want to remove it. 

My stamp is a red rubber wood base, so I had to use my stamp-a-ma-jig for alignment. When I use this method, I only get one shot at inking because I can never line it up straight again. It didn't stamp quite as dark as I wanted but I think it's ok. 
I attached my bunny image with glue dots and double-sided tape. 
I decided to add a hugs phrase on the image panel. I used the Hugs w/Shadow die. Then for the side panels I added some tulips. I cut them from the Spring Kitten w/Envelope die in a light purple cardstock. 
I finished off my card by scattering a few butterflies and adding a few hearts on the sentiment panel.   And that's my card for this week. I hope I have given you a way to use this ever so cute little bunny. See you next Saturday!!

Reminder: Our YouTube channel is active again. Check out the latest video from Marla, and we are having a giveaway for subscribing, liking the video and giving it a thumbs up. Click here. 

dies I used to create card:


Friday, February 18, 2022

Happy Easter

Hello CottageCutz friends! Thanks for taking the time to stop and visit with us today. It's Mary Marsh here bringing you the Friday edition of the Blog.

IT'S NEW RELEASE TIME! The Spring Release with 20 new designs is in the online store. The individual dies are currently at 30% off. There is a nice combination of both religious and whimsical designs. So perfect for all card makers out there. 

And the dies don't have to be used strictly for Spring or Easter. The team has done Valentine, Birthday and Thinking of You cards with these new dies. Take a look back on the Blog for lots of ideas.

And because it's President's Day weekend, we have a sale going on with up to 60% off selected dies. So, check out the store early for best selections.

Today, I have for your viewing pleasure a card for Easter featuring the new Spring Window w/Peekers (30% off) using just the bunny image and also an older die Fresh Spring Floral. You can pick up this older die for 50% off. 

I cut the wreath in a soft green shade of cardstock. I decorated it with eggs using the new Spring Chickee in Basket die. Cut the little bunny in a gray cardstock and stamped my Easter sentiment and framed it with the Pierced Wide Rectangle die. 

Looks like that one isn't available any longer, but you can easily make a frame with the Pierced Rectangle or Stitched Rectangle die. Simply cut a piece of cardstock 3 3/4" by 4 3/4" and use the largest of either of these dies.  Center the die on your cardstock and run through your die cutting machine. It will make a nice frame for you.

That's my sample for today. See you tomorrow with another Easter card idea. 

Reminder: Our YouTube channel is active again. Check out the latest video from Marla, and we are having a giveaway for subscribing, liking the video and giving it a thumbs up. Click here. 

dies I used to create card:


Thursday, February 17, 2022

Risen

 Hello Friends

It is Pam sharing with you today.  I have another Easter card with a Vintage twist from our wonderful Spring Release.  I don't know if you have check out the crosses in our store or not.  But if you haven't there are some really gorgeous ones available in many of the spring releases past and present.  Just search cross and you will see all of the beautiful cross dies available.


Design Steps:

1.  Use and A2 off white card base and distress the edges with a distress tool and then add a vintage ink to the edge
2.  Cut out the pieces for the front using the Flourish 1Easter Cross w/Flowers and Spring Meadow.  Glue your cross together.  Cut a piece of DP Script paper 2 1/4 x  3 1/4 use a corner rounder and then distress the edges the same as the base of the card
3.  Cut a piece of DP dark green 4 x 3 and a piece of DP Script 4 x 3 scallop if you would like.  Wrap a piece of purple lace around the pieces as shown above and then glue to the front of the card base  
4.  Glue down your rectangle of the script DP and then glue down the flourish
5.  Glue the cross to the script DP rectangle as show above Add your little purple flowers to the floursih and the flowers on the cross
6.  Using the Faith Sentiments cut out risen in metallic silver card stock.  I cut it out twice and glued them together.  Add it to the card front along with the purple butterflies as shown below

CottageCutz Products


Don't forget to check out the new Spring Release.  These sweet dies won't last long!
We have more inspiration on our YouTube Channel check it out HERE
Thanks so much for stopping by!  And I will see you next Thursday.

Blessings and Take Care
Pam

Tuesday, February 15, 2022

Hello Spring Peeker Bunny Easel Card

Happy Terrific TuesDIE Scrapping Cottage friends!
Melinda here with you today. I am super excited to be sharing with you today. Tuesdays will be my new day to post! So today I am sharing a cute little card I created with dies from the new SPRING RELEASE! Here's my project.

I created this cute Easel card featuring the Bunny in Pocket Die.


To create the Easel Fold

I started with a piece of cardstock measuring 4.25 x 11. That is exactly half of a letter size piece of cardstock. I folded it at the 5.5 mark. That is in half. I then folded the "top" or the right side in half again. I simply folded it to the center fold line.

Here's a picture of the two folds. It is hard to se the center fold on the left, but it is there.

Next I took a piece of white cardstock and cut it to 4.25 x 5.5. I added a pretty patterned paper mat to the top. That mat measures 4 x 5.25. I put adhesive on the bottom half only of the top folding. Next I put the mat onto the top part and lined up the bottom and sides. So only half of the mat is adhered to the base.

Here's a view of the side of the card with the base. This shows you that the mat is only attached to that bottom half. Once that is done, I went ahead and assembled my layers and the main die onto the card.

Here is the panel I added to the "bottom inside" of the card. This piece acts as a stopper of sorts for the top piece. It allows for that piece to be on top.


Here you can see all the fun dimension the layers have. I put some foam tape behind the mats to get them a little extra dimension. I added a sweet little bow in a matching yellow ribbon.

All of these pieces with the exception of the pocket started out as plain white cardstock. I have used this sweet little die in a couple other projects, but this one has a gray bunny. The others I colored that sweet little bunny in more of a brown. If you would like to see those projects head over to that blog post. CLICK HERE.


Here's another look at my finished project.


The Dies I used to create this project:


I used the Stitched Scallop version. That one is currently unavailable, but this is an excellent alternative.


In case you didn't hear, The CottageCutz YouTube channel is up and running.  Head over and check out the latest video! There is a giveaway for subscribing too!

Well that about covers it for today! Until the next time, have a wonderfully crafty day!
Melinda Beltran