Sunday, January 23, 2022

Happy Spring Kitty with Envelope Card- New Spring Release

Happy Sunday Scrapping Cottage friends!
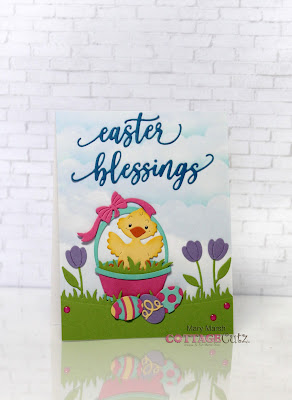
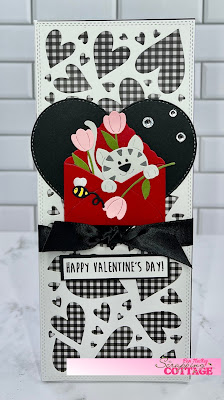
Melinda here with you today. I am super happy to be sharing a little spring inspiration featuring dies from the new SPRING RELEASE! Today's project is a fun and cheerful card. Take Look!
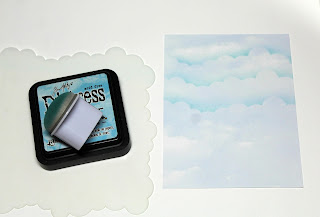
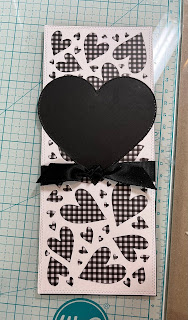
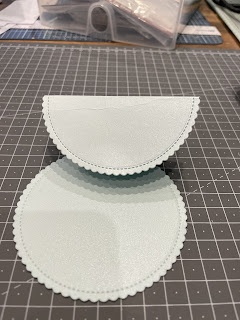
The finished card is a top folding US-A4 card base. I used some regular white cardstock. 
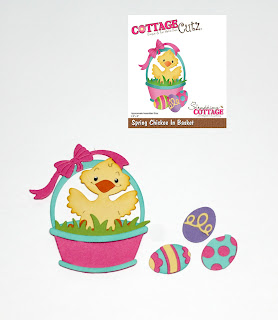
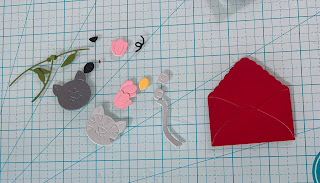
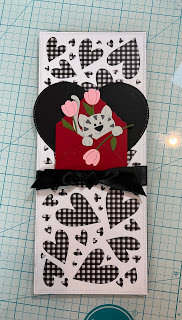
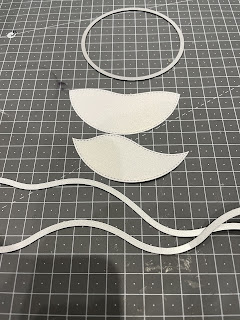
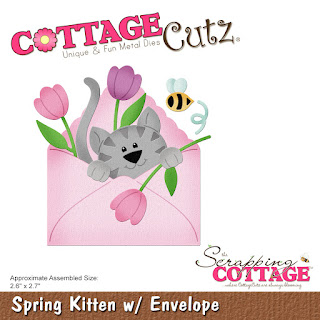
The main focus of my card is the adorable new Spring Kitten w/Envelope Die. It is part of the fantastic new Spring Release! I started by cutting out my die pieces in white cardstock. I then colored my various pieces in with my markers. I did also cut out the pieces in a light yellow cardstock as well as a patterned paper from Doodlebug. 

Here's a quick look at the envelope pieces in the yellow and patterned paper.

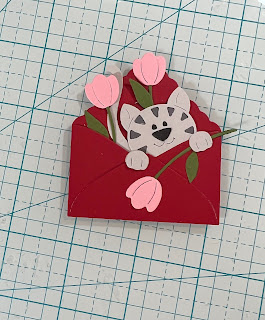
I decided to make a "liner" for the inside flap of my envelope with the patterned paper. I simply cut off the flap and then slid it under the yellow envelope piece. I then started building the scene by adding that adorable little kitty.

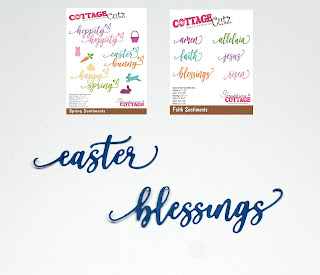
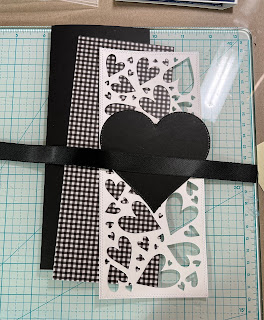
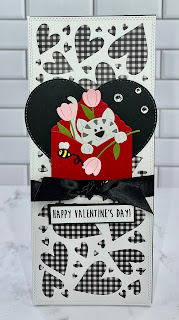
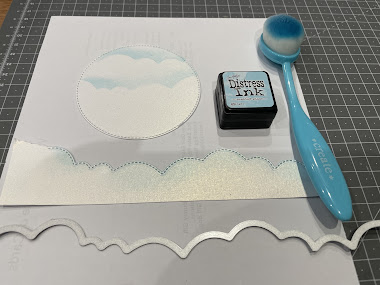
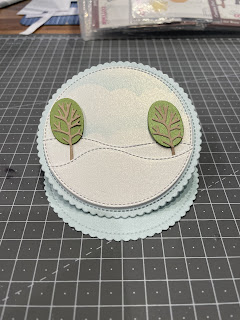
I assembled the kitty holding the flowers and added that onto the scallop stitched rectangle with a patterned paper mat. I then used the largest scallop stitched rectangle in the same die set and added a floral patterned paper mat to that. I layered them onto the background mat. To finish off my card I added the Happy and Spring Sentiment from the Spring Sentiments die.


Here is one last look at my finished card.  I think it turned out adorable. Full of springtime happiness! I am looking forward to spreading some cheer to a friend who could really use some!


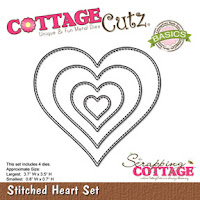
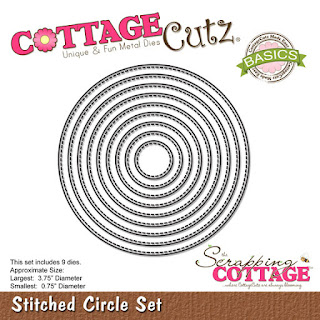
The Dies I used to create this project:


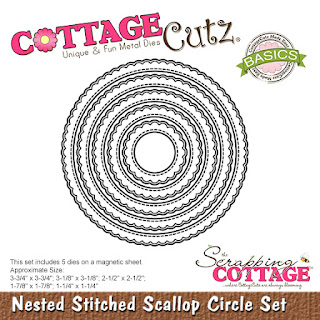
I used the Stitched version but those are not available. These are a great alternative.

In case you didn't hear, The CottageCutz YouTube channel is up and running.  Head over and check out the latest video! There is a giveaway for subscribing too!


Well that about covers it for today! Until the next time, have a wonderfully crafty day!
Melinda Beltran

Saturday, January 22, 2022

Spring Chickee (new dies)

Hello CottageCutz friends! Thanks for taking the time to stop and visit with us today. It's Mary Marsh here bringing you the Saturday edition of the Blog.

IT'S NEW RELEASE TIME! The Spring Release with 20 new designs is in the online store.  You can pick up the entire bundle at a 60% off savings. The individual dies are currently at 30% off

There is a nice combination of both religious and whimsical designs. So perfect for all card makers out there. I do a combination of both designs for my Easter cards. Today, I have a whimsical one for you. 

I am using the new Spring Chickee in Basket die and the phrases are from the Faith Sentiments + the Spring Sentiments dies. So, let's get started with some details of how I created my card. 

Design Steps:
I started with my background. I found designer paper that had a sky and cloud theme. It was a bit light, so I took a cloud stencil and tumbled glass distress ink and deepened the color a bit. 
Next, I cut the main image using different bright cardstocks. I liked the colors used on the packaging, and I kept with that color scheme. 
Then I used the Faith Sentiments & the Spring Sentiments dies for the phrases on my card. I cut them in a royal blue cardstock to allow them to stand out on the background. 
Now that my card elements are prepared, I am ready to start card assembly. I did cut a grass base using the Grass Slimline die and attached with double sided tape. The basket image is attached with the same adhesive.   
My Easter Blessings phrase is attached with Art Glitter glue. I like it because it dries clear. 
To finish off my card, I attached the image panel to a white card base measuring 4 1/4" x 5 1/2". I also added some spring tulips cut from the Spring Kitten w/Envelope die and scattered a few pink enamel dots.  
That's it for me for this week see you again next Saturday!

Reminder: Our YouTube channel is active again. Check out the latest video and we are having a giveaway for subscribing, liking the video and giving it a thumbs up. Click here. 

dies I used to create card:


Friday, January 21, 2022

Easter Blessings


Good morning Cottagcutz fans. It's Wendy bringing you the blog today.I do hope you've had a wonderful week. It's pretty cold out now so I say lets stay in and craft this weekend

Today I'm bringing you a card using the newly release spring dies. They are adorable and they are still on offer at 60% off the entire release. You can find them here

So today's card is pretty quick and easy so I will be giving you a light touch tutorial

To begin with, i used the 'Clouds Slimline' to create a stencil. I used some distress ink (Tumbled Glass) and a brush to rub over the stencil to get the cloud effect. Remember, start part way down your card and then gradually move up the card

Next I cut out the grass slimline dies twice. The first layer was attached with glue but the second was attach with 1mm 3d foam pads.

The first element on my card was the cutest die I have ever seen, 'Miss Spring bunny'. The die is so intuitive and is she easy to put together. Once assembled I added her to the card with 1mm 3D foam pads

Next I cut out element from the 'Spring chicken' die. I used the wooden log and the sign. I found a stamp in my statsh that fitted the sign perfectly. I cut out the vine, flowers and ladybug and attached these to my card

The final elements were the Sun and Tree from the 'Campin Out' range that I will list below for you.

I really hope you enjoyed the card and that i have given you some inspiration for your weekend crafting

Hugs
Wendy


Dies I used:


Also don't forget to keep an eye oot on our YouTube Channel for more great designs


Thursday, January 20, 2022

Valentine Kitten

 Hello Scrapping Cottage Friends

GUESS WHAT???  We have a new Spring release with 20 sweet designs.  The bundle for the entire release is at 60% off right now.  Just check it out HERE.  

I am using the Spring Kitten with Envelope.  I decided to make a slimline and pair the kitten with the Whimsical Hearts slimline die.


Design Steps:

1.  Using the Spring Kitten with Envelope cut out the pieces using: red, light grey, dark grey, pink, green and black card stock

2.  Assemble the pieces using a fine tip glue

3.  For the base use a piece of black card stock cut at 8 1/2 x 7 folded in half.  A piece of checked DP cut at 3 1/4 x 6 3/4. A piece of white card stock cut with the Whimsical Hearts Slimline die. A piece of black card stock cut with the largest Stitched Heart die. And finally a piece of satin ribbon cut at 11 inches

4.  Glue the checked DP to the back of the heart slimline.  Tie the ribbon into a square knot and tape it to the back of the white heart card stock then glue to the black card base.  Glue the black heart as shown above

5.  Pop up the kitten in the envelope to the front of the card just above the square knot

6.  Add the little bee, the sentiment and rhinestones and your card is complete


CottageCutz Products


Don't forget to check out the new Spring Release.  It is perfect for Valentines, Spring Birthdays and of course Easter!
We have more inspiration on our YouTube Channel check it out HERE
Thanks so much for stopping by!  And I will see you next Thursday.

Blessings and Take Care
Pam


Tuesday, January 18, 2022

Round Easel Racoon Skiing


Good morning Cottagecutz fans. I hope your week is going well so far. It’s Wendy bringing you the blog today. Can you believe we are over half way through January, Before you know it, we’ll be making those Christmas cards again :-)

I have been a massive fan of easel cards today and this time I thought, why not mix it up and make a circle easel card.

To begin with take a piece of light blue card, fold in half and make sure that is large enough to to be able to use the largest of the ‘Nested Scalloped Stitched circles’. What you need to do is make sure that when you out it though the die cutting machine that you lave a small amount at the top so you don’t cut 2 circles, but one 


Next fold one of the circles in half. You can measure but I’m not a fan so I folded it in half as best I could. It doesn’t really matter as no one will see it as we go through making the card


Nect cut out another circle of the same size and attached this to the bottom of the folded card


I then cut a white ‘ Nested Stitched Circle’ to fit inside the card above. 


I then decided to have some sky on the top of the circle so that it will be effective on the finished card. I did this by using the ‘Clouds’ Slimline die and used it as a template. As always, start part way down the card an build up to the top


Next I cut the same size white circle as those above and used the ‘Hills Slimline’ to cut some now hills into the card. I attached the base layer with glue and then the next layer with 1mm foam pads


I cut some of the tress from the ‘Winter Whimsical Village and attach to the card with 1mm foam pads


To finish off my card I assembled the ‘Winter Racoon on Ski’s’. I added some chalk for effect


I attached the Racoon to the cars with 1mm foam

To Keep the card upright I used the snowboard from the ‘Snowboarding Penguin’. I attached it with 2mm foam pads 


Dies I used:


I hope you have a lovely rest of the week and I will see you on Friday with hopefully a ner project using the Spring Release

Oh and don’t forget to check out our YouTube channel with the latest project