Thursday, November 25, 2021

Black Friday Release!!

 Hello Friends

A Very Happy Thanksgiving to you and your family!  If all the festivities are over it is time to get to those Black Friday sales and ours has already started.  With this adorable new release called Campin Out.  It can be used for almost anything especially those hard to make masculine cards!  Just check out the Black Friday info below!  

Today, I am using the Campin Out Fishing Raccoon and he is just so cute!  Plus I added the Campin Out Trees and the Sign from the Campin Out Campfire & Sign.  This is a birthday card for a friend who loves to fish! 


Design Steps:

1.  Start by cutting out the pieces using the Campin Out Trees, Campin Out Fire & Sign and the Campin Out Fishing Raccoon.  I used green, dark brown, light blue, kraft, gray, black, white, light teal and rust card stock for my scene.  Assemble your raccoon and the trees with a fine tip glue
2.  Use a 6 x 4 1/4 white base, 5 3/4 x 4 piece of yellow, 5 1/2 x 3 3/4 piece of DP,  cut a piece of brown polka dot DP with the second from the largest Wacky Stitched Rectangle.  I used the Hill Slimline to create the brown hill and the waves in the lake
3.  Glue the yellow to the white base card, glue the DP to the yellow then add the retangle with the hills and the water
4.  Add the trees and the raccoon to your scene.  I glued them flat
5.  After the scene is complete stamp you sign and use pop dots to adhere to your card

CottageCutz Dies


CottageCutz Dies     Click Here to SAVE up to 85%

Stamp & Die        Click Here to SAVE 80%    

 Slimline Dies       Click Here to SAVE 65%  

Retired         Click Here to SAVE up to 80% 

Overstock      Click Here to SAVE up to 70%


Lil’ Bluebird Designs    Click Here to SAVE 60%

Stamp Sets    Only $5.98

Die Sets         Only $7.98

Thanks so much for stopping by today and don't miss this fantactic sale!  And just to remind you we have a wonderful YouTube Channel for more inspiration.  Check it out HERE


Blessings

Pam


Wednesday, November 24, 2021

"Campin Out" Black Friday Special Release


An early Happy Thanksgiving to each of you.  I am so excited to share this slimline Christmas card over on the CottageCutz YouTube Channel featuring dies from the new "Campin Out" collection that's releasing as a Black Friday special.  The complete collection will be available in The Scrapping Cottage Store for $49.95. There are many other amazing products on sale with savings up to 85% off, so shop early to find the best selection.

As I mentioned, this slimline Christmas card features four of the new dies and I am sharing how I used pattern paper to add a Christmas vibe to dies that are not Christmas specific. Bonus, you can use these new dies all year long to create more amazing cards.


I will be announcing the winner of the "Peace On Earth" die that I was giving away in my last video.  I hope it was you. Please head over to watch my new video and if you missed the last giveaway, there is another opportunity in my new video to win one of the "Campin Out" dies.  Don't forget to subscribe and leave a comment to enter.  I look forward to seeing you over on the CottageCutz YouTube Channel!  Until next time, happy holidays.... Marla


Tuesday, November 23, 2021

December Daily Mini Album: Daily Page

Happy Terrific Tuesday Scrapping Cottage friends! Melinda here with another project share. 

Today I am sharing another page for my December Mini Album- December Daily project. Today's page is my daily page spread. It features dies from the upcoming Black Friday Release! You will want to grab this adorable set! n

Here is a look at my project.

The finished size is 7 x 7.

For the base of the project, I started with a piece of 7x7 medium blue cardstock. I then cut a dark blue cardstock mat at 6.75 x 6.75. I then cut a piece of patterned paper from my stash and then mounted the weekly spread onto the patterned paper mat. 


I went to work cutting and assembling the various die animals. They are all so very cute! I added marker, chalks and inks to give them details.  
Here's a closer look at the cute Campin Out Capfire & Sign, The Campin Out Mountains & Trees, and the Campin Out Moose & Reindeer die sets. 

In this closer look you can see the sweet little Campin Out Fox, the fire from the Campin Out Campfire & Sign, the sweet little mouse from the Campin Out Hedgehog & Mouse die as well as the adorable Moose from the Campin Out Moose & Reindeer die. In the background you can see I used the Campin Out Mountains & Trees I added a touch of Stickles Glitter Glue to the mountains.


Here is one last look at my completed page spread. I think it came out super cute. I am excited to start using these pages!


The Dies I used to create these projects:

Campin Out Fox

Campin Out Campfire & Sign


Campin Out Hedgehog & Mouse

Campin Out Moose & Reindeer


Campin Out Mountains & Trees


In case you didn't hear, The CottageCutz YouTube channel is up and running. We are featuring videos every Wednesday. Drop by and subscribe so you don't miss one and give us a thumbs up on our videos.

Make sure to come back by each day for some more great crafty inspiration from the super talented team. Don't forget to head over and take advantage of the great savings on these and more of the fabulous Sale!

Be sure to head over and check out the fantastic
CHRISTMAS PART 2 RELEASE!!!!
SOME AMAZINGLY CUTE DIES! 
This release has the Merry Christmas with Shadow die.

CHRISTMAS PART 1 RELEASE!!!!
SOME MORE AMAZINGLY CUTE DIES! 


Until the next time, have a wonderfully crafty day!

Monday, November 22, 2021

Friends

Hi everyone  I am back sharing the latest release for The Scrappin Cottage sneak peek for Black Friday...  These super cuties are Campin out Moose and Reindeer!


Enjoy the Times
I colored my diecuts by using distress paper and inked each one with the appropriate colors.   used Vintage Photo in Oxide for my Moose which is just too cute.

I inked all the mountains with Fades Jeans and Salty Ocean using a distress brush
I think inked some clouds for the background and diecut the main card using the Slimline Windows
Be sure to chcck out your Youtube channel which are loading with some amazing new videos for everyone you definitely want to check it out:


Sunday, November 21, 2021

Campin out Moose


Happy Sunday Cottagecutz fans. It’s Wendy bringing you the blog today and I am super excited to be showcasing dies from the new Black Friday release. These dies are so cute and versatile and I know that I’m going to be able to use them all year long. There are 14 dies in the set and each one is fabulous for creating your camping scenes and so much more

So my first design today showcases quite a few of the dies, ‘Camping Out Moose and Reindeer’, ‘Campin Out Trees’, ‘Camping Out Mountains & Trees’, and ‘Campin Out Fox’

So I started with a white folded card measuring 5” x 4” when folded. Onto this in navy blue I added the largest of the ‘Nested Scalloped Stitched Rectangles’ and the 2nd largest ‘Stitched Rectangle’ on top for some height. I also cut the rectangle in white which i will explain about later

To create the background I have used the ‘Campin Out Mountains & Trees’ in grey and white card. The white card is for the mountain tops and I used a little blue chalk to give them a frosty feel. 

Next I took the stitched rectangle in white card as and shaped it with the ‘Hills Slimline’ to give a snowy affect and attached with 1mm foam pads

For the next part of the card I cut out all 3 sizes of the ‘Campin Out Trees’ and assembled. I used some dark green chalk to make them look realistic and attached to the card with 3D foam pads.

Next I cut out the moose, sausages on a stick and lantern from the ‘Campin Out Moose & Reindeer’ die and assembled. Before sticking them to the card I used the log from the ‘Campin Out Fox’ so that it looks like Mr Moose is sitting on the log. Both the moose, the log and the lantern were attached to the card with 3D foam pads. To finish I used a white gel pen to give the effect of either stars or snow

So we are now done with the first card or

I really hope you like this release. I was blown away with the dies and the team will be sharing their designs in the coming weeks

I wish you the very best for the rest of the weekend and keep crafting!
Wendy


Dies I used


Saturday, November 20, 2021

Magic of Christmas

Hello CottageCutz friends! Thanks for taking the time to stop and visit with us today. It's Mary Marsh here bringing you the Saturday edition of the Blog.

IT'S NEW RELEASE TIME! 
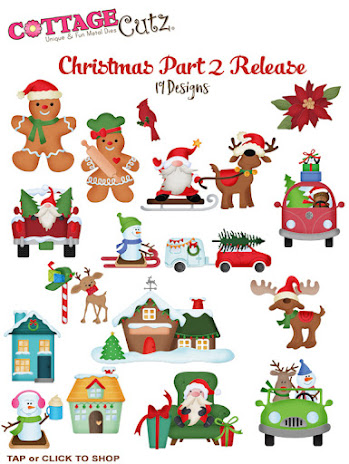
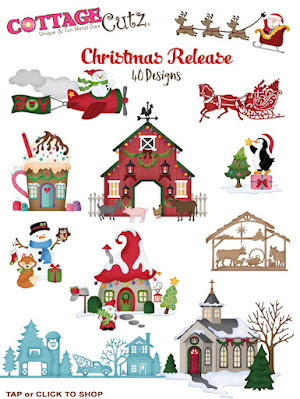
The new Christmas dies are in the online store with 40 new designs from Christmas Part 1 and 19 new designs from Christmas Part 2.  

Today for your viewing pleasure, I have a design featuring The Magic of Christmas die. It made for such a cute and whimsical scene as so many of our dies do. 
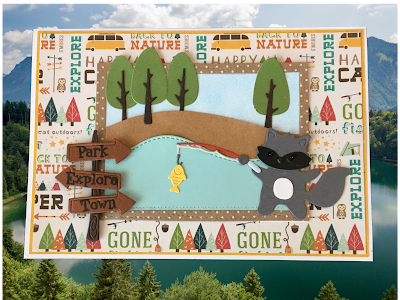
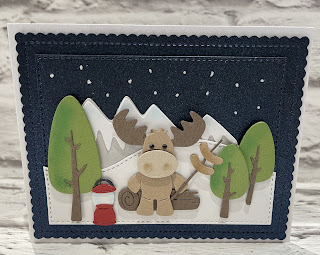
Here are two other cards I made using our scene building dies.  So let's get started on some details of how I created my card. 

Design Steps:

I started my card this week with the layout. As I have said so many times before having the sketch in mind helps jumpstart the card making process for me. I find the sketches I use very easy to interpret. I liked the sketch #880 on Splitcoaststampers. I thought it would work well for the oval shape of the die. 
I looked through my designer paper for a background pattern that might fit and not overwhelm the die scene. I found this subtle snowflake pattern that I only had pieces of, but I had enough to use for the three horizontal layers. 
Blue Card Base: 4 1/4" x 5 1/2"
Designer Paper Layer: 3 7/8" x 3 11/16"
Layer under DSP: 4" x 3 11/16" 
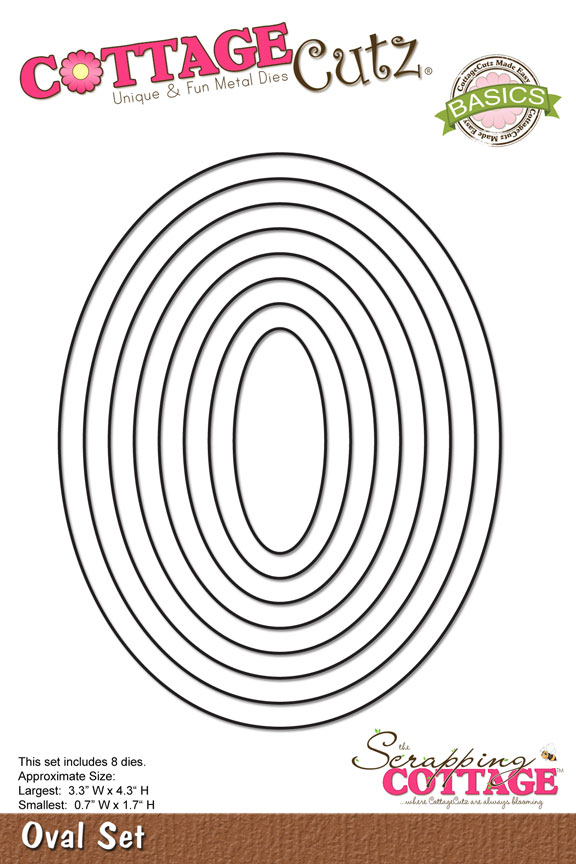
Next, I cut the image from blue green (lost lagoon) cardstock. Then I used the 2nd largest die from the Oval die set to cut a snowy background from white glitter paper.  

I cut the Christmas sentiment using the Merry Christmas w/Shadow die. The shadow is the light blue (card base) and the Christmas phrase is the lost lagoon shade. 
Now that all my card elements are prepared, I am ready to start card assembly. I attached the designer paper layers to the card base using double sided tape. 
I attached the image panel to the white glitter panel with Art glitter glue. Then I attached to the card base with dimensional adhesive. 
To finish off my card I attached the Christmas phrase with glue dots and added a few snowflakes for element 4 of the sketch. 


Well that's it for me for this week. I hope I have given you a fresh idea for a way to use this new die. We are having a Black Friday release and the DT will begin showing samples starting tomorrow. See you next Saturday!

Reminder: The CottageCutz You Tube Channel is up and running again. We have new videos every Wednesday. Plus there is a giveaway on the channel. Details on the channel. Check it out here. 

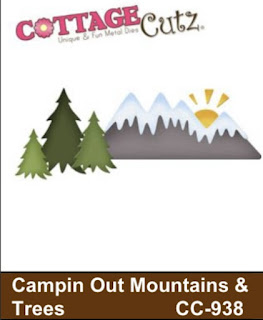
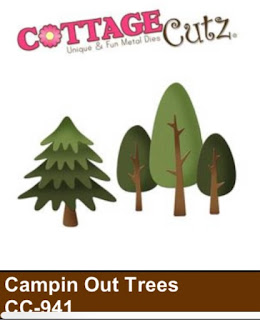
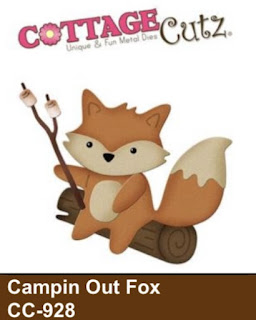
dies I used to create card: