Sunday, July 04, 2021

Happy Birthday

Hi!

It's Anja here. I have another farm inspired card for you today. I combined two of the Country Farm release dies and made the scene below. 


For this card I used:

- Cottage Cutz dies (Farm Tractor w/Trailer, Country Farm Barn, Clouds Slimline, Grass Slimline), 

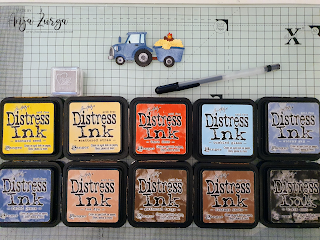
- Distress Inks,

- craft card base (10x21cm),

- white card stock for die cuts,

- black pen, 

- silver pigment ink,

- black pigment ink,

- sentiment stamp,

- acrylic block,

- scissors,

- paper glue. 


First I cut and colored the tractor. 

Next I did the same with the barn. 

Next Ii cut paper stencils using clouds and grass slimline dies. I used the stencils to color the clouds and the grass. 


Last I stamped the sentiment and cut it out.

 
And the I just placed all the cut and colored pieces and adhered it on the card base. And my card was done.  


Before I go I want to invite you all to the The Scrapping Cottage online store to check out 4th of July sale

And that's all from me for today. Happy 4th of July celebrations and a nice week ahead. See you again next Sunday. 

Anja Z.


Cottage Cutz dies I used:


Saturday, July 03, 2021

Sassy Farm Chicks Birthday

Hello Scrapping Cottage friends! Thanks for taking the time to stop and visit with us today. It's Mary Marsh here bringing you the Saturday edition of the Blog.

IT'S NEW RELEASE TIME! We have a new collection of Slimline Designs. Your slimline cardmaking is going to get a lot easier. We have 20 new designs and they are on sale. You can get the entire set at 58% off or each individual die is 25% off. The dies have appeal for all styles of cardmaking. So check them out and make your selections. 

Today for your viewing pleasure, I am featuring the Country Farm Chicks from our Country Farm collection. I created a birthday card with a sassy birthday sentiment. I have a few brothers who would think this is just too funny. So one of them will receive it for their birthday. So let's get started with some details on how I created my card.

Design Steps:

I started my card this week with the layout. I had this one saved from Splitcoaststampers #856 and thought it would work well for the images I wanted to use. I did take some liberties with the sketch. Layer 4 is moved to the top of the image panel and instead of a rectangle image, I used a cloud. 
Next, I die cut the chick images using different colors of colored cardstock. I used the packaging colors because I liked them. You could always use white cardstock and then color the images with your favorite coloring medium. Our design team does each of the ways I just mentioned.
I selected a sky themed background paper for layer 2 of the sketch. I used a blue panel for layering. My hill is cut from designer paper using the Hills Slimline die. I decided to add a sun and that is cut from the Clouds & Sun die. 
Blue Layering Panel - 4 1/4" x 5 1/2"
Designer Paper Layer - 4 1/8" x 5 3/8"
I cut my cloud image and stamped my sentiment in a blue ink. 
Now that all my elements are prepared I am ready to start card assembly. I attached the designer paper and the sun to the blue layering panel with double sided tape. The farm chicks and the cloud sentiment are attached with dimensional adhesive. 
To finish off my card I added a white card base. The base is 4 1/2" x 5 3/4".  Scattered a few glitter enamel dots and this card is complete. I hope I have given you a fresh idea for a way to use these cute farm chicks. See you next Saturday with a sample from the new Slimline release. 


dies I used to create card:


Friday, July 02, 2021

Udderly Amazing

Happy Friday!  It's Jeanne today with a slimline card featuring some cows from the fun, new Country Farm release.  I used several of the slimline dies and the Country Farm Cows.

I started with this sketch from Splitcoaststampers.  When I saw the sketch I knew these cows would be perfect.

To start I cut the cows from white cardstock and colored using Distress Oxide inks.

These are the colors I used for the cows.  For my black I colored the cardstock with a black Copic marker.

I cut the base rectangle from the largest of the Nested Stitched Rectangles.  I used the third largest Rectangle and cut two - one from green and one from white.  I used the Clouds Slimline to create a stencil and stenciled the clouds on the white rectangle.  Using the Grass Slimline I cut the grass and glued it to the cloud panel.

For the sketch I needed to cut the cloud panel.  I wanted my stitched lines to be on the inside under the sentiment circle, so I cut 5 1/2 inches from the right.

Then I switched the two sides so my long side was on the left and the stitching in the middle.

I added the cows to the left side....

and heat embossed my sentiment in white on a red circle.

Be sure to visit the online store where there is huge July 4th sale going on right now.  Lot's of great dies are on sale including the Country Farm release.  And there is a NEW release of slimline dies that feature wonderful and unique designs!

Products used:


Thanks for visiting today.  I hope you have a fun and creative weekend!


Thursday, July 01, 2021

Birthday Cow

Hello Scrapping Cottage Friends 

It is Pam creating with you today!

Our design team is continuing to fashion some ideas for you to use from the new collection called COUNTRY FARM! It has the so many incredible dies.  Everything from Tractors to Cowboy Chicks!  Each die is just full of awesome details and can be used for so many different occasions.  Today, I am using the Farm Cow Peeker.  This little cow has to be the cutest cow I have ever seen!  I think it makes a great pocket card for a tucked in tag and gift card.


Designer Steps:

1.  Use a 4 1/4 x 11 in card base scored at 1 1/4, 2 1/2, and 5 1/2
2.  Cut a piece of red dotted DP 4 1/8 x 5 and a piece of milk bottle DP 4 1/8 x 2.  Fold the card in half and then fold the top scores valley then valley again
3.  Glue the red dotted DP to the front inside of the card.  Fold the bottom flap up and the glue the milk bottle DP to the bottom flap as shown.  Staple the fold twice on each side.  I used my TH tiny stapler and round the corners. 
4.  Using the Country Farm Cows die cut out two pieces of dark brown fence and glue them to the flap as shown.  I also cut out 4 pieces of the grass clumps in green
5.  Using the Farm Cow Peeker cut out all the pieces shade and assemble
6.  Cut out 2 tags 5 x 2 1/2 one in brown and one in blue dotted DP.  Glue them together and punch the hole in the top
7.  Using dimensionals pop up the cow and add your ribbon.  Stamp the bottom of the tag with your sentiment and add a small strip of red dotted DP 1/2 x 2 1/2


CottageCutz Products


As always thanks so much for taking a peek at my card.  I really appreciate it!

Blessings and Take Care

Pam