Thursday, September 23, 2021

Llama Love

Hello Scrapping Cottage Friends

It is Pam creating with you on the blog today!

Today, I am making a fun little card that is sure to bring a smile!  I am using the Lil' Bluebird Llama Love stamp set.  The dies and stamps are still at a 25% savings so hop on over to the store and check them out!

Design Steps:

1.  Stamp your images using Memento Black ink and the Llama Love stamp set.  Color the images with copics.  The copics I used are in the picture above
2.  Use the coordinating die set to cut out the images
3.  Use an A2 white card base and a piece of white card stock cut to 4 x 5 1/4.  I used the second from the largest Pierced Oval die to cut the oval from the center of the piece of white card stock.  Then I ran it through an embossing folder.  Next I used a blue ink and blending brush to create the sky behine the oval
4.  Take the embossed piece of card stock and place dimension tape on the back
5.  Place the embossed piece onto the A2 white card base and then glue down the llama as shown
6.  Glue down he remaining stamped images and then stamp your sentiment and glue it between the cactus and basket of flowers and your card is complete

Lil' Bluebird Stamps and Cottagecutz Dies


Thanks so much for stopping by today and don't forget the stamps and dies are still at a wonderful savings of 25% off!  They make great Christmas gifts for all of your crafty friends.  So check them out HERE!

Take Care and Blessings
See you next Thursday
Pam


Wednesday, September 22, 2021

Reindeer fun and games

Good morning wonderful crafters, it’s the middle of the week so we’re halfway towards the weekend :-). It’s Wendy bringing you today’s blog and I really wanted to share this card with you. I like making cards which make people smile so I hope you like this


I am loving the slimline dies and have made the snow using the slimline hills dies. What I like about the dies is that they are longer than the card so you can play about with the layout using just one of the dies

I have cut the hills dies twice. The first layer has been adhered to the card with acrylic glue. The second layer has 1mm foam pads to give the card some depth.

For the snowflakes I have used the slimline snowflake background. For ease I stuck white card onto double sided adhesive before cutting it out. This made it easy to put the small flakes on the card without the need for glue and mess!

I have then cut the silly reindeer and artic snowy trees and again added these to the card using 1mm foam pads. I like giving the card some height rather than sticking elements flat on the card. For the noses and eyes I have used flat back pearls as they look so realistic 

I really hope you like the card as much as I did making it. Have a super day 
Wendy 

Here are the dies I used 


Monday, September 20, 2021

Trio of Teddy Cards

Happy Monday Scrapping Cottage lovely people . It's Wendy bringing you the blog today! I hope you've had a wonderful weekend. My weekend has been full of crafting happiness and walking my little Border Terrier Betty. Isn't she a beauty :-)


Anyway back to today's blog post, Today, I bring you a trio of cards as they are easily repeated. I thought they woud be great cards to send to friends and loved ones just to let them know you are thinking of them


So to start these cards, I measured card blanks of 9.5cm x 9.5cm


On top of the cards I used the 'Nested Scalloped square' set. I adhered them using 1mm foam pads as I like my cards to have some depth


Next, I started cutting out all the elements from 'Mr Snuggles' die. I use this die so much that I have brought several over the years. It's a really good idea if you are making  lot of the same cards


You'll notice that the ears and the noses are the same colours as the base card, just to pull it all together.

 Next I die cut the sentiments that I wanted the bears to hold. These sentiment dies are such good value for money and I can see me using them on many ocassions.


Next I assembled Mr Snuggles with his sentiments, I think he looks really cute


I thought it might be nice to add some floral embelishments to the top left of the base card to give the card another point of reference and is a great finish to the final cards. I used the 'Little Princess & Roses' die. 


So here are my final cards. I've used black flat backed pearl for the eyes on the bears and gave them rosy cheeks with some chalks. Finally I've used some flat back gemstones for completion. I really hope
the cards. You could make sets of them to sell or to give them as a gift. It would be wonderful to make a box for them


Here are the dies used


Sunday, September 19, 2021

Sea You Soon

It's Anja here. Summer is more or less gone so for today's post I made a sea inspired card. To say goodbye to Summer. 


For this card I used:

- Cottage Cutz dies (Lil' Bluebird Designs Under the Sea Stamp Set, Random Circles Slimline, Waves Slimline),

- Faber Castell Polychromos Color Pencils,

- blue and grey card stock for die cuts,

- light blue card stock for card base (22,5x19 cm),

- white card stock for stamping,

- black pigment ink,

- acrylic block,

- white pen,

- washi tape,

- paper scorer,

- scissors,

- paper trimmer,

- paper glue. 


First I stamped and colored all the images. This time I cut the images with the scissors to a get a different effect.  

Next I made the card base from light blue card stock. I also cut a bubbly background using the Random Circle Slimline. And last I cut a strip of grey card stock to use as a sandy ground on the bottom of the sea.

I also added the sentiment to the grey strip. 

Next I took a white pen and made some lines to the bubbles to give it more dimension. 

After that I just added all the cut creatures and my card was done.


And that's all from me for today. Have a nice week and see you again next Sunday.

Anja Z.


Cottage Cutz stamps and dies I used:


Saturday, September 18, 2021

Home Sweet Home Christmas

Hello Scrapping Cottage friends! Thanks for taking the time to stop and visit with us today. It's Mary Marsh here bringing you the Saturday edition of the Blog.

IT'S NEW RELEASE TIME! The Scrapping Cottage has just added a new brand to the company line. Lil' Bluebird Designs is being introduced with 16 new Photopolymer Clear Stamp Sets and 16 coordinating dies. There are stamps for so many of your card making occasions and then some. The coordinating dies just make it a perfect fit for your card making designs. They are currently on sale at 25% off

And speaking of new releases, we have just introduced new CottageCutz Sentiments with Shadows. There are 12 phrases in this new release and you can pick these up at a 25% off price as well.
The shadow dies are so popular right now and they coordinate so well with the new Lil' Bluebird Stamps and dies.

Today for your viewing pleasure, I decided to create a card using one of the new stamp sets. I was thinking of those of you out there they may not like coloring images. So I thought I would show you a card that required no coloring.  I have created a Christmas card using the new Home Sweet Home stamp & die set + the 
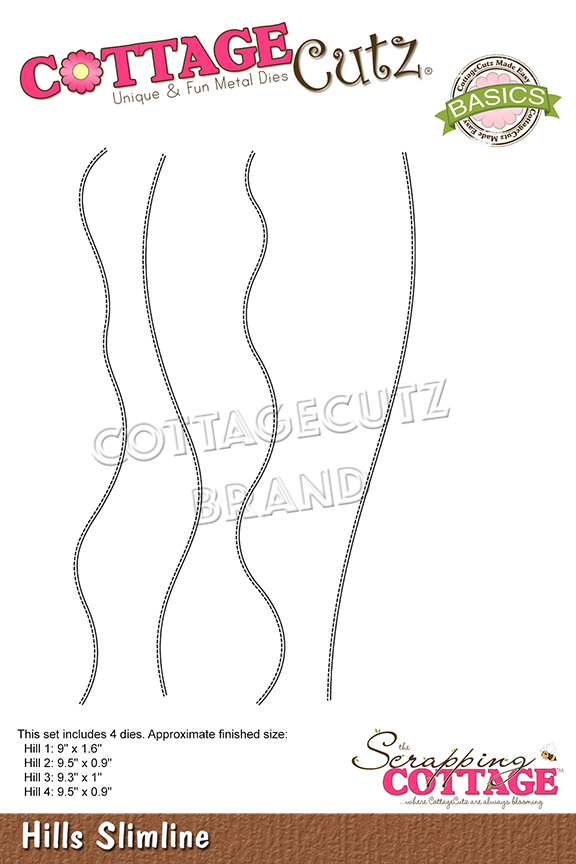
Mountains & Trees Slimline  & Hills Slimline dies. 

So let's get started on some details of how I created my card. 

Design Steps:  

I started this card by looking for some designer paper with a darker snowy background which would allow me to keep my houses and trees white. I found this snowflake pattern. So far so good!
 
Blueberry card base: 4 3/8" x 5 1/2"
White Layer Panel : 4 3/16" x 5 5/16"
Designer Paper: 4 1/4" x 5 1/4"
I stamped my houses in stormy sky distress ink. The color matched nicely with the designer paper. 
The  pine trees and snow banks I cut in white cardstock. The hills die is 9 1/2" so I was able to get 2 snowbanks at  4 1/4" each from the single cut. 


On the bottom snowbank I stamped my Christmas sentiment and some trees from the Camping Critters Stamp set. Looks like that one is sold out but you could also use the pine tree from the Forest Friends stamp set. 
Card elements are ready and now I can start the assembly. I decided to add some chunky glitter to the snowbanks for added interest. At this point some things started to go south. You know how that happens sometimes when you are cardmaking. 

My designer paper didn't line up straight enough for me and when I tried to lift it off the cardstock it wrinkled. So I had to cut another piece and the pattern is just a bit different. I used dimensional adhesive to attach the snowbanks and they weren't placed quite right and when I tried to lift it - yep it wrinkled my cardstock. I had to redo just the bottom one. Sometimes you just have cardmaking sessions that go this way!  
To finish off my card, I attached the image panel to the card base and scattered some iridescent snowflakes. I hope I have given you an idea on a way to use these new dies that required no coloring. See you next Saturday!


Stamps & Dies I used to create card: