Hello! This is Sukie and today I have a fun circus themed card to share for my design team post. I'm showcasing 4 of the die sets from the new Circus die release. They are currently on sale in the on line store.
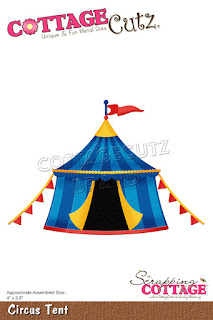
I went with a festive design for my slim line card. The bold pattern was broken up by adding 3 circles from the Circle Set. Next I nestled in the Leaping Lion, the Circus Tent, and the Prancing Pony into each of the die cut circles. The arrow from the Circus Signs was perfect for stamping a fun sentiment. I also stamped a couple of tickets and fussy cut them for my card.Monday, January 25, 2021
Sunday, January 24, 2021
Have A Nice Day
Hi!
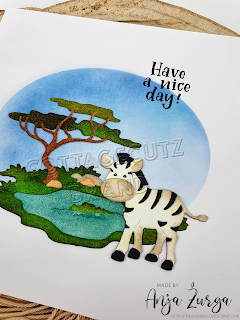
It's Anja here. I have a simple and clean card for you today. I combined two of the Safari release dies and made the scene below.
For this card I used:
- Cottage Cutz dies (Safari Watering Hole, Safari Zebra, Oval Set),
- Distress Inks,
- white card base (15x15 cm),
- white card stock for die cuts and paper stencil,
- black card stock,
- black pen,
- white pen,
- washi tape,
- brush,
- black pigment ink,
- sentiment stamp,
- acrylic block,
- paper glue.
First I cut and colored the watering hole.
Next I cut and colored the zebra. This time I used black cardstock for black parts.
Then I did the background. I made a paper stencil using the oval set dies. I used the largest and cut it out of the white cardstock. I placed the stencil over the card base and set it with washi tape. I used a makeup brush to blend different shades of blue ink for the sky.
Then I added the sentiment.
And last I just added all the cut and colored pieces and my card was done.
Thank you for stopping by. I wish you all a nice Sunday and see you again next week.
Anja Z.
Cottage Cutz dies I used:
Saturday, January 23, 2021
Stop Monkeyin' Around
We have a brand new release of dies in the online store. It's our Circus release with 16 new designs. They are currently on sale at 25% off individual dies. The Safari release dies are also on sale at 25% off individual dies. This was our Black Friday release.
Friday, January 22, 2021
Welcome Circus Train
Happy Friday! It's Jeanne today with a fun slimline baby card. The Circus Train and Circus Train Animals are a marvelous way to welcome a little one. This train would also make a wonderful invitation to a child's birthday party. And the 8 1/2 x 3 1/2 format of a slimline card is the perfect format for the train!
I wanted this card to be bright, yet somewhat soft in color since it's a baby card.
I looked through my paper and found some perfect patterns in the tones I had in mind. I keep two reference notebooks of paper samples and this helps enormously in picking out patters and colors. I have two posts on my blog (here and here) about how I organize them.
I cut the pieces for the train and animals from various colors of the cardstock. I made sure to choose the seal and elephant for my animals since the paper has gray in it.
This is a card where everything needs to be aligned. I have some tips on how I did this.To get the wheels straight when assembling the engine and train cars I made sure to align the top of the horizontal spoke with the bottom of the car and the vertical spoke with the inside edge of the cage. This works for all wheels but the small one in front. That will be added once the engine is on the card.I also glued the animals to the cage before putting them on the card so I could better align their faces with the bars. They are very slightly off center but I wanted the eyes to show!
I aligned all the train pieces on the card and placed a light pencil mark over the center of the curlicue on each piece so I would know exactly where to glue them. Then I glued down the engine, the connecting piece and the bottom of the middle train car.
I had not yet adhered the ball to the seal's nose as I wanted it to be "balancing". It needed to be just touching the nose not glued to it. Once the train car was in place I used tweezers to insert and glue down the ball. Then I adhered the top and the rest of the train.
To align the front wheel I used a ruler to get it even with the other wheels.
My final step was to create my sentiment and some fun banners for the front. I simply cut strips, fishtailed the ends and used a few enamel dots.
I hope you have enjoyed my card. Please be sure to visit the online store where the new Circus dies are on sale for a limited time!
Dies used:
Thanks for visiting today. I hope you have a fun and creative weekend!
Thursday, January 21, 2021
Birthday Clown
Hello Friends
Today, I am continuing to make my 2021 cards. And I wanted to do a shaker so I decided to use the happy little clown with the handful of balloons to create a fun birthday card.
2. Circle the hole with double sided foam tape add the sequins and little stars. Add additional foam around the bottom of the card also
3. Cut another piece of white card stock 4 x 5 /4 and place it directly over the piece with the shaker window and then mount it to the card base
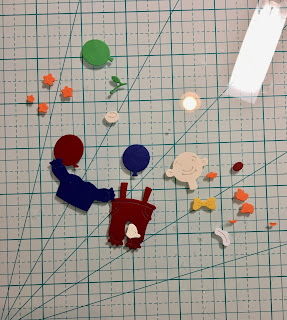
4. Use the Clown with the Balloons die and cut out the pieces in red, blue, green, yellow, tan, white and orange card stock
5. Using a fine tip glue and tweezers assemble the little clown with his balloons
5. Using Happy Birthday Expressions cut out Happy Birthday twice and glue together. Then adhere the sentiment to the front of the card
6. Pop up the clown to the card front and the Birthday card is complete


