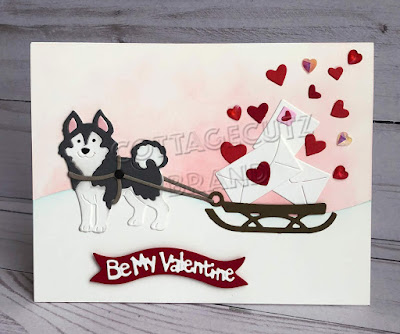
We are having a big after Christmas sale over in the online store. You can pick up some great dies at some great prices. The savings range anywhere from 25% to 80% off the original die price. We also have a new release of Circus dies and they are being featured on a special bundle price. Check everything out here.
Saturday, December 26, 2020
Faves from 2020 (Part 1)
We are having a big after Christmas sale over in the online store. You can pick up some great dies at some great prices. The savings range anywhere from 25% to 80% off the original die price. We also have a new release of Circus dies and they are being featured on a special bundle price. Check everything out here.
Friday, December 25, 2020
Nativity Pop Up Box Card
Merry Christmas! I hope you are having a wonderful holiday. It's Jeanne sharing a special card with you today. One that reflects the true meaning of Christmas.
I love making 3D projects and box cards are among my favorites. There are many tutorials on the internet for pop up box cards. Here is a link to one from Splitcoaststampers.My favorite part of making this type of card is filling it. I will admit that this card took some time and is not for those looking for a quick project. But it is well worth the effort and makes for a truly special gift /card.
All my pieces are colored using Distress Oxide inks. I think I used every brown Ranger makes to get a wide variety of shades!For my night sky I used Stormy Sky, Faded Jeans and Chipped Sapphire along with Wilted Violet. I left an area white for around the star and flicked water on the panel to add a few minor "stars".For my sentiment I added my favorite verse of the Nativity from the Gospel of Luke - Luke 2:10-11
Below are some close in pictures of the card.
Thanks for visiting - I hope you have a blessed and joyous holiday!
Thursday, December 24, 2020
Gift Box
Hi Everyone!
It is Pam sharing on the blog today!
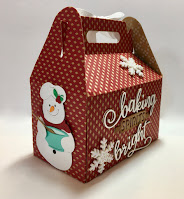
I am giving a few gift cards to friends this year. So I have created a little box that I can put the gift card in and add a few homemade lemon drop cookies. This little box is also perfect for any other small gift you may have in mind such as jewelry or candies. I decorated the box to make it extra special using the Baking Spirits Bright die.
Design Steps:
1. Using Baking Spirits Bright cut kraft and white card stock. Glue the white on top of the baking and bright. I used a little brown ink on the rolling pin2. Also cut out all of the little snowmen using white, green, blue, tan, orange and red card stock
3. Assemble the snowmen using a fine tip glue
4. You can either buy or create your little box
5. Glue you snowmen to the front and sides of the box
6. Glue you baking spirits bright to the back of the box. Add your snowflakes and ribbon
Wednesday, December 23, 2020
I can Bearly wait 'til Christmas!
Hello! This is Sukie and today I have a sweet card to share. I used the most adorable Polar Friends die set as the focal point of my card. It's available in the store along with so many other amazing die sets.
The fun sentiment was stamped on the slope while the trees were tucked in behind. The polar bear fit perfectly between the set of trees.
Next came the penguin which was adhered on top of the polar bear for a playful look.
This whimsical card completes my collection of Christmas cards for this year and as the sentiment says, "I can Bearly wait 'til Christmas!"
Here are the die sets used on my card, available in the store:
Monday, December 21, 2020
Joy Snowman
Then I chose my background paper. It's from a "snowflake splendor" collection. Perfect to cover the balmy blue and highland heather colors.
The "joy snowman" is cut in the challenge colors. The image panels are embossed with a falling snow embossing folder.
To finish off my card I added some ribbon in the balmy blue shade and a few snowflakes cut from the designer paper. For the snowflakes I used this older Snowflakes Set die.
Sunday, December 20, 2020
Merry Christmas
Hi!
It's Anja here today with another Christmas card. This time I made a gingerbread house and added this cute little snowman to the scene.
For this card I used:
- Cottage Cutz dies (Gingerbread Cottage, Christmas Camper),
- dye inks,
- white card base (15x15 cm),
- white card stock for die cuts and background (13x13 cm),
- black pen,
- black pigment ink,
- sentiment stamp,
- acrylic block,
- scissors,
- paper glue.
First I cut and colored all the little pieces.
Next I trimmed the paper for the background and colored the sky with light blue shade. I also cut two pieces for the snowy ground. I colored the pieces around the edges with blue ink.
I used the sentiment stamp and stamped it on the smallest cut piece.
When all the pieces were ready I assembled the card together.
That's all from me for today. I wish you all happy and peaceful Christmas holidays. I hope you'll be able to spend it with your loved ones.
Also have a nice Sunday and see you again next week.
Anja Z.
Cottage Cutz dies I used for this card:


