Thursday, June 04, 2020

Tulips!

Hello Scrapping Cottage Friends,

It is Pam designing with you on the blog today!

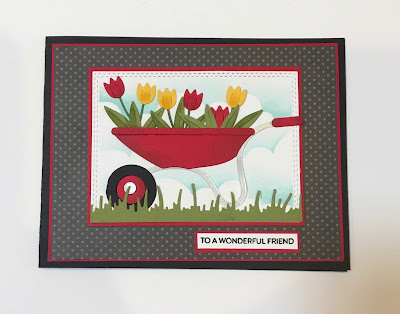
I love tulips!  They are usually one of the first flowers to pop up in the spring! Signaling that the cold winter months are coming to an end.  My favorite tulips are yellow but the red come in a close second!


Background Photo by Wynand van Poortvliet on Unsplash

Design Steps:
1.  I used a black A2 card base, red card stock 4 x 5 1/4, and polka dot DP  3 3/4 x 5.  Glue the red card stock to the polka dot DP and set aside 

2.  Next cut out a piece of green card stock using the Spring Grass die.  Cut out a white rectangle using the Double Stitched Rectangle die 3rd from the largest.  Use a cloud stencil and blue ink to create the background.  Glue the cloud stitched rectangle onto a red rectangle layer

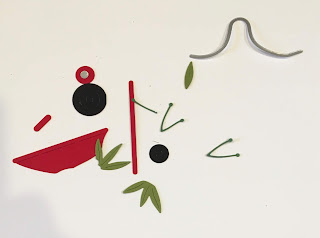
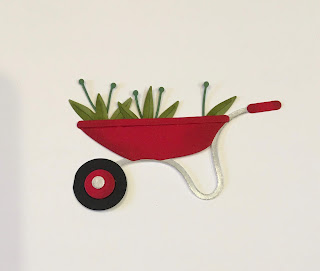
 3.  Using the Garden Wheelbarrow die cut out the pieces in red, black, silver, dark and light green, red and yellow

4.  Shade the pieces and then assemble them using a fine tip glue
5.  Next pop the cloud panel onto the polka dot DP add the grass then the wheelbarrow.  Then carefully arrange the tulips and glue them into the wheelbarrow.  Add the sentiment and glue to the black card base and your card is complete
 CottageCutz Products


Thanks so much for stopping by today.  I appreciate it so much.

Blessings and See You Soon!
Pam

Wednesday, June 03, 2020

Happy Happy Days

Hello!  This is Sukie and today I'm sharing this cheerful card for my design team post. I used a couple of fun dies from the Gardening release.
I selected the Garden Wheelbarrow for the focal point of my card and opted to use the accessories from the Gardening Cat die set.  The grass is from the Spring Grass die set. I went with a rustic theme for all of my die cuts, inking the edges with some Vintage Photo Distress Ink.
I created my own background with a brick themed stencil and some Oxide Ink.  Then I used more Vintage Photo Distress Ink around the edges of my card panel.  I fussy cut a couple pieces of kraft card stock to replicate shelves.
The sentiment was stamped on a piece of card stock and embellished with an extra die cut flower.  I also inked the sentiment tag on the edges.
To create my gardening scene, I placed the strip of grass along the bottom edge of my card base and added the wheelbarrow.  The 2 shelves were floated at the top half of my card.
Each of the shelves were accessorized with the watering can, rain boots, apron and basket of flowers.
The shovel was tucked into the grass.  The sentiment tag was the final finishing accent on my card.
Here are the dies used on my card, available in the store:

Tuesday, June 02, 2020

Garden Cat with a Wagon

Hi Janja here. Welcome to the blog.
Today I would like to share with you a card made with another cute die from the gardening release.


- CottageCutz dies: Garden Cat w/ Wagon, Holiday Gate With Wreath
- blank card: 5 5/16" x 5 5/16" (13,5 x 13,5 cm), folded
- white cardstock: 4 3/4" x 4 3/4" (12 x 12 cm)
- different colors of cardstock
- different colors of ink pads
- enamel dots
- glue, double-sided adhesive tape, self-adhesive foam pads

Start by die-cutting all the pieces for the main image out from different colors of cardstock. Shade all cutouts with ink pads.


Stamp the wood on beige cardstock with coffee-colored ink. Then cut out the gate twice. Use scissors to cut one in half. Assemble the fence.


Trim white cardstock. Use a large brush and blue ink to shade the background.


Paste the main image on the prepared background as shown. 


On the back, add self-adhesive foam over the entire surface and attach to the front of the card.


Lastly add shade under the wagon and shoes. Use a light grey ink pad.


Thank you for stopping by. 
Janja


Monday, June 01, 2020

Father's Day Potting Shed


Hello Scrapping Cottage friends! Thanks for taking the time to stop and visit with us today. It's Mary Marsh here bringing you the Monday edition of the Blog. 

For my card today, I am featuring the new Potting Shed die. I created a Father's Day card for my hubby. He is an avid gardener and has a potting shed, so I thought this image would be perfect for him.

I hosted the color challenge #793 on Splitcoaststampers, and the colors I chose worked great for the potting shed image. For this challenge you can use neutrals and that includes dark green, so that was in my favor as well. 
blueberry bushel, balmy blue, lovely lipstick
I cut the potting shed in the challenge colors plus neutral shades of brown, gray and green. I sponged the flower pot and the watering can with the same color ink as the cardstock to get a deeper shade of blue. Used a cloud stencil for the clouds and lightly sponged the dark green ink for the grass.

I used the stitched sun, clouds & umbrella die for my cloud and stamped the sentiment in blueberry ink. Finished off this card with a few epoxy hearts. That's it for me for this post. See you again on Saturday!
   
dies I used to create card:


Sunday, May 31, 2020

Special Delivery

Hi!

It's Anja here. I have a card in red for you today. I used this cute mouse with a wagon die for a special delivery card.


For this card I used:
- Cottage Cutz die (Mouse w/ Garden Wagon),
- Distress Inks,
- craft card base (15x15 cm),
- red card stock for background (11x15 cm and 8x15 cm),
- patterned card stock for background (10x15 cm),
- white card stock for die cuts and background (7,5x15 cm),
- silver pigment ink,
- black pen,
- white pen,
- Versafine black ink,
- sentiment stamp,
- acrylic block,
- paper trimmer,
- paper glue.

First I cut and colored the mouse and the wagon.


I used a sentiment stamp and stamped it directly on the wagon.


Next I trimmed all the background paper.


And when I had all the pieces ready I put the card together.


Thank you for stopping by. Have a great Sunday.

Anja Z.


Cottage Cutz die I used for this card:


Saturday, May 30, 2020

Puppy Hugs


Hello Scrapping Cottage friends! Thanks for taking the time to stop and visit with us today. It's Mary Marsh here bringing you the Saturday edition of the Blog.

We have a brand new release of dies in the online store. This one is garden themed and has 19 new designs. These new dies are perfect for Mother's Day, Father's Day, birthdays, thank you, or even a thinking of you card for the person who loves to garden. 

For my card today, I am featuring the new Puppy in Garden Cart die and created a thinking of you card for one of my dog loving friends. This one could even be used for a birthday card with a birthday sentiment on the inside. So let's get started with some details on how I created my card.

Design Steps:

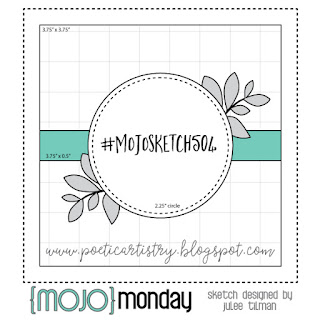
I started this card with my sketch. I had one saved on my Pinterest board that I thought would work well with this die image. It calls for a square shape that I also liked. It changes things up just a bit. 
Once the layout was decided on I chose my card colors. I decided to go with a medium blue shade and use the matching gingham designer paper. 
Card Base: 4 1/2" Square
Gingham Designer Paper: 4 1/4" Square
I cut the images in various shades of cardstock. For the garden cart I used a brown striped designer paper for added interest. 
The circle is the 2nd largest from the Stitched Circle set. I used a cloud stencil to sponge in some background clouds with tumbled glass distress ink. Sponged some mowed grass distress ink at the bottom of circle for a grassy area.
The "Big Hugs" sentiment  is stamped in a dark blue ink.
Now that everything is cut and stamped, I am ready for card assembly. Started by attaching the images to the circle using double sided tape. 
For the rectangle strip across the middle, I decided to use ribbon that matched the designer paper. 
I used dimensional adhesive to secure the image circle. I wanted it lifted slightly off the designer paper. The side leaves are cut from the Planter Box & Seeds die.
To complete my card, I attached the image panel to the card base. Scattered a few blue glitter enamel dots - just because I like using them on a card (lol)!! 

Well, that's it for me for this week. I will be back on Monday with a Father's Day card using the new Potting Shed die. 

Dies I used to create card: