Friday, May 24, 2019

Write Your Own Fairy Tale

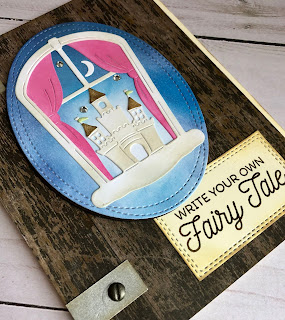
Happy Friday!  It's Jeanne today with another card using the Magical Fantasy dies.  I wanted to make a card that had a "possibilities" theme to it.  I thought the combination of this die, sentiment and an old book fit that bill. 
I started by inking the background to the castle using Distress Oxide inks in various shades of blue.
I used the second largest of the Wacky Stitched Oval Dies to cut the oval for the castle.
I cut the castle pieces from white card stock and used Distress Oxides to color those as well.
I assembled those on the oval.
To create the "book" I used a weathered wood paper cut to 4 1/8 x 5 1/2 inches.  Then I cut a piece of ivory card stock 4 1/4 x 5 1/2  inches.  This gave me a little bit of the pages peeking through.  I used ink to add patina to the edges of both.  I also used two strips of "tin" card stock cut to 1/2 x 1 inches for the hinges.
I added three ovals of dark brown underneath the main oval to form the medallion.
I stamped my sentiment on ivory using brown ink and distressed the edges using Antique Linen and Vintage Photo inks.
To finish everything I used two tiny screw brads on the hinges and some rhinestones for the stars in  the sky.

Dies used:
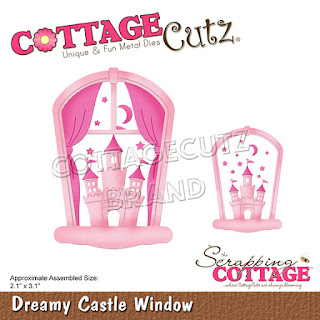
http://www.scrappingcottage.com/cottagecutzdreamycastlewindow.aspx

http://www.scrappingcottage.com/cottagecutzdouble-stitchedrectanglesetbasics.aspx

Thanks for stopping by today.  I hope you have a fun and creative weekend!


Thursday, May 23, 2019

Make A Wish

Hello Scrapping Cottage friends! Thanks for taking the time to stop and visit with us today. It's Mary Marsh here bringing you the Thursday edition of the Blog.

We are still featuring cards using the new Magical Fantasy release.  If you haven't seen the Magical Fantasy release yet, you have to drop by the online store and check it out. These new dies are all so cute and whimsical. There are 27 new designs and I am in love with everyone of them. 

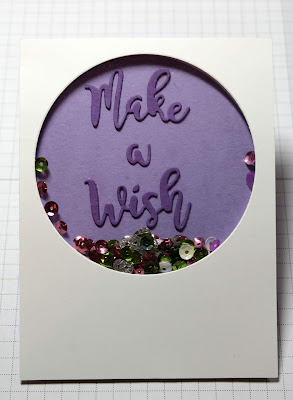
Today, I am featuring the new Sweet Unicorns die. It looks like it's currently out of stock but it should return soon. I needed a birthday card for a 4 year old girl and she loves unicorns. They are hot with the kids these days. Unicorns are everywhere along with rainbows and glitter. I thought I would turn it into a shaker card. She will love shaking the sequins around. They really aren't hard to make and it has that "wow" factor. So let's get started with some details on how I created this card. 

Step 1: I decided to cut the circle first to make sure I had enough room for my sentiment inside the circle. Using white cardstock 3 3/4" x 5" and the 2nd largest double stitched circle die I cut my circle. I used this die because it was the size I wanted for my opening. I will save the die cut circle for another use. 
Now I need to make my "window". I used a window sheet cut to 4" x 3 1/2". It's smaller than my white panel but larger than the circle opening. I used double sided tape to secure the window sheet in place. To avoid static on the window sheet I used my powder tool on both sides of the sheet. You could also use an embossing buddy. It will keep the sequins from sticking to the sheet. 
Next I used foam tape and ran it around my circle opening. I also used dimensional adhesive on the corners to make sure it's the same height all around my card. I again used the powder tool on the inside of the foam tape. It cuts down on the stickiness and the sequins won't stick to it. 
I cut the Make a Wish words in grape cardstock from the Fairytale Birthday die. I added to a lighter shade of purple. I wanted to have some color in the shaker background. 
Added the sequins to the inside of the circle. I added a little more than I thought  I would need because I wanted her to be able to shake it. 
I peeled off the foam backing and placed my sentiment panel on top. Since it is the same size as the shaker panel I lined it up at the top first. 
I wanted the shaker panel to pop and so I added a layer of the grape cardstock to this panel. The layering panel is 4" x 5 1/4"

Step 2:  Now that the image panel is ready, I cut my unicorn images from the Sweet Unicorns die. I used the package coloring as my color guide. 
Added them to the image panel and secured with double sided tape. 
To finish off my card, I secured the image panel to the pink card base. The base is 4 1/4" x 5 1/2". Added a few pink enamel dots and my card is complete. Don't you just love the unicorn images? I hope I have given you an idea for a way to use this new die. See you on Saturday with another card from this new release. 
dies I used to create card:


Wednesday, May 22, 2019

May Your Day Be Magical

Hello!  This is Sukie and today I have a sweet card to share for my design team post. I'm still loving all of the dies from the Magical Fantasy die release, they are perfect for those whimsical projects!
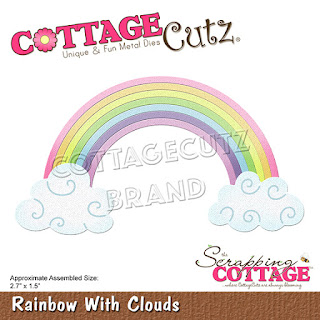
All of my pieces were die cut in white card stock and then shaded with my Oxide Inks.  I went with a soft color palette for both the Rainbow with Clouds and the Magic Dragon.
To create my background I cut out several of the clouds from the Rainbow with Clouds die and used it as a stencil at the bottom of my card base.  The top of my card base was inked with some Mustard Seed Oxide Ink and splattered with a bit of water.
I heat embossed a sentiment from the Scrappy Moms (retired) Happily Ever After stamp set and anchored the rainbow next to the sentiment.  The sweet dragon was adhered above the clouds, he appears to be floating.
For a finishing accent, I adhered some sequin stars on the upper half of my card.  This card is perfect for any special occasion!
Here are the dies used on my card available in the store:


Sunday, May 19, 2019

U Rock!

Hi!

It's Anja here. I have a simple card for you today. I combined two dies from Magical Fantasy release and made a cute card.


For this card I used:
- Cottage Cutz dies (Knight, Royal Horse),
- Distress Inks (Pumice Stone, Black Soot, Fired Brick, Tattered Rose, Worn Lipstick, Hickory Smoke) and Oxides (Fired Brick),
- white card base (10,5x15 cm),
- white card stock for die cuts and background (10x14,5 cm),
- silver pigment ink,
- black pen,
- white pen,
- sentiment stamp,
- acrylic block,
- sponge,
- paper glue.

First I cut and colored the knight.


Then the horse.

Next I stamped the sentiment. I cut around it.


I used white card stock for the background. I used a sponge as a stamp and stamped "bricks" over the paper. I colored also around the edges.


And when I had everything cut and colored, I glued all the pieces onto the card. And my card was done.


That's all from me for today.

Have a nice Sunday.
Anja Z.


Cottage Cutz dies I used:


Saturday, May 18, 2019

Princess Cake


Happy Saturday!

It is Pam sharing with you on the blog today.  Mary and I just switched places for the week.  So her post will be on Thursday.

I have another birthday card for you today.  I am using one of the dies from our new whimsical release called Princess Cake!

Designer Steps:

 1.  Cut out all of the pieces in white card stock using the Princess Cake die
 2.  Use your favorite makers to color the cake pieces.  I used my Copic Markers

 3.  Assemble the card
 4.  Cut out the oval shape using white card stock and the Nested Stitched Eyelet Oval die.  Pop the cake to the oval
 5.  Using silver glitter card stock and the Princess Cake die cut out the crown and the little circle embellishment.  Glue them to the card as shown
6.  Cut out the Happy Birthday using pink and purple DP and the Happy Birthday die
7.  You can cut out the large scallop easel card using your Circuit or a large 5 inch scallop die.  I used 2 different types of coordinating DP for the background both inside and out.


CottageCutz Products


We appreciate you stopping by!  Make sure to take some time out of your day to get crafty!
Blessings
Pam