Friday, July 27, 2018

Monochromatic Fairy Shaker Card

Happy Friday Cottage Cutz fans!  It's Jeanne today and I have another shaker card for you.  I had so much fun creating last week's card I had to make one more.
This card is simple to make but really makes an impact.  Part of the design was inspired by a box my mother-in-law made for my daughter.  She is also a papercrafter and made a monochromatic box highlighted in places with Wink of Stella. So that is what I did here.
I started with an A2 piece of cardstock for my top panel and cut my shaker window using the Spring Fairy Scene die.  I measured 1/2 inch from each side and a little over 3/8 inch from the top leaving enough space at the bottom for my sentiment. Washi tape held the die in place so it wouldn't move as I ran it through my die cutter.  I removed the fairy and was left with the window hole.
I then cut two sets of the vines and "Imagine" using a self adhesive sheet on the back of the word.
I covered the word and vines in several coats of Wink of Stella to get them to really sparkle.
I used snail adhesive to tape a sheet of acetate slightly smaller than 5 1/2 x 4 1/4 to the back of my panel.  Then I placed the fairy in the hole on the front and glued it to the acetate using very tiny dots of glue.
I added the word and two of the vines to the front of the panel.
I cut another A2 sized panel from some paper printed with a watercolor pattern in a slightly darker green and added the two remaining vines.  I made sure to place them where they would not be directly behind the fairy.
I then glued that to a top fold A2 card base in the same green color as the front panel.
I used two layers (only one shown here) of double sided foam tape around my shaker window.  I also used anti-static powder on the inside of the tape so that the sequins would not stick.
Finally, I placed about 3/4 teaspoon of iridescent sequins in the center and adhered the front panel on top.

This card would be lovely in the recipient's favorite color.  It's hard to see the glimmer in the photos, but it does sparkle - just as you imagine a fairy would.

Dies used:
http://www.scrappingcottage.com/cottagecutzspringfairysceneelites.aspx

http://www.scrappingcottage.com/cottagecutzleafyvineselites.aspx

http://www.scrappingcottage.com/cottagecutzexpressionsplusimaginephrase.aspx

Thanks for stopping by today.  I hope you have a fun and creative weekend!


Thursday, July 26, 2018

Christmas Cardinals

Good Morning Crafty Friends!

It is Pam sharing with you today.

Great news CottageCutz is having a Christmas in July sale!  You can save up to 65% on Christmas dies like the one I am showing you today!

CottageCutz isn't having a new release this month so we are pulling out older dies and giving them a fresh new look. We are calling it our throw back month!

In South Carolina we have a large population of beautiful Cardinals.  I just love watching them out of our back windows.  They are such gorgeous birds.  And I love the bright red against our very green backdrop.  So with that said those sweet birds were my inspiration for today's card.

Design Steps:
 1.  Cut all of the pieces out of white card stock using the Cardinals & Birdhouse die and the second to the largest Nested Stitched Scallop Circle die
 2. Color the pieces with your markers then assemble the birds and bird house
 3.  Place the die back over the scalloped circle. Use a cloud template and a sponge dabber to create the clouds.  Move the template down and continue creating the clouds
 4.  When you are finished you will have a nice clean edge
 5.  Use a white A2 card base cut a red checked piece of DP 5 1/4 x 4.  Also cut a piece of green checked DP 5 x 3 3/4.  Glue the pieces to the front of the white card base.  Add 2 1/4 x 3 3/4 in pieces of red checked DP toward the bottom of the card
 6.  Glue the birds and the birdhouse to the scalloped circle as shown
7.  Using dimensional tape mount the birds to the front of the card and add the sentiment.  Last add a little Stickles to the birdhouse roof for some glittering snow.

Cottage Cutz Products


Thanks again for stopping by to visit!  Make sure to start your Christmas cards early and shop our wonderful sale!
Blessings
Pam

Monday, July 23, 2018

Cardinal Ornament Card

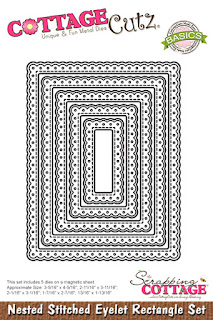
Hi, Lois here to share another card with you today.   CottageCutz is having a Christmas in July sale -- you can save 65% on CottageCutz Christmas designs, including the cardinal ornament I used on my card today.  As we have mentioned previously, the design team is having a throwback month in July, using previously released dies on our cards.  I used the Cardinal Holly Ornament as well as the Nested Stitched Eyelet Rectangle set.  My card went together pretty quickly.


To begin my card, I die cut the cardinal ornament -- the bird from a scrap of red cardstock and the ornament pieces from white.


I colored the ornament pieces with Copic markers and added a bit of darker red to the cardinal to give him some depth of color.  After I constructed the ornament, I added a bit of white highlight to the holly berries with a white gel pen.


My card base is a piece of red cardstock cut 8 1/2" x 5 1/2", scored at 4 1/4".  I cut the mat piece from some slightly patterned snowflake shimmer paper with the largest Nested Stitched Eyelet Rectangle die.


I constructed the card base . . .


. . . and added the ornament.


I then tied a bow with some gold cord, attaching it to the top of the ornament with a glue dot, and placed some small gold sequins for a bit of bling.  My card was complete.


CottageCutz dies used on my card are:


http://www.scrappingcottage.com/cottagecutzcardinalhollyornament.aspx


http://www.scrappingcottage.com/cottagecutznestedstitchedeyeletrectangleset.aspx

If you've been wanting to get some Christmas dies, now is the time to check out the website and SAVE 65%.

Sunday, July 22, 2018

Ice Cream Card

Hi!

This is Anja. We're showcasing some old dies this month and I decided to make a summer card, using ice cream cones.


For this card I used:
- Cottage Cutz die (Ice Cream Cones),
- Distress Oxides (Fossilized Amber, Squeezed Lemonade, Picked Raspberry, Worn Lipstick, Vintage Photo, Twisted Citron, Cracked Pistachio, Seedless Preserves, Broken China, Abandoned Coral),
- white card base (10,5 x 21 cm),
- water color paper for die cuts and background (10,2 x 21,7 cm),
- water spritzer,
- heat gun,
- Versafine Onyx Black ink,
- sentiment stamp,
- scissors,
- paper glue.

First I made the background. I used Distress Oxides and blended it together.


I used water spritzer to add some interest to the background. I dried it with the heat gun.


Then I cut and colored the ice cream cones.


I again used the water spritzer for the ice cream.


Then I stamped the sentiments and cut it out with the scissors.


And then I just glued all the pieces to the card base. And this is my finished summer card.


This is all from me for today. Have a nice week.

Anja Z.


Cottage Cutz die I used:

Saturday, July 21, 2018

October Harvest

Hello Scrapping Cottage friends! Thanks for taking the time to stop and visit with us today. It's Mary Marsh here bringing you the Saturday edition of the Blog.

There isn't a new release of dies for July,  but there is a Christmas in July sale going on right now. You can save up to 65% on selected dies in the online store.
This is also a throwback month for designs.  The team will be featuring some of our previously released dies to give you fresh ideas for using them.

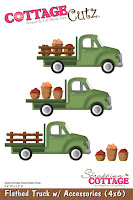
I jumped ahead a few months and thought I would feature a happy harvest card. Not that I am looking for summer to end anytime soon (LOL)!!! My card today is showcasing the flatbed truck w/accessories die. Let's get started with some details on how I created this card.

Step 1: This week I started with my layout. I saw this one on Splitcoaststampers and thought it would work great for the card that I had in mind. I flipped the sketch to accommodate the truck image. It also would allow me to use fall themed patterned paper.

Step 2: I chose my card colors from the patterned paper I found in my stash. The card base is a deep, rich brown shade.
Espresso Brown Card Base (Element 1): 5 1/2" x 4 14"
Patterned Paper (Element 2): 5 1/8" x 3 7/8"
Vanilla Rectangle Panel (Element 3):  3 7/8" x 2 7/8" - 2nd largest stitched rectangle die
Step 3: I cut my truck from colored cardstock- using 2 shades of green for truck body, black and 2 shades of gray for tires, a light gray for door handle and trim around windows, suede for the wood planks, baskets are a brown sugar cardstock.
 The October Phrase is cut in a Cajun cardstock (cinnamon). Used the calendar months die. Looks like it's currently out of stock, but you could use one of Expressions Phrases dies such as Blessings, Grateful or Happy.
Step 4: Started the card assembly. Attached the first 3 panels together using double sided tape. Before I attached the image panel I decided to sponge a few clouds and at the bottom I sponged some kraft ink to simulate the dirt in the harvest field.
I attached the truck using dimensional adhesive. I always like the look of an image lifted from the panel a bit. I forgot to stamp the sentiment before I attached the panel so I did it at this point. I used my MISTI because it's a clear stamp and sometimes it needs stamped twice- and it did. I used Cajun ink so it would match my October phrase.
Step 5: I attached the wood truck planks with Ranger multi matte medium. I ended up cutting the October phrase 3x to give it more dimension on the card.Especially since part of it was against the designer paper ,which is a bit busy. This is element 4 of the sketch. I moved it up top. I guess I took a bit of liberty with this sketch.
For the 3 embellishments of the sketch I found some sunflower buttons in the stash. I thought they worked great.
 
Well that's it for me for this post.  I hope I gave given you some inspiration if you have this truck die. If you don't, it's still available in the online store. See you next Saturday.
 
dies I used to create card:
 
http://www.scrappingcottage.com/search.aspx?find=flatbed+truck
 
http://www.scrappingcottage.com/cottagecutzcalendarmonths.aspx
 
http://www.scrappingcottage.com/cottagecutzpiercedrectanglesetbasics.aspx