Monday, September 25, 2017

Frankenstein Says Hello

Hello Scrapping Cottage friends! Thanks for taking the time to stop and visit today. It's Mary Marsh here bringing you the Monday edition of the Blog.

Well the Fall season is here officially as of Friday, September 22.  With Fall comes thoughts of harvest time, pumpkins, hay rides and of course Halloween.

CottageCutz has a new release of Halloween & Christmas dies that are now available in the online store for ordering.  So if you have made a wish list, now is the time to get it fulfilled.
.

My card today is using some of the new dies: Frankenstein & Ghost Owls and Halloween Phrases & More. So let's get started with some details on how I created my card.


When I saw this Frankenstein Owl die, I immediately knew I was going to make a card for my husband. I call him Dr. Frankenstein sometimes- jokingly of course. He was filling his gas blower in our garage once and the smell filled our entire house. Hence the name was borne for him (lol)!!So he will get a chuckle out of this card as well.


Step 1: Selected my card colors. I found some double sided designer paper in my stash from an old Halloween collection. I liked these patterns and thought it would work well for the layout I had in mind.
 
Green Card Base: 4 1/4" x 5 1/2"
Designer Paper: 4 1/8" x 5 3/8" (cut in half)

Step 2:  I cut my Frankenstein Owl in a light, medium and dark shade of green. He is such a little cutie.
I also cut a rectangle- used 2 different sizes and layered them together on my cardstock to get a wide frame.
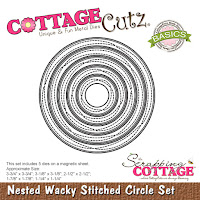
 I did the same with the wacky stitched circle to get a wider frame. To connect the layers together, I used the CottageCutz icicle die. I thought it would work for the drippy goo you see on Halloween cards.
I cut my hello word from the CottageCutz Hello Spring die in a pumpkin shade. The pumpkin is part of the Halloween Phrases & More die.
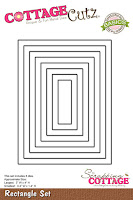
Step 3: Attached the rectangle and circle to the card base. The rectangle is on an angle- just for some added interest.  
I changed the color of the drippy goo to a pumpkin shade. The designer paper has this cinnamon shade in it but its not a lot and I didn't think it was a good match on my card.
My Frankenstein Owl is popped up with dimensional adhesive. Attached the hello word and my pumpkin to the rectangle corner.

To complete my card, I stamped the friend word and scattered a few orange sequins. I hope I have given you some inspiration on a way to use this cute new owl die. It will be available in a few days.
I will be back this Saturday with another sample card with the new dies. So until next time...........inky hugs

Dies I used to create card:

 
http://www.scrappingcottage.com/cottagecutzhellospring.aspx
 
http://www.scrappingcottage.com/cottagecutzcirclesetbasics.aspx

http://www.scrappingcottage.com/cottagecutzrectanglesetbasics.aspx
http://www.scrappingcottage.com/cottagecutznestedwackystitchedcircleset.aspx
http://www.scrappingcottage.com/search.aspx?find=icicle+border


Sunday, September 24, 2017

Penguins with Gifts

Hi everyone!

It’s Anja here. Today I finally got to play with new Cottage Cutz dies. They will be available in the store by September 25th. There is so many cute new motives and you will have so much fun coloring and putting all the pieces together. For my first Christmas cards this season I used this cute penguin die. I colored it with Brusho colors which are new addition to my craft supplies. 


For this three cards I used:
- Cottage Cutz dies (Penguin with Presents, Nested Stiched Scallop Oval Set),
- Brusho colors (Lemon, Orange, Scarlet, Turquoise, Ultramarine, Emerald Green, Sea Green, Olive Green, Black), 
- three white card bases (15x11 cm),
- watercolor paper (3 14,5x10,5 cm), 
- white card stock for die cuts,
- white pigment ink pad,
- water brush and spritzer,
- heat gun, 
- black pen,
- paper glue.he penguin three times. 

First I die cut all the pieces and colored them with Brusho colores. I added a bit of powder to the pallet and mixed it with water. When the pieces dried I glued them together.


 Then I made the backgrounds. I cut it from watercolor paper. I added a bit of Brusho color to the corners of each paper and spritzed it with water.


Water helps the powder make beautiful designs. 


I tapped additional water with a paper towel and dried the paper with heat gun.


I added some white ink around the edges to soften it a bit.


Then I cut three ovals from white card stock and glued it and the penguins to the card base.


And these are the finished cards.


Have a nice Sunday!
Anja Z.

Cottage Cutz products I used:


Saturday, September 23, 2017

Snowglobe Village

Hi, Lois here with another card made with a soon-to-be available stamp/die set -- Snowglobe Fun.  Due to unforeseen circumstances, the new stamp/die and die sets should be available for purchase by September 25.


I used a really old Sketch Challenge from Splitcoaststampers for my layout -- SC50.   I find that I like to go back through the old sketch challenges for a place to start.


To start my card, I stamped the images onto white cardstock.  The set includes two different sentiments which can be placed on the plaque on the front of the snowglobe.  I chose "Let It Snow."


I then colored the images using Copic markers . . .


. . . die cut the images and constructed my snowglobe.


Then I started my card by cutting out my cardstock panels.

Heavyweight white - 8 1/2" x 5 1/2", scored in half at 4 1/4"
Red - 4" x 1 1/4", 2 1/4" x 3 1/2"
Green patterned paper - 4" x 5 1/4"
Snowflake patterned paper - 2 1/8" x 3 3/8"

After adhering all the layers onto my card, stamping the sentiment, and adding the snowglobe, I decided the card needed something else.  So I stamped three snowflakes with gray ink and cut them out with the matching dies, scattering them on the right side of the card.


The CottageCutz stamp/die set I used on this card is Snowglobe Fun.  As you can see, there are several different elements that you can use inside the snowglobe.


Friday, September 22, 2017

Chickadees for Fall

Happy autumn everyone!  It's Jeanne sharing today and I am so happy fall is here -it's my favorite season.  To celebrate I made a card with an autumn feel.
These chickadees are part of the new release and come with both stamp and die.  To make the card, I first colored the birds with Copic markers and cut them out using the coordinating die.  Next I cut an A2 sized panel out of the gingham paper along with a 1 1/2 x 5 1/2 inch strip of dark red card stock.  I used the largest Nested Wacky Stitched Rectangle die to cut the white panel.
Then I stamped my sentiment in dark brown on the stitched panel.  I love how this sentiment goes with the songbirds!
I used several shades of green and two shades of brown to cut the foliage from the Pine Spray die.
Next, I adhered the panels down, offsetting the stitched panel so that I would have room on the left for the large sprays.  I love asymmetry in design and think this works well here.
I used several of the foliage leaves that I cut but not all.  After I had decided on placement, I glued them in place and used foam dots to adhere the birds.

http://www.scrappingcottage.com/cottagecutznestedwackystitchedrectangleset.aspx

Thanks for stopping by and I hope you have a great weekend!


Thursday, September 21, 2017

Spooky Cake!

Hello Scrapping Cottage Friends!

It is Pam from Stamper at Heart Blog Spot creating with you today! The first day of fall is tomorrow my very favorite season!  I just love the warm fall colors and cheering on my favorite football team! And of course Halloween is always fun. It is a great excuse to play dress up even at my age! Hee Hee!!

Cottage Cutz has some wonderful new Halloween dies so please check them out!  They are now available at our online store.

Design Steps:


1.  Start with an A2 white card base, cut a 5 1/4 x 4 1/8 piece of black and a orange polka dot piece
5 1/8 x 4.  Glue the black to the white card base and the orange polka dot to the black

 2.  Use orange, gray, purple, black, dark brown, white, yellow and green and cut out all of the die pieces with the Spooky Cake die and Halloween Pedestal die
3.  Add some Distress Ink to the pieces for some depth
4.  Assemble all of the pieces
5.  Pop to the front of the card and add Boo with a label maker

Cottage Cutz Products

Thanks for stopping by and Happy Fall Y'all!

Blessings
Pam