Kris here to share some Monday inspiration with you☺ I made a Safari-themed Pull Tab Slimline Slider card (that's a mouthfull! LOL!) I made this for my great-nephew's 6th birthday.
(click the pic to see it larger)

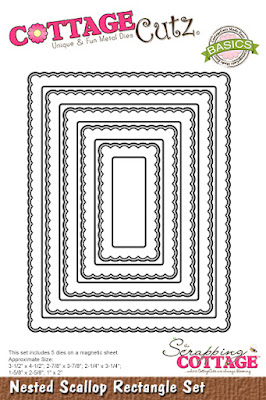
COTTAGECUTZ PRODUCTS:
SUPPLIES:
small magnets
foam tape or strips
ink blending ink pads
glue
CUTTING & SCORING:
• Cut base (green) at 7-3/4" x 9"
-- score the shorter edge at 3-7/8"
• Cut (black) at 8-1/2" x 3-1/2"
• Cut (black) at 3/4" x 2-1/8" (cut 2 of these)
• Die cut (white) largest Scallop Stitched Rectangle Slimline
• Die cut Safari elements (die cut the cruiser 2x)

DESIGN STEPS:
• With the black layer, use the extended die technique to elongate the cut using the 2nd smallest Nested Rectangles Slimline set as pictured below.

• With the white scalloped layer, die cut the lower portion as pictured using the straightest die from the Hills Slimline set.

• Add vintage photo D.O. ink (or color of your choice) to the lower scalloped part.
• Ink blend the top scalloped part with D.O. wild honey, carved pumpkin, crackling campfire, and candied apple (or colors of your choice).


• Add glue to the TOP only of black layer, leaving 1/8" border around top and sides and add TOP scalloped layer.

• Glue the tree to the bottom of the top scalloped layer as shown below.
• Add glue to bottom of black layer, leaving 1/8" border and add BOTTOM scalloped layer, overlapping the top just a tiny bit.

• Affix the rest of your Safari die cuts.

• On the back of the safari cruiser, add 2 magnets (I used glue and Scor Tape): one towards the front and one towards the back. (I used 3 because I messed up on the placement of my slider wrapper the first time, so I went back and added a 3rd magnet and moved my wrapper.)

• Add glue and/or Scor Tape to magnets and add the 2nd cruiser on top. Cover up backside as much as you can w/out adding builk.

• Add glue to the center of both slider wrappers as shown below.

• Add one near the edge of opening on the back and glue the next one 1/2" - 3/4" away from the first (see photo below)
**Important: the placement of the 2nd Wrapper prevents the Cruiser from running over our baby gorilla when the magnet hits the wrapper!!
• On the front, place cruiser to the far right of card and holding it there, turn card over and place your magnets where they automatically want to attract them.
• Add foam strips or tape to the back, around edges and close to the slider opening without hindering it from moving.

• Add glue to magnets and carefully slide the slider tab thru the wrappers and over the magnets. You will have 1/4" of the tab sticking out -- this is what you'll need to grab and pull the slider.

• Pull slider out and write your sentiment, or emboss a stamped sentiment in white! I used a white and a gold sparkly pen.


I hope you enjoyed this tutorial and that you get crafty with your favorite CottageCutz dies!
~Kristine


.jpg)