Showing posts with label grass. Show all posts

Thursday, June 03, 2021

Best of Cluck!

Hello Scrapping Cottage Friends 

It is Pam creating with you today!

IT IS NEW RELEASE TIME! The collection is called COUNTRY FARM! It has the most delightful dies.  Everything from Tractors to Cowboy Chicks!  Each die is just full of awesome details and can be used for so many different occasions.  Today, I am using the Farm Tractor w/Trailer as a best of luck z-fold card.


Design Steps:

1.  Using the Tractor w/Trailer die cut all the pieces.  I used red, black, silver, brown and acetate for the window and head light.  I also used the Stacked Farm Animals for the additional chickens.  And the Grass, Tree and Vine die for the background tree.  Shade and assemble all pieces
2.  For the base of the z-fold card I used a white piece of card stock 4 x 11.  Fold it in half and then fold the front fold in half again.  For the little z-fold white strip I cut a 1 x 11 inch strip.  This strip is scored at 2 3/4 x 5 1/2.  

3.  Before attaching the strip glue down your cloud DP 2 panels at 2 5/8 x 3 7/8 and 1 panel at 5 3/8 x 3 7/8.  Next use your Grass Slimline die and cut 2 pieces of green grass about 1 inch high.  Also cut 4 pieces of white fence using the Victorian Fence die.  Glue the fence to the back of the grass and then glue to the z-fold strip.  Using the Stitched Sun, Cloud and Umbrella die cut out a sun in yellow
4.  Pop up the Tractor and Trailer to the card as shown.  Add the sun to the upper left corner
5.  Glue the tree flat to the back panel as shown.  Glue the 2 additional chickens and bags of grain to the card as shown.  Add the sentiment and your card is finished

CottageCutz Products


Thank you all for stopping by and be sure to check out this adorable new release!

Take Care and Blessings
Pam


Saturday, May 06, 2017

Dinosaur Birthday Kisses

Hello Scrapping Cottage friends! Thanks for taking the time to stop and visit today. It's Mary Marsh here bringing you the Saturday edition of the Blog.

The new baby dies release is just too cute and I just can't stop making cards using these sweet dies (LOL)! And with 42 different designs, I have had lots of ideas.  So today for your viewing pleasure, I am showcasing a couple of the new baby dino dies using the Brontosaurus and T-Rex. I needed a child's birthday card and these dino's work perfectly. What little one doesn't love dinosaur's? And that's both boys and girls.

So let's get started with some details on what I did this week. I already knew I was making a birthday card so I just needed my layout. So when I saw the sketch #643 on Splitcoaststampers this week, I knew it would work for a little dinosaur scene.

Plum Card Base: 4 1/2 " x 5 3/4"
White Image Panel: 4 1/4" x 5 1/2"
I used a hinge technique to get this larger size card base. Here is a link to some instructions I provided previously on how I do this with 8 1/2" x 11" cardstock.

Step 1: Once I looked at this sketch, I thought I would make rolling hills as the spot to place my dino's. I was going to cut the hills but after looking through my patterned paper, I found paper that already had the shape of the hills. I just needed to measure and fussy cut. The paper even had a little pattern. It's the look I was after.

Step 2: Once the hills were cut I adhered to white card base with dimensional adhesive. I used a cloud template and sponged the top of the white cardstock with tumbled glass distress ink. The clouds are covering layer 1 of this sketch.

Step 3: I wanted 3 dino's in this scene so I cut one (1) T-Rex and two (2) from the Brontosaurus dies. On the Brontosaurus I used a peach card stock + peach patterned paper and yellow cardstock and + yellow patterned paper.
On the T-Rex I used plum and olive cardstocks + plum patterned paper. I like the variegated colors on the pattern papers I chose. It adds some interest to the dinosaurs.

I also used the CottageCutz grass, tree and vines die for another element to this card.


Step 4: Now that all the card elements are done, I needed to think about my sentiment and the placement of it. I have a stamp set with individual sentiment words so I chose birthday & kisses. Since they are 2 separate stamps, I stamped in black ink on plum cardstock and cut them into 2 labels. Here is a card close-up.

Well, that's my card for this week. I hope I have given you some an idea for using these Baby dino stamps. Have a great weekend, Blogger friends and see you back here next time........
Dies I used to create card:
http://www.scrappingcottage.com/cottagecutzbabydino-brontosaurus.aspx

http://www.scrappingcottage.com/cottagecutzbabydino-t-rex.aspx

http://www.scrappingcottage.com/cottagecutzgrasstreeandvines.aspx


Friday, July 15, 2016

Old House as Home Decor


Hi, is Vladka. I love pictures of old cottages. There is something homely and magically in them. So, I decided to create one out of the paper. My first idea was to create a card, but after it was finished, I decided to leave it as it is and added some twine. So, this way I can hang it on the door or on the wall. Are you interested how I did it? It is really easy actually. Let me show you.


Here is list of all supplies I used:
Cardstock: watercolor paper for die cuts
CottageCutz Dies: Listed Below
Distress Ink: Peeled Paint, Forest Moss. Fired Brick, Gathered Twigs, Hickory Smoke, Victorian Velvet
Other: White watercolor in tube, brown fun foam, scissors, Sizzix machine, liquid glue, double sided tape, twine

1. So, let's start with the roof, which I cut out from watercolor paper. First I colored it with Fired Brick distress ink and my blending tool. I didn't press too much:


2. Second step is to cover the whole area with Gathered Twigs distress ink. Another layer of distress ink is done with Hickory Smoke. Here you can see, that mixter of all this colors creates realistic roof look.


3. But, because my roof is old, I will use some more Gathered Twigs distress ink and this time I will press a little bit more and also distress the roof edges. Last touch is white watercolor in tube,  or white acrylic paint. I used it together with sponge and gently apply it here and there. When it was dry I apply some more of Hickory Smoke.


4. If you want to get really old look, then use also green acrylic paint and apply it here and there with the paint brush. This will look like a moss. It is optional, but here you can see how did turn out:


5. So, nothing difficult, just playing with distress inks and other color medias. And this took me most of the time. So, let's go to the house. All I did here was, that I colored it with white watercolor in tube and after it was dry, I distress the edges with Hickory Smoke distress ink.


6. I also colored the windows, door and picket fence with Gathered Twigs distress ink and with blending tool and added some white watercolor in tube  here and there. Just curtains are colored with Victorian Velvet distress ink.


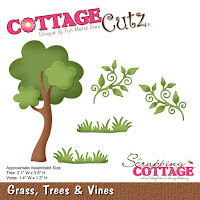
7. For the greenery I used Garden Accessories die and cut the greenery out from white cardstock and colored it with Peeled Paint and Forest Moss distress inks. Then I took paint brush and some water and just went across the greenery. This way paper got wet and I was able to wrinkle all little leaves:


8. Then I glued them on the roof. I think it look cool, don't you? I also used some greenery for the pot plant.


9. Time to put everything together. For this you will need also one more roof, cut out from brown fun foam and additional piece of fun foam, size of the whole house. But first glue the roof on the fun foam roof with double sided tape.


10. Now, glue the roof on the house and in next step glue the whole house on additional piece of fun foam. Cut off the redundant foam. For the finishing touch I also made the back side of the house, so I colored additional piece of the roof and house wall.


11. The last step is to glue the picket fence and some grass and Welcome expression if you want and little old cottage is finished. Today's post has a little bit more photos and I hope this will help you. Have fun.


And don't forget, fourth CottageCutz challenge is waiting for you. This time theme is GREENERY. You can linked your project here. And please, use only Scrapping Cottage dies.

Wednesday, July 13, 2016

Screen Divider Card + Tutorial


Hello Scrapping Cottage friends! Thanks for taking the time to stop and visit today. It's Mary Marsh here bringing you the Wednesday edition of the Blog.

Today for your viewing pleasure, I am featuring dies from both the May "this & that" release & the June "home sweet home" release. I have also created a screen divider card and I will give you all the details on how you can create one as well. You can use your CottageCutz dies in a fun and creative way with this style card.

Card Base: 5 1/2" x 11"
Decorated Panels: 2 5/8" x 4 1/4"

Step 1: Score 5 1/2" x 11" cardstock at 2 3/4", 5 1/2", and 8-1/4" in the horizontal position.

Step 2: To create the Screen Divider fold, fold in half at 5 1/2" score then fold each side back in the opposite direction on the scored lines.


Step 3: Unfold card and lay flat. Using a border punch, create a punched border along the top edge of the card. I used a Martha Stewart trellis punch. I started punching at the 5 1/2" center point and worked my way across the card.
Step 4: To create "legs" at the bottom of the screen you can either use a punch or a die. For my card I used a punch. I worked with half of the card at a time. Keeping the two left panels folded, slide the bottom of those two panels into the punch (only 2 layers at a time will work). Position the cardstock about one-third of the way into the punch and center side to side, then punch.


Step 5: The screen divider is ready for decorating.

I started my 1st panel by sponging in some clouds with a light blue ink using a cloud template.
Die-cut the pieces for this panel using the grass, trees & vines, build-a-house accessories, spring stamps and fancy pocket plus dies. Bike is cut in a coral cardstock, tree in gumball green and matching patterned paper, birdhouse in pool party.
 
The next panel I used the same light blue ink to sponge the panel and a medium green for the grassy area. The dies are from the same sets listed above.
 
The 3rd panel is using the same dies listed above plus the garden accessories & hello spring dies. I cut a stencil from the clouds & sun die and sponged in the sun in the upper corner. I also added clouds and a grassy area. I wanted some small butterflies so I used a punch for those.


On the last panel I used the spring bloom corner and the bicycle in grass  and the fancy pocket plus dies. I sponged the background in the light blue ink. My corner is cut in coral cardstock and the butterflies in a rich razzleberry cardstock.
 
 
I adhered the panels to the screen divider and to hold in place I used some light blue ribbon that matches the card base.


Here are some other close-up shots of the card panels.


And, that my friends is my card for this week. Thanks for sticking with me till the end of this post. I know it was a long one. Don't forget about our current challenge. This one is Greenery. Get more info here. So until next time......inky hugs.
http://www.scrappingcottage.com/cottagecutzbuild-a-houseaccessories.aspx

http://www.scrappingcottage.com/cottagecutzgardenaccessories.aspx

http://www.scrappingcottage.com/cottagecutzcloudsandsun.aspx

http://www.scrappingcottage.com/cottagecutzgrasstreeandvines.aspx
http://www.scrappingcottage.com/cottagecutzfancypocketplus.aspx

http://www.scrappingcottage.com/cottagecutzspringstamps.aspx
http://www.scrappingcottage.com/cottagecutzspringbloomcornerelites.aspx