Showing posts with label flowers & more release. Show all posts

Monday, March 06, 2023

Floating Sentiment Shadowbox

Happy Monday CottageCutz friends!

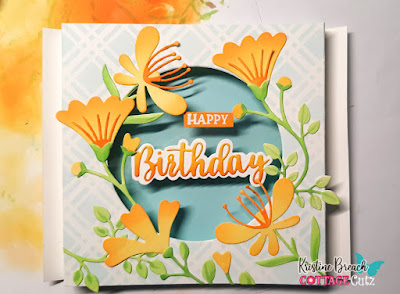
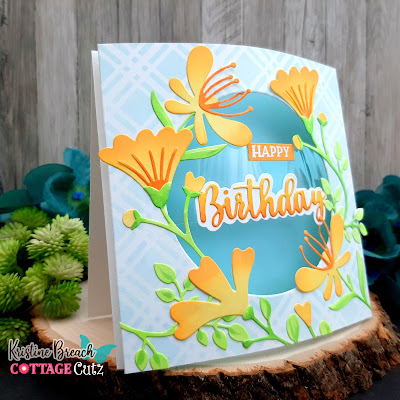
Kris here sharing with you today.  I have a Floating Sentiment Shadowbox type of card.  I've used Flower 1, Flower 6, and Flower 7 from the newest Flowers & More Release.


This style is very easy to make, but if you'd like to watch a video, Jennifer McGuire recently shared this one and I was inspired to try it for my card this week. ☺

Design Steps:

1.  I cut a white card base at 5" x 10" and scored at 5 inches.  

2.  I cut another piece of white cardstock at 5" x 7" and scored along the 7" side at 1/2" and 1" on both ends.  Accordion folded them and burnished.

3.  I stenciled a background with the Plaid stencil from the Daisy Stencil set (La-La Land Crafts) with Tumbled Glass Distress Oxide ink.


4.  I die cut a circle from the center of that piece using the 2nd largest Pierced Circle set.


5.  Next, I die cut my flowers from white cardstock and added Distress Oxide ink in Squeezed Lemonade, Wild Honey, Carved Pumpkin, Twisted Citron, and then I added some shading to the leaves with a Copic marker. 

6.  I then placed them around the opening and glued them down.


7.  I stamped & embossed my "Happy" sentiment and die cut the "Birthday" from the Happy Birthday w/ Shadow die.  

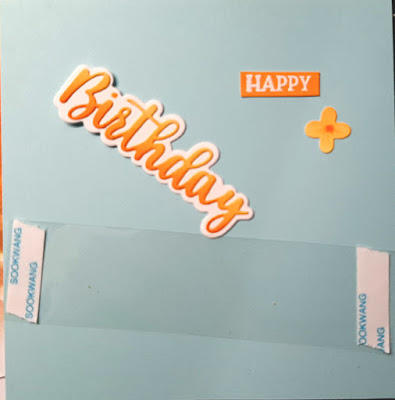
8.  I cut a strip of window sheet about 4-3/4' x 1-1/2" and added Scor Tape to each end.


9.  I then taped the window sheet to the back of my flower layer, in the center.


10.  I attached my sentiment pieces to the front of the window sheet.  I ended up cutting off one of the limbs from the stem on the left so it didn't cover up my sentiment too much. 

11.  I then tried out different colors of cardstock as my backdrop for my flowers and decided on this light teal color.  I cut it to 3-7/8" x 4-7/8" and set it aside.  *This is not attached to the front floral panel.


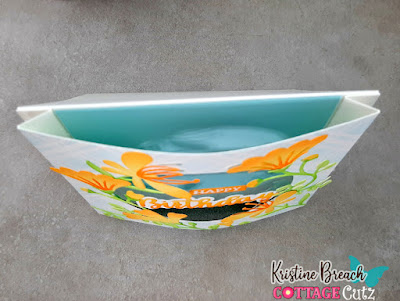
12.  I added Scor Tape to the 1/2" scored flaps of the flower panel piece and lined them up with the side edges of my card front.  I love how it causes the front panel to dome out!

13.  I then added glue to the backside of my blue panel and inserted it between my front floral panel and the card front so that the 4-7/8" is vertical.  


Done!


PRODUCT I USED:


Thanks for taking a peek!  I hope you are inspired to get creative with your favorite CottageCutz dies!

~Kristine


Monday, February 27, 2023

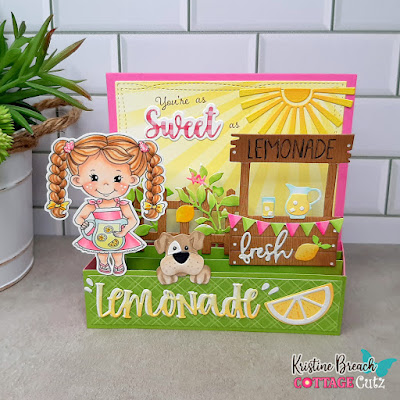
Sweet as Lemonade

Happy Monday crafty friends!

Kris here with a cute Box Card!  I really love to make box cards like this because they are easier than they look and you can fit more dies/images on them to create cute scenes and really gives your recipient a fun surprise!  ☺ 

I've used several brand new sets from the Flowers & More Release -- which are all 30% off for a limited time!


*The girl is an image I drew as part of my own  digital stamp collection (2015) and is not currently available, however this boxcard would also be cute with only the CottageCutz dies listed or add your own favorites from the shop!


Design Steps:

1.  I cut all my cardstock and patterned paper pieces:

Pink Cardstock:
• 4-7/8" square
• (2)  2-1/2" x 1-1/4" - scored 1/2" in on each end;  mitered top flaps

White Cardstock:
• die cut the largest Nested Wacky Stitched Rectangles

Lime Green Cardstock:
• 1-1/4" x 4-7/8"
• (2) 5-5/8" x 1-1/4" - score 3/8" in from each end; miter top flaps

Patterned Paper (green):
• 4-3/4" x 1-1/8"

Patterned Paper (pink):
• 1-1/8" x 1-3/8"


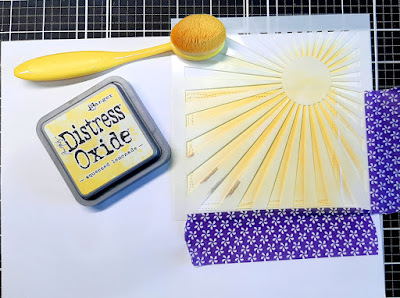
2.  I stenciled sun rays onto the Wacky Stitched Rectangle with Squeezed Lemonade Distress Oxide ink.


3.  I mounted my patterned papers and sun rays to their corresponding pieces as shown below.


4.  To assemble the shelves, I used the same technique as my cow box card HERE (follow steps 8-14).


5.  I die cut all my decorative pieces, then colored and assembled them.  

*Note:  I die cut 2 of the lemonade stand, one in a wood pattern and one in white and glue together to make it more sturdy.  

6.  I attached all my pieces!  

*Note:  I stamped "You're as" onto the sun rays panel.  Then glued the Sweet w/ Shadow in place.  I attached the stand, fence and my stamped girl with a piece of heavy acetate that extended an inch below the die cut/image and attached that to the shelves.  You could use cardstock, but the acetate I used is sturdier than c.s.  Here's a couple of process photos.


One more look at my finished card.


It folds to the side and fits into a 5" x 7" envelope.


Products I Used:


Monday, February 20, 2023

Heartfelt Sympathy

Hello and Happy President's Day crafty friends! 

Kris here sharing some inspiration with you, but first.... we have a HUGE President's Day Sale going on right now thru Friday, 24th!!  Save up to 70% OFF on selected CottageCutz dies in the store! Shop early for best assortment!


Today's card features flowers & leaves from the new Flowers & More Release -- which are still 30% off -- a great deal and these are a must-have for your all occasion stash!  All the CottageCutz products I've used on this card are pictured and linked at the end of my post.

CUTTING & SCORING:
  • Sand-colored Card Base = Cut 9-1/2" x 6" - then score the longest edge at 4-3/4"
  • Patterned Paper (Teal) = Cut 4" x 5-1/4"
DESIGN STEPS:

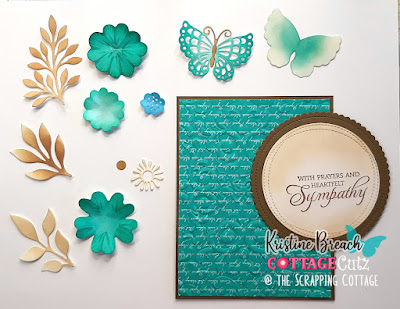
1.  I embossed my teal patterned paper with a Parisian 3D embossing folder, and attached to Suede card panel (4-1/4" x 5-1/2")


2.  I stamped a sentiment on my white circle, then sponged some Gathered Twigs distress ink to tone down the white.  I glued it onto the scalloped circle, then onto my card front, over to the right edge.

3.  I die cut Flower 3, Flower 5, Leafy Branches 1, 2, and 3, and the Butterfly Kayla from white cardstock and then added distress inks to color them; Gathered Twigs for branches & butterfly body.... Peacock Feathers for the blossoms and butterfly wings... Broken China for smallest blossom center.  


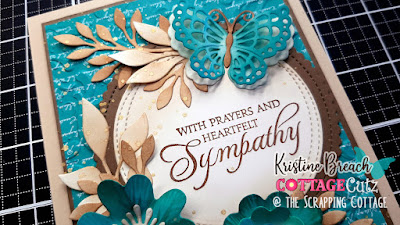
4.  I figured out placement of everything and glued in place, then adhered to center of my sand-colored card base. 

5.  I then spattered some metallic gold acrylic paint over my leafy branches (mostly).  I love the look this gives for a nice finishing touch.  


Here's one more look of the finished card...


COTTAGECUTZ PRODUCTS USED:


Want to watch CottageCutz designers in action? 

Follow the CottageCutz YouTube channel here.

~Kristine


Monday, February 13, 2023

Partial Front Birthday Card

Happy Monday crafty friends!

Kris here with a super easy floral birthday card using Flower 1 and Flower 2 from the new  "Flowers & More" Release!  I do love the larger size of these flowers as they are super easy to color and assemble so this card came together very quickly!

The individual dies in this release are all 30% off!  ☺ They are FANTASTIC for birthdays, weddings, sympathy... you name it!  A great staple to have in your stash of dies!


This is an A2 top folding card, but with part of each side cut off the front for a li'l bit different look.


CUTTING & SCORING:

Yellow Cardstock = 4-1/4" x 11" 
- score at 5-1/2" (card base)
- Cut 1" off each side of the card front, just up to the score line. 

White Cardstock = 5-1/4" x 2" (inside panel) 
- die cut a circle using 4th largest Pierced Circle Set  

*Tip - this would look great using ovals instead of circles - I used what I had.

Coral Cardstock = die cut a scalloped circle using the 2nd largest from the Nested Stitched Scalloped Circle Set

Patterned Paper Green (center panel) = cut at 2" x 5-1/4"

Patterned Paper Floral (sides) = cut (2) that are 3/4" x 5-1/4"


DESIGN STEPS:

1.  Open your card and attach the 2 floral pieces to each side, leaving equal border all around.

2.  Stamp a sentiment if you wish on the white panel and attach to the center inside of card.


3.  Close card and attach your green patterned paper to the front center panel.

4.  Stamp on white circle if you wish and glue to the coral scalloped circle, then onto the center panel of card front. 


5. Die cut your flowers from white cardstock and add Distress inks with a blending brush.  (I used Mustard Seed, Wild Honey, Abandoned Coral, and Candied Apple for the flowers, and I used Old Paper, Shutters, and Mowed Lawn for the stems/leaves.)  Assemble the pieces.  


6.  *Optional:  Next, I spattered some metallic gold paint (mixed with a tiny bit of water) for a shiny distress look.

7.  And attach to your center panel.  Embellish with enamel dots or gems if you wish, and done!


These make quick and pretty cards that are always nice to have on hand. 


PRODUCTS I USED:


Thanks so much for looking!  Happy crafting!

~Kristine