Showing posts with label Toucan. Show all posts

Saturday, July 17, 2021

Toucan Celebrate Your Birthday!

Hello Scrapping Cottage friends! Thanks for taking the time to stop and visit with us today. It's Mary Marsh here bringing you the Saturday edition of the Blog.

IT'S NEW RELEASE TIME! We have a new collection of Slimline Designs. Your slimline cardmaking is going to get a lot easier. We have 20 new designs and they are on sale. You can get each individual die for a limited time 25% off. The dies have appeal for all styles of cardmaking. So check them out and make your selections.

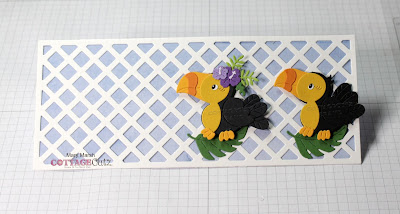
Today for your viewing pleasure, I am featuring the new Lattice Slimline die and paired that with the Toucan from our 2020 Beach & Tropical release. I created a birthday card for my daughter-in-law who celebrates in August.  I have plenty of time to make sure it arrives on time (LOL)! I am notorious for getting cards in the mail at the last minute! So let's get started with some details on how I created my card.

Design Steps:

I started my card by cutting the lattice in white cardstock. For the background I used sky blue designer paper. I am also using a white card base.

Card Base: 3 3/4" x 8 3/4""
Lattice: 3 1/2" x 8 1/2"
Blue Designer Paper: 3 3/8" x 8 3/8"

Next, I started building my outdoor scene. I cut the toucan with cardstock following the packaging colors. I also cut some extra greenery using the Tropical Bouquet die.
For my sentiment I used 3 different stamps and by masking and the help of my MISTI, I stamped on 3 lines in a grape ink. The banner is one of the extra dies that was included in the Windows Slimline die set. 
Now that all my elements are cut I am ready to start the card assembly. I attached the blue designer paper to the lattice with double sided tape. Then the toucans were attached with dimensional adhesive. I have them standing on a green tropical leaf.  
Next, I attached the banner sentiment and the two tropical leaves. 
The Birthday phrase is from the Fairytale Birthday die. I cut two for more dimension in a grape cardstock.
To finish off my card I attached the image panel to the white card base. I added some additional tropical greenery in the corner. I hope I have given you an idea for a way to use this new slimline lattice die with dies you already have in your collection. See you next Saturday. 

Dies I used to create card:


Friday, August 28, 2020

Toucan Birthday Party

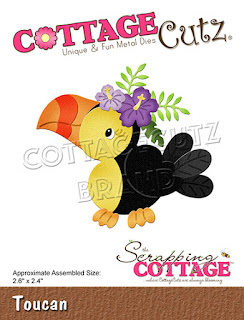
Happy Friday!  It's Jeanne today with a fun, bright birthday card featuring the toucan from the new Beach & Tropical release.  It seems every week I get a new favorite die.  This toucan is so adorable, I think it may be my new favorite!
I had this sentiment had thought it so perfect for a toucan birthday card.  The first thing I did was pick out a paper for the background.  I wanted it bright with yellow and orange since those colors are in the birds' beaks.  There were multiple options but I liked this one for its casual feel.  From there the colors were chosen and the rest was easy.
I cut the pieces from various colors of cardstock using two oranges (beaks, feet, flowers) and two yellows (bird, cake, flowers).  I cut the cake stand from silver and then used paper snips to cut off the base to make a cake plate.  I assembled the birds but did not attach the eyes or feet.  I wanted the eyes to be looking towards the cake and the feet on the branch, so these will need to be the added last.
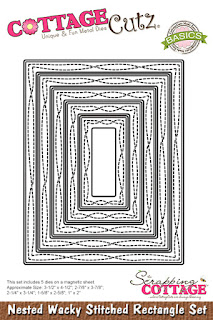
Since all of this will be adhered to an A2 card base, I cut a panel from my patterned paper 4 1/4 x 5 1/2 inches.  I used white cardstock to cut a rectangle using the largest of the Nested Wacky Stitched Rectangles.
I stamped the sentiment in the lower left corner of the white rectangle, centered it on the panel and added the branch and cake.  I  placed the birds on the card without gluing down to finalize placement of the branch.
I glued the body of the lower toucan first leaving the head unattached so I could slip in the upper toucan and adjust its placement.  When that was done I adhered the lower toucan's head using a fine tipped glue.  Then I added the eyes and feet.
The lower right of the card looked a bit bare so I added a few flowers.  Normally I like white space on cards but this one is so festive It seemed to need MORE!  So I added....
a few sequins for bling!  After all, what's a party without sparkle?

And now a little extra tip:
When cutting the beak, feet, body and flowers I had colors for parts that I did not use.  It took just a few minutes to assemble a few more beaks and flowers.  Now I have them ready to use on other cards.  Not exactly the same as this card, but definitely usable.  I store these in the die package so they are ready to go!

Dies:
http://www.scrappingcottage.com/cottagecutztoucan.aspx

http://www.scrappingcottage.com/cottagecutzlayeredcakeandstand3x3.aspx

http://www.scrappingcottage.com/cottagecutzgardenbear.aspx
http://www.scrappingcottage.com/cottagecutznestedwackystitchedrectangleset.aspx

Thanks for visiting today.  Be sure to stop by the online store where the new release is on sale for a limited time.

I hope you have a fun and creative weekend!


Wednesday, August 26, 2020

A Sweet Hello

Hello!  This is Sukie and today I'm sharing a card using one of the sweet birds from the Cottage Cutz Beach & Tropical die release! There are so many fun dies in this new release I've been having a blast creating with them!

I created an ink blended background, with only one color on the entire card panel.  My card base was then splattered with water.

The toucan paired so well with the pretty hibiscus flowers, I decided to cut out an extra flower for my card. All of my die cuts were shaded with Oxide Inks.
Next, I masked off my card panel and splattered it with some paint at an angle.  I also hand cut a couple of flags. The sentiment was heat embossed on the solid flag.

I adhered the cluster of hibiscus to the background of my card.  I love how the bold colors pop against the yellow!
The sweet bird of paradise was perched up on the patterned flag.  The grouping of hibiscus are so pretty with the coordinating toucan.
The sentiment tag and a few enamel dots were the finishing accents on this tropical card making for a fun way to say hello!
Here are the die sets used on my card, available in the store:

Thursday, August 06, 2020

Tropical Toucan

Hello Scrapping Cottage Friends

It is Pam on the blog today!

I am bringing you another BRAND NEW RELEASE!  And it is all about the tropics and the wonderful lazy days of summer!! This selection of dies is on sale in the store for a big 25% off.  Check them out HERE!

I love all the bright colors you use with these dies.  Today, I am featuring the Toucan.  I used bright colors and a black background to make them pop.

Background Photo by Bart Zimny on Unsplash

Design Steps:
1.  Using the Toucan die cut out all of the pieces using: black, orange, red, yellow, 2 shades of purple and green card stock.  Shade all of the pieces using TH inks and a small applicator
2.  I cut out a branch using brown card stock and the Garden Bear die.  I also cut out additional leaves using Sloth die and 2 shades of green card stock.  Using the Pierced Circle second from the largest cut out a piece of orange chevron DP.  Use a white A2 card base and a piece of black card stock cut 4 x 5 1/4.  Also use a piece of black polka dot DP cut slightly smaller then the black card stock
3.  Assemble the Toucan with a fine tip glue
4.  Glue the polka dot DP to the solid black card stock.  Then glue down the orange chevron circle to the polka dot DP as shown slightly higher then center
5.  Arrange the branch and leaves and then glue down add the leaves at the top right of the circle.  And last glue down the toucan

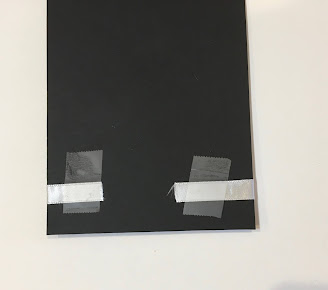
6.  I added ribbon to the card and this is a trick I use to get the ribbon to lay flat and tight around the card.  I cut a piece of ribbon about 8 to 10 inches and tie my square knot.  Then I hold it up by the square knot and cut the ribbon in half directly below the knot.  I then tape it to the back of the card as shown.  Your card is complete
Cottage Cutz Products


Thanks so much for stopping by!  We really appreciate you and don't forget to check out this adorable new release!
Blessing 

Pam