Hello Scrapping Cottage friends! Thanks for taking the time to visit with us today. It’s Theary Chea, and I am so excited to be here today on the blog. I am such a fan of the winter season, and the recent release has just put me in the holiday mood. I am sharing a fun interactive card that was made using the Joyful Snowman die set. So, Let’s get started!
Design Steps:
I cut out the images from white cardstock and colored them in with Copic markers. The markers that I used are listed below:
Snowman: W6, W4, W3, W1, W0, E37, E31, YR21, YR14, BG18, BG75, BG09
The letter J and the letter Y: R89, R59, R39
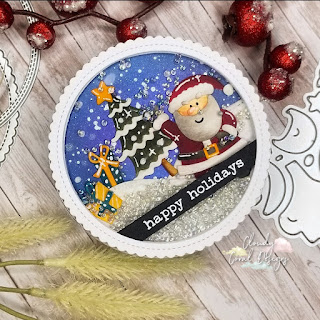
Poinsettias: R29, R39, YG99
(The photo shows the letter Y colored in green, but I did change it to the color red on the final card.)
There are four layers to my card.
- For the card base, I used white cardstock cut down to 4.25” x 5.50”
- The red card layer measures 3.75” x 4.75”
- The vellum sheet was cut with the largest Nested Stitched Scallop Rectangle Set
- The white card front was cut using the Double-Stitched Rectangle Set
The card front:
For the background, I used hybrid ink in a combination of four colors. The colors that I used are mustard seed, broken china, prize ribbon, and black soot. I like to use a blending brush to help with the blending process when I am ink blending.
I then used white and gold paint to splatter onto the card front.
For the ground, I used a hillside border die and cut that out of white cardstock. I also use the same nested stitched rectangle die to cut it down to size. I’m am doing this because I want to have the same stitched border all over the card front.
I wanted to add a little bit of interest to the hillside cutout. So, I used a snow pen to create a snow effect. I love this technique because it gives the card front a lot of drama without doing a lot.
Then, I adhered the snowy hillside and the letters onto my blended card front using liquid adhesive, making sure to leave space in between for our cute snowman.
So for the fun part! I attached the cute snowman to an action wobbler. If you’re unfamiliar with an action wobbler, it is the mechanism used to create movement (wobble) on your card front. The action wobbler is used to create the interactive effect. I attached one side of the action wobbler to the snowman and the other side to the card front.
I also added a black sentiment strip from my stash on the bottom corner of the card front.
Isn’t it so cute!
Then, I used a snowflake embossing folder in my stash to emboss the red layer. I also went over the embossed area with white ink. Applying white ink over your embossed areas is a great trick to create extra interest in your card.
Now, to assemble the card.
Using liquid adhesive, I adhered the top card front to the vellum piece that I cut out using Cottage Cutz Nested Stitched Scalloped Rectangles Die. Then, I used foam tape to adhere the card front to the red embossed layer. And finally, I adhered everything down onto the side folding card base.
I love adding dimensions and layers onto my cards, and I hope you give some of the techniques that I share a try.
💖Have a wonderfully blessed day! Until next time!💖
Theary Chea
Here is a short video with the wobble in action!
Supplies used:
Joyful Snowman
CottageCutz Nested Stitched Scallop Rectangle Set
Double-Stitched Rectangle Set