Showing posts with label Sweet w/Shadow. Show all posts

Monday, March 13, 2023

Sweet Easter Wishes

Hello Scrapping Cottage peeps! 🐤

Kris here, sharing an Easter card featuring the CottageCutz Spring Bowl w/ Eggs.  


Design Steps:

I cut and layered the following, bottom to top:

• White card base = 4-1/2" x 11" and score at 5-1/2" for a top folding card
• Patterned paper (gingham) 4-1/2" x 5-1/2"
• Die cut largest from the Nested Scalloped Rectangles set (attach with foam tape)
• Patterned paper (scripty) 4-1/4" x 5-1/4" 
• Die cut largest of the Nested Stitched Scalloped Circles set
• Die cut Spring Bowl w/ Eggs, the Sweet w/ Shadow, and Wishes w/ Shadow from white cardstock and apply distress ink and/or markers.  Assemble. 
• Adhere bowl to lower part of scalloped circle with a thin piece of foam strip.  Adhere eggs behind the bowl with glue.
• Stamp "Easter" and trim.
• Run ribbon around the Scalloped Rectangle (between foam strips) and tie a knot on front right side.
• Add foam strips to each of the sentiments and adhere as shown.

Kept it fairly simple this week.  I hope you all have a funtastic week!
~Kristine

Products I used:


Monday, February 06, 2023

So BLOOMIN' Sweet

Hello sweet friends!

Kris here with a Springy card for someone 'So Bloomin' Sweet'!

My card today uses 3 brand new dies from the "Flowers & More" Release!  For a limited time, the whole bundle is 50% OFF!!  Or, if you want to choose individual dies, they are 30% off!  ☺ 

Center Step Fold Card
When folded, this card will be a 5-1/2" square


How to Make It

Photo reference for cutting/scoring your base.  
BLACK lines = CUT  \  RED dashes = SCORING
You can click on the pic to see it larger.


• Cut base at 5-1/2 x 11".  

• Put cardstock in paper trimmer VERTICALLY and line the right side up on the 1" line.  Position the blade at 1" and cut down to 6-1/2".

• We need the same cut on the parallel edge.  To do so, you can flip it over (side to side, not bottom to top) and repeat that step.  

• Turn card horizontally and score from the outside edge to the cut lines at 1", 2" and 6-1/2"

• Score between the 2 cut lines at 5-1/2"

The 2" score lines are both valley folds.  All other score lines are mountain folds ☺


• Die cut the largest die from the Nested Wacky Stitched Rectangles set from white cardstock.   If you don't have these or similar, you can cut a rectangle that is 3-1/2" x 4-1/2" - I then sponged it with clouds.

•  Die cut 4 grass borders using the Grass Slimline set from lime green cardstock.  Trim 2 of them to 3-1/2" wide, and 2 of them to 5-1/2" wide.  I sponged Mowed Lawn Distress Oxide ink to 3 of them, leaving one of the 5-1/2" wide ones a lighter green.

• Die cut Bunny with Butterfly |  Little Flowers |  Fence w/ Flower Garland | Arch Sun - then  color and assemble them. 


Glue the sun to the top of the cloud layer, and one of the grassy layers to the lower part.

• Add foam strips to the back of the other shorter grassy layers and pop it to the bottom of the cloud layer, overlapping the glued grass.

• Add foam strips to the back of the fence and attach it between the 2 grassy layers.

• Pop the butterfly up with a foam dot.

•  Glue that whole layer to the middle section of  card base, aligning top edges.

• Add foam strips to the bottom 1" x 5-1/2" section and attach the lightest widest grassy layer.

• Add foam strips to the bottom only of the shorter grassy section and attach to the front bottom of card. You will want to leave the top part non-glued so you can tuck flowers behind it.  

•  Glue the lower half of the bunny between the 2 bottom layers of grass and the little flowers behind each layer of grass.

-- I added some Wink of Stella to the butterfly, bunny's bouquet, and the garland flowers for some shine!


• Cut 2 patterned paper strips to 7/8" x 4-1/4" and tape to each side panel.

• Die cut sentiments and glue to bottom front of card.   -  The "Bloomin" is pieced together from the Garden Phrases.  The "SO" is from Berry Phrases.  And "Sweet" is from Sweet w/ Shadow die.


Hope your week is BLOOMIN' with creativity! 
Kristine


Products I used:


Monday, January 02, 2023

Sweet Hearts Slimline Shaker

Happy New Year crafters!

Kris here sharing with you today.  I have a feeling we're in for a very long cold winter here, so I decided to make a cute Snowman Slimline Shaker card for Valentine's Day using the Snowmen Friends and the Cookies & Cocoa dies from the Christmas Release #2.  I've also used the Whimsical Hearts Slimline die - I thought with many open spaces it would be perfect for a shaker card!  (See product list at end for a full list with links.)


- CUTTING -

Dark Teal Cardstock
•  8" x 9" and score the 8" side in half for a top folding horizontal base.
• Whimsical Hearts Slimline (try to keep the hearts in place after they're cut)

Pixie Pink Cardstock
Whimsical Hearts Slimline (punch out all hearts)
 
Patterned paper (teal with white grid)
• 3-3/8" x 8-3/8" (for background behind the sequins)

Acetate/Window Sheet
• 8-3/8" x 8-3/8"

Light Teal Cardstock
• Stitched Hearts (2nd largest centered in middle of largest die to make a frame)

Dark Pink Cardstock
• Stitched Hearts (largest die)

White Cardstock

Black Cardstock

- ASSEMBLY -

1.  Teal Whimsical Hearts Slimline piece - punch out all the large and medium hearts, but try to keep all the tiny & small hearts in place.

    - Turn piece onto backside and place a small dot of glue onto each tiny & small heart.
    - Place acetate onto back of teal piece and press down where glued hearts are.
    - Turn piece over and carefully lift off the Teal background, leaving the tiny/small hearts

2.  Pixie Pink Whimsical Hearts Slimline piece - add glue to the backside and place carefully onto front of acetate, lining up the teal hearts.

    - Glue in any remaining tiny/small hearts that may not have stuck or that fell out after die-cutting so that all the tiny/small hearts are filled in and all the medium/large hearts are empty.

3.  Turn Pink piece onto backside and add 1/8" foam strips all along the 4 edges, getting very close to the edge, but not past it.  

    - Remove backing from foam strips.
    - Add shaker elements (ie. sequins, glitter, beads, etc)

4.  With your patterned paper piece turned upside-down, carefully fit it onto the top of foam strips, lining up the edges.

5.  Add tape or glue to back of shaker and center it onto card front.

6.  Add dimensional tape or foam strips to back of Light Teal heart frame and adhere to Dark Pink heart.

7.  Color Cocoa mug, and 2 of the Snowmen and pop them onto heart with foam tape.

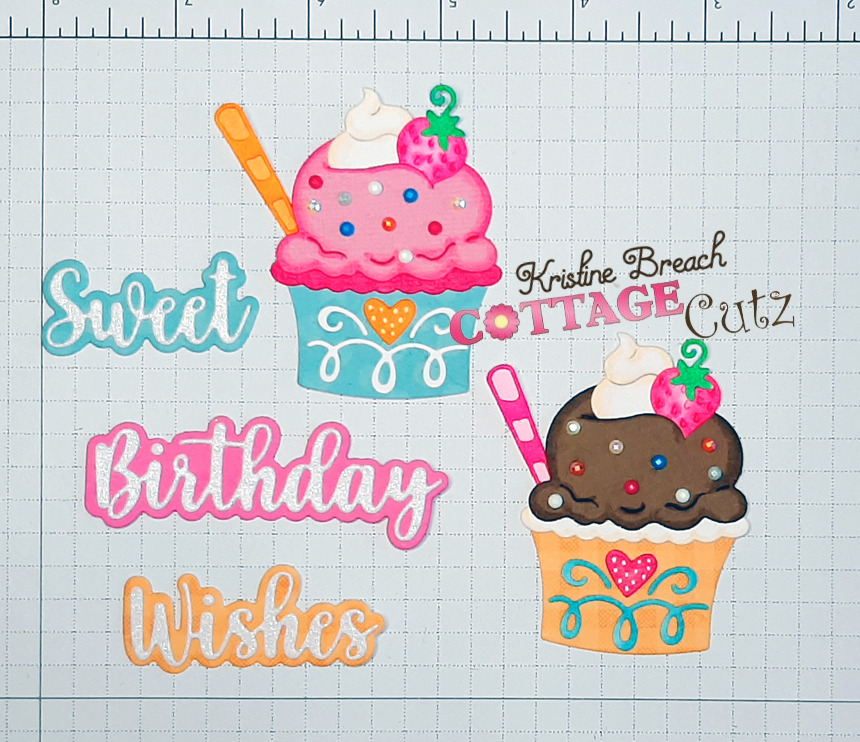
8.  Glue the white "Sweet" onto it's black shadow and adhere to the top left of large heart. 

    - Adhere hearts to middle of shaker.


I hope this project inspire you to get crafty in 2023 with your favorite CottageCutz dies!

~ Kristine

PRODUCTS USED:


Sunday, June 26, 2022

Sweet Slimline Birthday

Hello and welcome back ~ it's Kris here on this sweet Sunday... or shall I say sundae? ☺  This week I'm sharing a yummy slimline birthday card using the Ice Cream Sundae die from the new Sweet Treats release, along with some other funtastic CottageCutz dies! 


Design Steps

I cut a piece of pink cardstock to 8-1/2" x 7" & scored at 3-1/2" along the 7" side.

Next, I die-cut a white frame (I used glittery white cardstock) from the Windows Slimline die.

And then I cut 3 pieces of coordinating patterned papers at 2-1/2" x 2-3/4".  


I glued the patterned papers to the back of window frames, and then glued the frame to card base.


Next, I cut all my pieces with the Ice Cream Sundae and sentiment dies and glued together.  
  • The cupcake liners were cut from patterned papers in the same paper pad as my 3 rectangle frame pieces so they coordinate.  I cut the rest of the die out of pink, brown and white cardstock. 
  •  I gave some shadows to the strawberry & chocolate ice cream and colored all other pieces with Copic markers.  
  • The top layers of the sentiments were cut from glittery white cardstock, like the frame.
  • I added some shaker elements to the ice cream for some sparkly "sprinkles"

And to finish the card, I attached all the die-cut elements to my card front using foam dots.  Easy peasy!


Thanks for taking a peek!  Hope your Sunday is extra sweet!

~Kristine


Here are the products I used:


Sunday, June 12, 2022

Ice Cream Truck Slider

Hello Scrapping Cottage Friends!  

Kris here with my debut as Guest Designer!  With the arrival of summer, I'm excited to be working with this new Sweet Treats release as there are so many occasions for these dies!  

I made a super easy Pull Tab Slider card using Ice Cream Truck.  


You find the list of products I used linked to the store at the end of my post.  But for ease sake I'll list them here along with some other tools needed for this project:

Products:                                            
•  Ice Cream Truck die                         
•  Sweet w/ shadow die                        
•  Happy Birthday w/ shadow die     
•  Wishes w/ shadow die                      
•  Clouds Slimline die                                                
•  Hills Slimline die
•  Pierced Circle Frames die
Other:
•  stamps of your choice  
•  patterned paper                  
•  ruler                                              
•  paper trimmer
•  foam strips/tape
•  low-tac tape     

As always... if you need to see my photos up closer, just click on them for a larger size.

Design Steps:  
  • We all know it's more fun to eat our dessert first.... so I started this project with the FUN stuff!  That is... cutting and piecing together my Ice Cream Truck!  I had this fun paper with blue and pink ice cream trucks, so I matched it.  
  • Next, I cut my main pieces of cardstock.  
    • Card base (grey) is cut at 6" x 12" and scored at 6"
    • Another piece in the same color as base cut at 4-1/2" x 5-3/4"
    • and a dark pink cut at 6" x 6" 
  • To make the frame on the front, I measured in 1/2" on every edge (near the corners) and placed a light pencil mark.  You'll end up with 4 "X"s  near each corner.  (if you don't have an "X" then you might need to extend your 1/2" marks/lines a bit until they intersect with the one parallel.)  I then used my paper trimmer to CUT between each of those "X"s to end up with a frame.  
    • Erase mark lines or turn it over to the other side ☺
  • I cut a piece of white to 2" x 5-3/4" and cut the very bottom using one of the Clouds Slimline dies.
  • I then cut (2) pieces of coordinating designer papers at 2" x 5-3/4" and cut the very top of each with one of the Hills Slimline dies.
  • You want to add glue to the (front) sides and top (NOT the bottom)  of your cloud border and attach BEHIND your frame at the top as shown below.
  • Next, we need to cut a notch out of our frame for our pull tab. (You could do this step before attaching your clouds - I just forgot to do it prior).   I used a small circle from the Pierced Wide Circle Frame Set to cut a PARTIAL CIRCLE from the LEFT edge of your frame as shown below.  It's important that you cut from the left side because it you do it on the right, your truck will be driving backwards!  ☺ 
  • Now we need to cut the same notch out of our card base in the exact spot we cut the frame.  SO... you want to lay your notched frame on top of your CARD BASE making sure everything lines up and fold is at the top, then lightly draw the outline of your notch onto the card base and cut the notch using the same circle die as we did in the previous step.
  • I then taped my 2 pieces of patterned paper together and added adhesive to the (front) sides and bottom (NOT the top!), then placed BEHIND my frame at the bottom ***NOTE:  lay your truck in the middle first so you know how far down to attach your patterned papers.  
  • Next, I placed my 4-1/2" x 5-3/4" grey slider piece behind my frame, but FLUSH with the left hand side and centered between the top and bottom.  You can write or stamp "PULL" where the tab dips down, OR draw an arrow going to the left to let your recipient know to pull.  
  • Now remove your slider piece and set it aside.
  • Reminder - our frame is just sitting on our card base - it is not attached yet!  
  • Decide what you want to have revealed when the truck is being pulled!   I stamped a "YUMMILICIOUS" sentiment and some confetti .  To find the placement, I laid my truck onto my card and off to the left - see photo below for placement.  Now you can see how much space you have and decide what you want to fill that space with!  ***It's best not to have too much dimension as it may prevent the truck from sliding back into place.  Flat stamped images are best!

  • Now we can add our foam tape to the back.  Again, line up the slider (from the front) so that your arrow or "PULL" is lined up in the center of your notch and the edge of slider is flush with edge of frame... and the whole piece is centered between the top and bottom edges of card on the back.  To keep it in place, I added some purple low-tac tape.
  • To the BACK of your frame, add foam tape to the 3 sides close to your slider, but not TOO close or it won't slide well.  (Don't tape the edge where your notch is cut out.)  
  • And now we can add our truck!  You'll want to pop it up with foam strips/tape so it goes over our frame on the edge.  Start your strips in a li'l ways as shown below so that our truck will go over the frame a li'l bit.  That way we know it will reveal our whole stamped image.
  • Attach your truck to the far RIGHT of your card but make sure your foam strips/tape does not go onto the frame! I added some fairly flat sprinkles to fill the space on front and added my "Sweet Birthday Wishes" using the words with shadow dies (linked below).

Here are the products I used on my card today:


Click the pic below to shop the whole release!


I hope my card inspires you to create your own interactive card or something else using the fun new release!   I'll be back next week with a simple-but-cute card :)  
Have a CRAFT-astic day!

~Kristine