Showing posts with label St. Patrick's Day Cupcake. Show all posts

Thursday, March 03, 2022

Leprechaun Gnome!

 Hello Friends,

I am taking a break from making Easter cards and switching it up to St. Patrick's Day cards.  I am repurposing one of the new Spring Release dies and making it a cute St. Patty's Day card.  I just added some of the clovers from one of our older dies to give it a different look.

Designer Steps:

1.  I am using the Spring Gnome Cottage die and the St. Patrick's Day Cupcake die.  I cut the pieces out of tan, brown, yellow, green, and cream.  I added a little color to the hands and nose with my Copic maker E21.  I also added a little TH Vintage ink to the edge of the beard.  Glue together the pieces with a fine tip glue
2.  Use an A2 white card base cut the green 4 1/8 x 5 3/8 and the yellow dotted DP 4 x 5 1/4.  Glue the yellow and green together but do not glue to card base yet
3.  Pop the Gnome to the front of the card add the little clover to the grass and the yellow flowers to the center of the large clover
4.  Add the checked green ribbon to the bottom of the card with the knot off set to the right as shown above.  Glue your Gnome panel to the white card base
5. Stamp your sentiment in black and layer onto green card stock.  Glue the sentiment to the front as shown above.  Add yellow Stickles to the center of the flower and your card is complete

CottageCutz Products


Don't forget to check out the new Spring Release.  These sweet dies won't last long!
We have more inspiration on our YouTube Channel check it out HERE
Thanks so much for stopping by!  And I will see you next Thursday.

Blessings and Take Care


Friday, July 17, 2020

It's Yarrr Birthday, Matey!

Happy Friday!  It's Jeanne on the blog today with a birthday card for all those pirate lovers in your life!  It uses the Ahoy Matey die from the new Pirates and Sea Creatures release.  I adore this release because I have several Jimmy Buffett fans in my life who love pirates, parrots and the ocean!
I first cut all the pieces from various colors of cardstock.  I ended up with extra parrot pieces which I saved.
Parrots come in such a wide variety of colors I know I will be assembling more using these extra pieces in the future.  In addition to the Buffett fans, I have a few friends who own parrots and this little one looks adorable as a non-pirate parrot without his hat!
Next I used a pirate embossing folder to emboss a black panel 4 1/4 x 5 1/2 inches.
Using the largest of the Stitched Circle dies, I cut a circle from white cardstock.  I cut a panel 2 1/4 by 5 1/2 inches from red and a panel 2 x 5 1/2 inches from a red stripe paper. I fishtailed the bottom of the two narrow strips creating banners.
I stamped my sentiment to the upper left of the circle and lightly sponged a soft blue background in the center.
I added the fishtailed banners and the circle to my panel angling sentiment on the circle.
I used foam dots to pop up the parrot.  I felt the card still needed a little something and decided that most pirates have a stash of treasure, so what about some gold?  I used the coins from the St. Patrick's Day Cupcake die and a few gold sequins.  The yellow "Ahoy" looked a bit washed out so I cut another one from the same blue green that is in the bird and glued it on top.  Now my sentiment stands out and has a nice yellow shadow underneath!

I hope you enjoyed my card today!

Dies:
http://www.scrappingcottage.com/cottagecutzahoymatey.aspx
http://www.scrappingcottage.com/cottagecutzstpatricksdaycupcake.aspx
http://www.scrappingcottage.com/cottagecutzstitchedcirclesetbasics.aspx

Thanks for stopping by.  I hope you have a fun and creative weekend!


Sunday, March 24, 2019

Best of Luck

Hi!

It's Anja here. Today I have a tag for you instead of a card. I used different dies from the previous release and made a tag you cab send to a friend to wish them luck.


For this project I used:
- Cottage Cutz dies (Be My Valentine Puppies, Lucky Leprechaun, Shamrock & Valentine Scottie, St. Patrick's Day Cupcake, St. Patrick's Day Phrase & More, Mail Tag Set),
- Distress Inks (Black Soot, Mowed Lawn, Forest Moss) and Oxides (Squeezed Lemonade, Wild Honey, Fossilized Amber, Spiced Marmalade)
- white card stock and watercolor paper for die cuts,
- silver pigment ink,
- gold pigment ink,
- white pigment ink,
- gold color spray,
- black pen,
- embossing tools,
- hole punch,
- white pen,
- heat gun,
- string,
- paper glue,
- adhesive foam pads.

First I cut and colored the heart.


Then I prayed it with gold and dried it with the heat gun.


Next I cut and colored the shamrocks and other pieces.


I used white pigment ink and white pen to make it a bit more realistic.


I added the shamrocks a little dimension using the embossing tools.


I wrote the sentiment with black pen.


 I punched a hole into the heart and glued a golden ring around it.


And then I just arranged the shamrocks and other pieces on the heart I used adhesive foam pad for the sentiment.


That's all from me for today. Have a nice Sunday and see you again next week.

Anja Z.


Cottage Cutz dies I used for this project:


Wednesday, March 13, 2019

Happy St. Patrick's Day

Hello!  This is Sukie and today I'm sharing a card for my guest designer post.  My card was created with dies from the Valentine's release featuring the darling scottie!
I cut out the oversized sentiment in two different shades of green from the St. Patrick's Day Phrases & More die set.  The sentiments were adhered together and offset slightly.  The two colors give the sentiment some depth and dimension.
I also pieced together the Shamrock & Valentine Scottie and the hat from the St. Patrick's Day Cupcake die.  The hat on the scottie was bit oversized for my card so I cut out a tiny bow from the Lovebug Bee & Ladybug die set instead.
Once I selected the colors for my A2 card base, I used a circle from the Stitched Circle Set to create a window.  A smaller circle was also die cut.
The layers were adhered on my card base.  Next, I  placed the die cut circle inside of the window ensuring it was centered.
The sentiment was added to my card at an angle for a whimsical look and anchored with the hat.
Here are all of the dies I used on my card available in the shop:

Friday, March 01, 2019

Happy St Patrick's Day - Again!

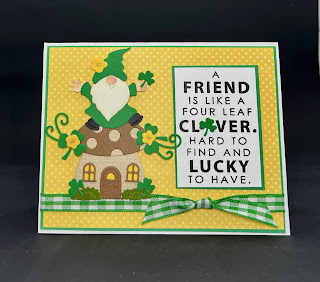
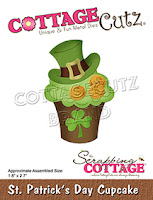
Happy Friday!   It's Jeanne posting today with another St. Patrick's Day card.  This one use the St. Patrick's Day Phrase and More and the St. Patrick's Day Cupcake dies.
I wanted to do something a bit different so I went for a stand-up easel card.
I started with an 8 1/2 x 5 1/5 inch piece of green card stock scored in the middle.
On the bottom section I very lightly drew a line across it at the 2 1/8 inch mark (halfway between the score line and the bottom).  The line should be erased after die cutting.
I placed the third largest stitched circle die equal distance from each side with the pencil line halfway up and down (centered on my pencil line).  I did not measure - I just eyeballed it.  Then I ran it through my Big Shot using a small plate I have.
This cuts out just half the circle.  I then scored each side from the circle to the edge.
When you fold, it gives you the easel.
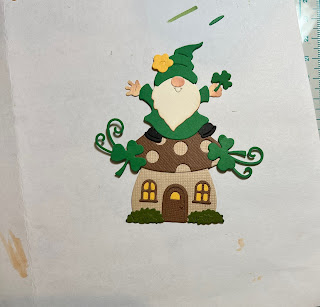
Next I cut my pieces from gold, green, black and white.
And I assembled them.
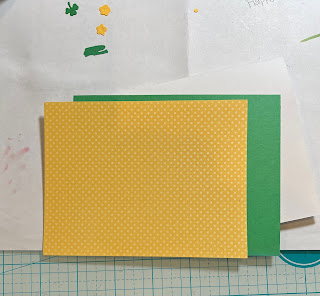
I cut three panels from green, black and patterned paper.  The green is 5 1/2 x 2 1/8 inches.  The others are 1/8 inch smaller in both directions.
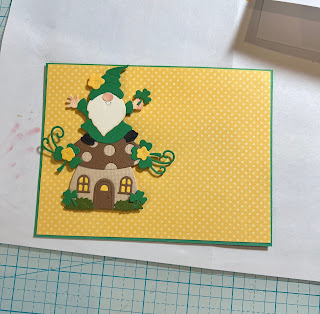
I added the black panel on top of the green.  I also had to snip the Happy St Patrick's Day apart to fit on my panel.
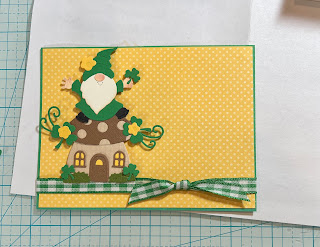
And finally I put it all together.  Although the card looks a little complicated, it is actually quite easy.

Dies:
http://www.scrappingcottage.com/cottagecutzstpatricksdayphraseandmore.aspx

http://www.scrappingcottage.com/cottagecutzstpatricksdaycupcake.aspx

http://www.scrappingcottage.com/cottagecutzstitchedcirclesetbasics.aspx

Thanks for stopping by today.  I hope you have a fun and creative weekend!