Showing posts with label Spring Foliage Border. Show all posts

Wednesday, February 28, 2024

Santa Gnome as St Patrick Let Your Light Shine Card

Hey crafty friends,
So glad you stopped in today!Today I am sharing a fun and cute card I created with some fun Cottage Cutz dies. Check it out.

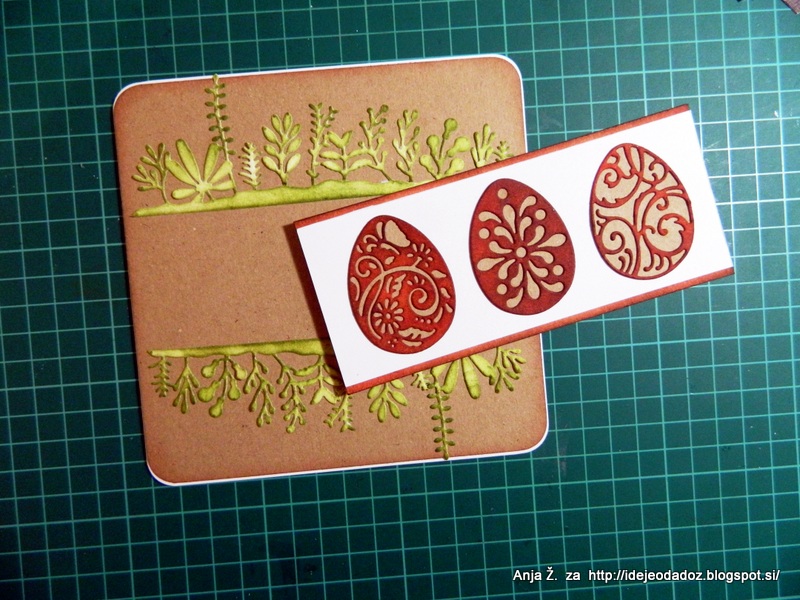
The size of my card is 5.5 x 5.5. 

Here's a closer look at my cute little gnome. He is actually a Christmas gnome die. Take a look.

Here is the little gnome I used. I pretty much used all the same pieces of him. I did cut the wavy parts of the hat rim to make them straight. I left off the holly and little ball of the hat. I added an extra belt and buckle on the hat. I used the solid portion of the candy cane. Also for the shoes I used the piece that cuts out from the beard. It is a bit larger than the shoes. 


Here's a closer look at the tree trunk and the foliage.

Here's a closer look at the additional foliage.

TIP: I needed some blue cardstock but didn't have the right color blue. Not to fear, I just cut the size I needed and then colored the edges in blue with my marker.

Here is a closer look at my saying. I used the Retro Alphabet for the lettering. I did use the Q for the G in light only because the G in the alphabet is really big. Also, the little lantern is a die cut from the ladder die cut set.


Dies Used For This Project

Santa Gnome w/Christmas Tree


Retro Alphabet

Autumn Ladder ( Lantern)

Spring Foliage Border

Tree Stump and Log For Peekers


Head over to Cottage Cutz and do a little shopping today!

Get Social With Cottage Cutz


Well, that about covers it for today. Be sure to come back real soon. You will want to keep up with my crafty adventures!  Don't forget to find me on social media too! Links are below.
Until the next time, have a wonderfully crafty day!
Melinda

Sunday, May 20, 2018

Blooming Meadows

Hi!

It's Anja here. Meadows around me are in full bloom. I love this time of the year because everything is blooming and colors are just beautiful. But not everyone loves this time of the year. I have a few friends and family that just waits for the trees, flowers and grass to stop blooming, because it gives them awful allergies. And because of all this sneezing around me I got an idea for today's project. I made two Feel better tags to send positive thoughts to all those who cannot enjoy the nature blooming.


For this project I used:
- Cottage Cutz dies (Flowers for Mom, Mail Tag Set, Spring Foliage Border, Ouch with Tooth, Sending Hugs Bear),
- white card stock for die cuts,
- Distress inks (Peeled Paint, Bundled Sage, Pine Needles, Mustard Seed, Mowed Lawn, Stormy Sky, Dust Concord, Seedless Preserves, Fired Brick, Barn Door, Forest Moss),
- brush,
- scissors,
- violet ribbon,
- paper glue.

First I cut the tags and colored them with Distress Ink and brush.


Then I die cut and colored flowers and other greenery.


Then I cut the sentiments and colored them with Distress Inks.


And then I had to glue everything together. I cut Spring Foliage Border into two pieces, one for each tag.


And this is all from me for today. Have a nice Sunday and see you again next week.

Anja Z.


Cottage Cutz dies I used:


Sunday, April 16, 2017

Easter Eggs Card

Hi!

It's Anja here. I hope you're having a nice Easter Sunday.
I have an Easter card for you today. I used the beautiful Fancy Spring Eggs die which is one of my favourite Easter eggs dies.

I used:
- Cottage Cutz dies (Fancy Spring Eggs, Spring Foliage Border, Bib Mini),
- white card base (15 x 15 cm),
- craft paper (14,5 x 14,5 cm),
- 2 white paper strips (6 x 15 cm and 5,5 x 15 cm),
- Distress inks (Barn Door, Vintage Photo, Shabby Shutters, Peeled Paint),
- paper glue,
- adhesive foam pads,
- round corner punch,
- yellow and white marker


First I die cut three embellished eggs from white card stock and three egg bases from craft paper. I colored the embellished eggs with Barn Door and Vintage Photo Distress ink to make them look like Easter eggs colored in onion peelings. I used the same Distress Inks to color the edges of the bigger white paper strip. 


Then I die cut and then colored two pieces of border. I used Shabby Shutters and Peeled Paint distress ink.


I rounded the corners or white card base and craft paper square. I put some Distress inks on the edges of the craft paper. I used the same colors as for the eggs.


Then I glued all the pieces together. I used adhesive foam pads for the white strip. 


I cut a few small flowers and colored them round the edges with Barn Door Distress ink. I gave them a little shape and adhere them to the green border. Finally I used white marker to put a little more interest to the greenery and yellow marker for flower stamens.


And just a reminder. There is a new release of beautiful baby dies and it is available on the Scrapping Cottage site. Don't forget to check it out and get 25 % discount.

Have a nice Sunday.
Anja Z. 

Cottage Cutz dies I used:


Tuesday, February 07, 2017

Gift set of cards in a folder

Hi, Janja here!

Gift set of cards in a folder which I share with you today are created with new CottageCutz dies - Spring.


CottageCutz dies: doodle bugs, spring butterfly 1, spring butterfly 2, spring butterfly 3, spring foliage border, stitched square set or pierced square set

For the folder we need:
- white cardstock for the cover: 11.4 x 5.3" (29 x 13,5 cm)
- white cardstock for the insert: 11 x 5.3" (28 x 13,5 cm)
- patterned paper: 5.2 x 5.2" (13,3 x 13,3 cm)
- white and colored cardstock

Trim white cardstock for the cover and insert sheet. Fold them on:
- 5.3" and 6.1" (13,5 cm and 15,5 cm)
- 5.3" and 5.7" (13,5 cm and 14,5 cm)


Trim four pockets from white cardstock in the size of 6.3 x 3" (16 x 7,5 cm). Made the folds 0.6" (1,5 cm) from left, right, and from the bottom edge.
Glue patterned paper on pockets, which should be slightly smaller then the size of the pocket.


On each of four pockets glue spring foliage border.


Glue the cover and the insert sheet in each other.


Make a tab in the size of 5.5 x 1" (14 x 2,4 cm). Fold cardstock at 2.4" and 3.2" (6 cm and 8 cm).


Insert two magnets under a patterned paper, which hold a tab in place, when the folder is closed.


Decorate the front cover and attach it to the base.


Supplies for cards:
- white card base: 4.7 x 4.7" (12 x 12 cm)
- colored cardstock: 3.7 x 3.7" (9,5 x 9,5 cm)
- white nad colored cardstock
- Memento ink: Lady Bug, Bamboo Leaves, Tangelo, Dandelion

Prepare four card bases and trim squares from colored cardstock.
Cut out squares with the largest die from white cardstock. Stamp various sentiments on them.


Cut out butterflies.


In addition to sentiments do some smudges. We can use a brush, stamp or ink smooshing technique. Whichever you prefer.
Select colors that match the color of butterflies.
Assemble the cards.


Insert cards into pockets.


That's all for today. I hope you like it.