Showing posts with label Spring Daffodils. Show all posts

Thursday, April 11, 2024

B Spring Daffodils and Tulips Table Decor Sign

Hey crafty friends,
So glad you stopped in today! It is my turn to share on the Cottage Cutz blog. So I created this cute "B" sign that will be a part of my table decor.


Here's another view of my sign. I started with a piece of white cardstock measuring 5x7. I then added a mat of some designer paper I created. I then cut out the pretty Trellis background die. I layered that onto some cream cardstock. I cut the B out of some yellow cardstock and then cut out the daffodils, tulips and butterfly from some cardstock and then colored and shaded the various white pieces.  In case you're wondering I used a capital B as that is the first letter of our last name :-).


Here's a closer look at the pretty folk art butterfly. I colored the detail pieces with my yellow markers. However the wings were cut from some red cardstock.

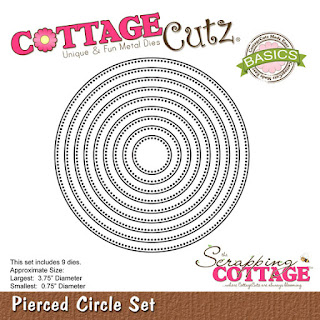
I used the smallest pierced circle die to place a tulip head onto with some of the foliage. All of the leaves started out as plain white cardstock. I just used my markers to color them. I mounted the B onto some foam tape and then onto the mat. This gave it some lift and I thought it made it look very nice.


Here is one last look at my completed sign. I thought it turned out so festive and with a ton of cheerful spring vibes.


Dies Used For This Project

Spring Daffodils

Spring Tulips

Folk Art Butterfly

Pierced Circle Set

Trellis Background


Well, that about covers it for today. Be sure to come back real soon. You will want to keep up with all the beautiful projects the design team is creating.  Don't forget to follow Cottage Cutz on all their social media accounts too! Links are below.
Until the next time, have a wonderfully crafty day!
Melinda


Head over to Cottage Cutz and do a little shopping today!

Get Social With Cottage Cutz

Monday, May 01, 2023

Mother's Day Vase Pop Up Card

Happy May Day, crafty friends!

Kris here to share with you a pretty pop up card with a vase and bouquet!  This one is called a Vase Pop Up card... so the wow factor is on the inside of your card.  I decided to make it a Mother's Day theme featuring the NEW Spring Daffodils. 

I'll show you the inside of my card first ☺

and below is the front of my card...

Here's a short clip of how the vase pops up when you open the card ☺  
If you can't see it here, please click HERE.

I followed a video tutorial on Splitcoast Stampers by Gloria here.  It may be most helpful to watch that video (or there are others on YT if you search Vase Pop Up ☺)

The patterned paper I used is called Sunshine and Rainbows from SU!

DESIGN STEPS:

I started with a white A2 card base:  5-1/2" x 4-1/4"

INSIDE RIGHT:
Mango Melody mat = 5-1/4" x 4"
White cardstock = 3-3/4" x 5" 

INSIDE LEFT:
 • Blue patterned paper (same DSP) = 5-1/4" x 4"
• Rainbow striped patterned paper = 2-1/4" x 5"  
- then score along the 5" side at 1" and 4"
- then score along the 2-1/4" side at 3/4" and 1-1/2" just up to the scored line!
- then cut as shown in photo 
• white cardstock = 3/4" x 2"
• white cardstock = 3/4" x 3-7/8" 
- then scored at  3/8" on just one end


It's best to watch the video to see how to create the vase with moving mechanism ;)  


I die cut the Daffodils from yellow (Daffodil Delight), orange (Mango Melody) and green cardstock then gave some shadowing with Copics.


I glued a few of the flowers/stems to the blue layer above the vase, and some I glued to the top back-side of the vase so they pop out along with the vase when the card is open. 

I then decided to print a poem for the right side of my card since I didn't have any big Mother's Day sentiment stamps.  So I cut my white piece down to 3-1/4" x 4-1/4", then I matted it with a piece of blue/white patterned paper that I first die cut with largest Nested Scalloped Rectangle.


For the front, I die cut the Stitched Alphabet in oranges and yellow, and the Daffodils in green and yellow, then I used Copic markers to give the orange shade into it.  The li'l hearts were die cut from the Celebrate Banner die.  And the blue inverted scallops frame is just what was left after I die cut the scalloped rectangle from the middle of it for the inside mat!  


I hope I've inspired you to try something NEW to you using your favorite CottageCutz dies! 

~Kristine

PRODUCTS I USED:


Saturday, April 08, 2023

Daffodils for Mother's Day

Hello CottageCutz friends! Thanks for taking the time to stop and visit with us today. It's Mary Marsh here bringing you the Saturday edition of the Blog.

We have a brand-new Easter release with 17 new designs available in the online store. There is something for every card maker with faith-based dies, beautiful floral images, whimsical with bunnies and frogs and several lovely birds and butterflies.

You will be able to take the images beyond the Easter or Spring season. And for a limited time you can get individual dies at 30% off. Today for your viewing pleasure I am using the new Spring Daffodils to create a Mother's Day card. So you see how easy it is to move these dies to another occasion besides Easter.

Design Steps:

I started my card this week by cutting the daffodil images. I used a bright yellow cardstock (daffidil delight) and an orange cardstock (mango melody) for the floral images. The stems are a brighter green cardstock (granny apple green). 
I wanted to layer the daffodil images on black cardstock. I saw a card recently on Pinterest and it was so striking on black. I used a 3D textile embossing folder for a bit of background interest. It's more of a subtle embossing which is the look I was going for. 
Tip: when you use a 3D folder spritz the cardstock with water to break up the fibers. This way your cardstock doesn't crack.
I wanted a stamped sentiment on the card and after a bit of thought I decided to use one of the banner images from the Windows Slimline die. It was the perfect size for my sentiment. I cut the banner in the mango melody cardstock and stamped in black ink. 
I am now ready to start card assembly. I secured the embossed panel to the black card base.
Black card base: 4 1/4" x 5 1/2"
Black embossed panel: 4 1/8" x 5 3/8"
Attached the flowers with glue dots. I used these just in case I needed to move any of the floral images. It's much easier to do that with glue dots than liquid glue. Attached the banner sentiment and scattered a few green sequins on the card. 
That's it for me for this post. See you next Saturday. Have a wonderful Easter celebration. 

Dies I used to create card:


Thursday, March 23, 2023

Because He Lives!

  Hello Friends!

It is NEW RELEASE TIME!  The collection is called EASTER and it has 17 incredible pieces!  They are so perfect for Easter and Spring.   Right now you can save up to 65% on these dies if you buy the bundle and believe me you are going to want the bundle.  If you purchase the dies individually they are 30% off.  This sale will not last so stop by the store today right HERE!

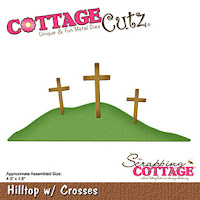
I am using 2 of the dies from this release The Hilltop w/Crosses and the Spring Daffodils.  And I am just in love with these beautifully designed dies!


Design Steps:
1.  Cut out the pieces using the Spring Daffodils die on yellow and green card stock.  Using the Hilltop w/Crosses cut out the hill in green and the crosses in Kraft card stock.  Ink the outer parts of the daffodils in a honey color ink and add just a little darker green ink to the leaves and hill

2.  Assemble the flowers with a fine tip glue and set aside
3.  For the base use a white A2 size card.  Cut a piece of with 5 3/8 x 4 1/8 then use the 3rd from the largest Pierced Circle die and cut a circle slightly toward the top as shown.  For the piece behind the circle cut white card stock 3 1/2 x 3 1/2
4.  Ink the 3 1/2 x 3 1/2 white card stock with blue TH ink and then splatter with water
5.  Glue the green hill to the back side of the circle and then glue the blue inked piece to the back of the circle.  Make sure not to glue the top of the hill down so you can tuck in the crosses
6.  Add the crosses to the hill and two of the daffodils to the bottom of the card as shown above
7.  Glue the other daffodil and bud to the top left corner and then add your sentiment.  Your card is complete

 
CottageCutz Products


I think this is one of our most beautiful collection so don't miss out!  I think it will sell out fast!

We have more inspiration on our YouTube Channel check it out HERE

Thanks so much for stopping by!  And I will see you next Thursday.

Blessings and Take Care