Showing posts with label Snowman w/ Tree. Show all posts

Tuesday, December 20, 2022

Easy Snowman Tag

Happy Tuesday Cottage Cutz Friends!
Melinda here with you, and today I am sharing a very easy tag for a present I created with the adorable Snowman w/Tree Die from  from this year's amazing Christmas release! As we get down to the wire and finish wrapping all of those presents, here is a very quick and easy tag solution that you can get done fairly quickly!
To create my cute and very simple tag, I used the second largest double stitched rectangle die from that set for my base. I cut it out of plain white cardstock. I then proceeded to cut a piece of patterned paper for the background mat. 

I then cut out the adorable snowman die in white cardstock. I colored the various pieces with my markers. and assembled them and put them onto the mat. I added some puff paint for the snow, the brim of the hat and the ball. I also added some of that same paint onto the tree too.

Next, I cut out the Merry and Christmas from the Tree die set. I colored in the pieces with my pink markers. 


Lastly, I took the second smallest stitched scalloped rectangle from the die set to make my to and from tag. I stuck all of that onto the double stitched mat. To finish off my gift, I wrapped the center in some pretty ribbon. I adhered the finished tag over the ribbon. I hand wrote the To and From on the tag. For a little extra touch,  I added a cute snow flake charm to the corner.

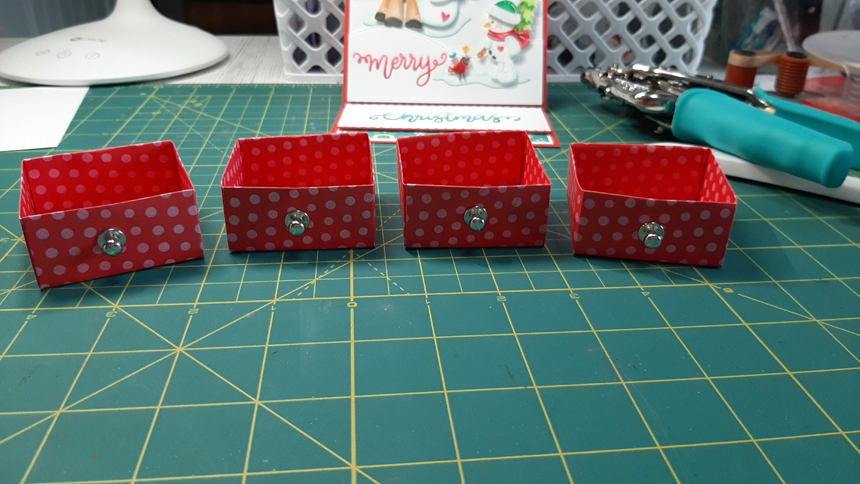
Here's a closer look at my finished tag. I think it turned out super cute and really makes my package look finished!


Dies I Used


Snowman w/Tree


Nested Scallop Rectangle Set


Double Stitched Rectangle Set


Merry Christmas Tree


Here's a look at the entire release. Be sure to head over and grab them while they last!

Well that about covers it for today! Until the next time, have a wonderfully craft-die day!
Melinda Beltran


Friday, September 23, 2022

Tear Away Peek-a-Boo Card


Hi everyone! Linh here and I have a new video up on the Cottage Cutz YouTube channel. The holidays will be here before you know it!  The first Christmas collection has just released and there are some really fun sets to play with.  On this card, I'm featuring the the Christmas Puppies, a bird from the Snowman and Tree and the Christmas Tree Peekers to create a Tear Away Peek-a-Boo card.


Thursday, September 22, 2022

Snowman Shaker

Hello Scrapping Cottage Friends

We have a NEW RELEASE FOR AN EARLY START ON YOUR CHRISTMAS CARDS!!   The collection is Christmas Part 1 and has 21 fantastic dies. The release includes everything from Gnomes to Reindeer!! Check it out HERE it is on sale now!!

The die I am creating with today is Snowman w/Tree. I made a shaker card with this cute little guy! It seems like young and old love shaker cards!


Design Steps:

1.  Cut a piece of white card stock 4 1/8 x 5 3/8 and a piece of red snowflake DP 4 x 5 1/4.  Glue the two pieces together and then cut the square for the shaker window (I did it slightly to the left of center).  The shaker window is 2 1/2 by 2 1/2 so I used my Pierced Square die 3rd from the largest to cut the opening  
2.  Place the plastic window in the hole and fill it with your shaker pieces.  Use glue or tape to seal the shaker with a pieces of glitter white paper measuring 2 3/4 x 2 3/4
3.  Glue the whole shaker panel to the white A2 card front
4.  Using the Snowman w/Tree die cut out the pieces in: white glitter card stock, green, blue, red, orange, black, mint and gold.  Assemble the pieces with a fine tip quick drying glue and set aside 
5.  Cut the icicles using the Icicle Border die on white glitter card stock.  Adhere the border to the top of the card using foam tape.  Place dimension dots to the back of the snowman, bird and ground then pop him to your card front as shown below.  Stamp your senitment and heat emboss with clear powder.  Glue the sentiment flat to the card front and your card is complete

CottageCutz Products


We have more inspiration on our YouTube Channel check it out HERE

Thanks so much for stopping by!  And I will see you next Thursday.

Blessings and Take Care


Monday, September 19, 2022

Origami 4-Drawer Easel Card

Happy Monday CottageCutz friends!  Kris here with an easel card that tops a set of 4 origami drawers that are perfect for gifting li'l treasures or small wrapped candies etc!  Although the card folds down flat, the boxes underneath do not, so this is one of those gifts that's perfect for giving in person ... or displaying on your entryway table for your holiday guests!

My card today uses 2 of the cutest dies from the NEW CHRISTMAS RELEASESnowman with Tree and the Happy Reindeer & Snowman  but ALL the individual dies in this release are  30% off for a limited time!!


While I am not the original creator of the 4-drawer easel card, I did create my own version back in 2010 using a simple origami fold for the drawers and then I came up with the measurements for the drawer casings.  You can of course just make 4 simple boxes from cardstock, but I think it's pretty to have them made inside and out from patterned paper - light weight scrapbook paper is key!  It's fun to go back to this project using NEW products through the years ~ Here is how I did it!

CUTTING & SCORING:
Red Cardstock 
•  Cut 5" x 10" and score at 5" and 2-1/2" 
•  5" square
•  4-3/4" x 1-7/8"

White Cardstock
•  (3)  4-3/4" squares
•  5" square
•  8-1/2" x 7-5/8"--- from that, cut (4) pcs. that are 7-5/8" x 2-1/8" and score each strip at 7/8”, 3 1/8”, 4 ¼”, and 6 ½”
•  4-3/4" x 2-1/4"  
•  Cut the smallest die from the Scalloped Stitched Rectangles Slimline  (*optional)

Teal Snowflake Patterned Paper
•  (2) 4-1/2" squares

Red/Pink Polka-Dot Paper
•  (4) 6" squares

DESIGN STEPS:

1.  I started by creating my easel card!  I layered one of my snowflake papers to a white mat then onto the 5" red square. 

2.  I added tape to the lower half of my closed card front and attached my snowflake piece on top.
 

3.  From one of my 4-3/4" white squares, I die cut 2 hills from the Hills Slimline set.  I glued the highest one directly to the snowflake layer, and I popped the front one up with foam tape.


4.  I die cut all my cute elements from the  Snowman with Tree and the Happy Reindeer & Snowman as well as the Merry Christmas with friendsI colored them with Copics and pieced together.  The reindeer's muzzle & scarf, and the snowmen's arms & hats are popped up with foam dots.


5. Once again, I attached my 2nd snowflake layer to my white mat (4-3/4" square) and then attached that to the INSIDE of my card.

 6.  I cut my white scalloped rectangle to a width of 4-3/4" and attached to my red mat (4-3/4" x 1-7/8").  I then added foam tape to pop it up so it will act as an easel and prop up my card front! (see photo below)

7.  I glued the die-cut snow pieces & sentiments and everything else was attached with foam tape.


Now to make our drawers and base.... stick with me, I PROMISE this is easier than it looks! ☺

8.  With one of your 6" square patterned papers, fold in half, then open it up and fold in half the other way as shown below.


9.  Fold all 4 corners up the center and keep them folded for the next step.


10.  Fold one edge up to the center, unfold that edge before you go onto the next edge until you have all 4 edges folded as shown below. 


11.  Now unfold the TOP and BOTTOM sections all the way, and then fold the side sections up ash shown below.  

12.  Using your pointer fingers, press in on the top corners which will cause the top section to pop up.  


13.  Now fold that top triangle over the folded edge and press it down, creasing all folds.


14.  Repeat on opposite edge.

15.  *Optional:  You can glue down the triangle flaps if you wish.


16.  Next, we need to punch holes in the front of our boxes (choose one of the thicker sides) and insert knobs!  If you don't have these button studs you can get creative with pipe cleaner, stacking foam dots and adding a charm, brad or decorative pull, etc. 


17.  I used my Crop-o-dile to add the holes in the same spot on all 4 drawers.


18.  Now to make our drawers casings!  Fold and burnish your (4) strips that are 7-5/8" x 2-1/8"

19.  *Important!!!  Glue the ends so that the SHORTER end is OVER (outside) the longer end as shown below.

20.  Now, before you start gluing, just place your casings onto the 5" square base so that ALL the seams are facing the inside, and so that you only have ONE open end along each edge.  In the photo below, the left box is the open end of the casing, where we will slide a drawer into, but the one next to it on the right is the side of the next casing.  

*You will want your boxes to be touching each other, so you will have a small border around. Once you have them centered..... no seams are showing on the outside, and only ONE opening per edge.... Glue them down, one by one! 


21.  Insert your drawers!


22.  With drawers pushed all the way in, add glue to the whole top being careful not to get too close to the outer edges - you don't want seepage! ☺  Then attach your easel card to the top, centering it with the white base under the drawers.


23.  Attach your 4-3/4" x 2-1/4" pc. of white cardstock to the back of your easel as shown below.  This is a spot for you to write a personal message to your recipient.  OR, you could write a note and put it in one of the drawers!  ☺


24.  Be sure to add some wrapped candies or li'l gifties inside your drawers!  Christmas candy isn't out yet here, it's all Halloween, so I added some caramels to mine for now.  They won't last long enough to gift this to someone, LOL!!!


Here are the Products I Used:


THANK YOU for taking time to visit today!  
I hope I inspired you to get crafty with your favorite CotageCutz dies!  

~Kristine